
Filling Text with Multiple Colors in InDesign
Sandee Cohen shows you how to fill your text with color.

This article appears in Issue 63 of InDesign Magazine.
Q. I bought one of those old-fashioned fonts that look like snow has settled on the letters. The font looks great on a white background, but as soon as I put it over an image, the part that should be snow turns see-through. How do I get the snow to be solid white? A. Yup, with summer coming it’s time to dust off the old ice-and-snow fonts to sell air-conditioners and lemonade. What you’ve discovered is that the white areas of those fonts aren’t white. They’re actually compound paths that poke holes in the color of the text (Figure 1). You’re going to have to turn your text into artwork to fix the problem.

Figure 1: The snow art on the typeface looks fine until it’s put over a background. Then the white snow turns clear.
Warning: This technique should only be used for extremely short bits of text. You really wouldn’t want to have to modify thousands of characters this way.
Put the text in its own text frame, select the frame, and then choose Type > Create Outlines. Now, choose Object > Paths > Release Compound Path. The clear areas disappear, and the text turns into a solid mass of paths (Figure 2). You might also want to hide any objects behind the text for the following steps.
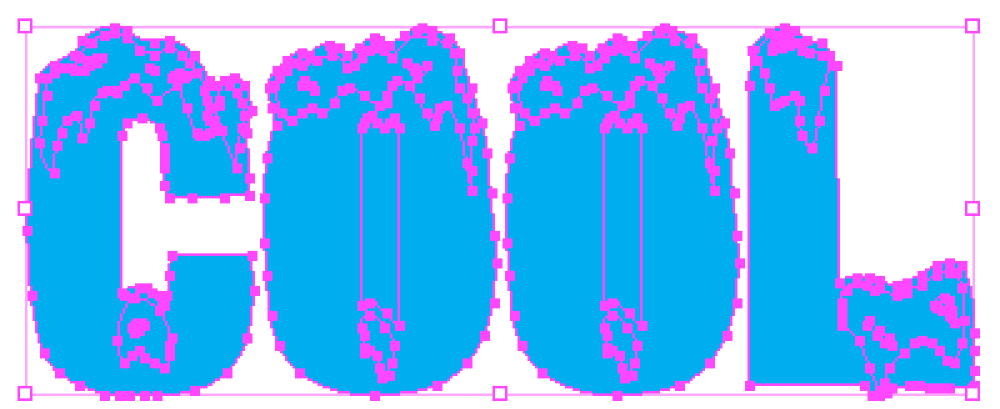
Figure 2: Creating outlines from text converts all the areas in the text into paths.
Next, use the Selection tool to select those areas of the characters that should be white, and change their fill to Paper. If you only have letters such as C or L that don’t
have any space inside them, you’re done.
But if you have letters such as O or B that have holes (counters or bowls) in them, you need to reset those areas back into compound paths. Select the outside path of the letter and the inside path. Choose Object > Paths > Make Compound Path. This pokes a hole back in the characters (Figure 3). Sometimes the Make Compound Path function doesn’t create the proper effect. If that happens, use the Direct Selection tool (white arrow) to select just the path that needs fixing, and then choose Object > Paths > Reverse Path. This sets that path to the correct orientation. You can now show the background, and the areas that were filled with Paper will knock out the background (Figure 4).
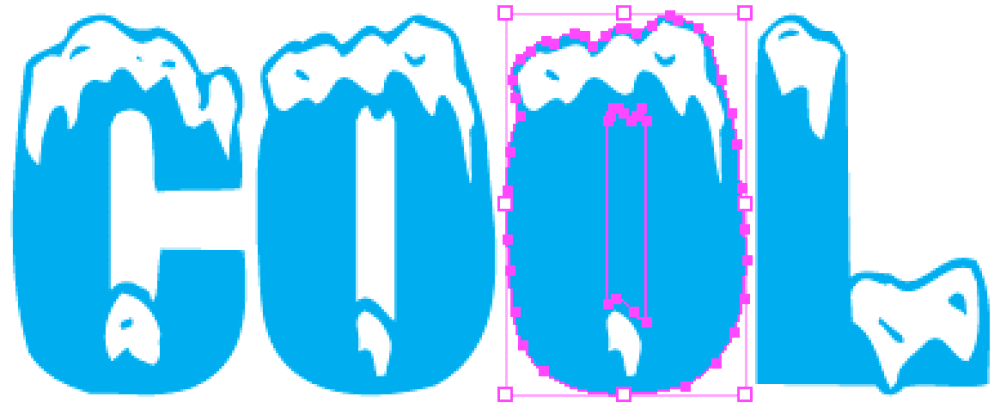
Figure 3: Letters that have counters or bowls need to be made into compound paths in order to see through those holes.

Figure 4: When the text paths are modified so that the white areas are filled with Paper, they look correct over background art.
Commenting is easier and faster when you're logged in!

Recommended for you

Inside QuarkXPress: Getting Creative in a Page Layout Application
Version: 4.1 Operating Systems: Macintosh, Windows No matter how easy software m...
Real World Tips for QuarkXPress 5: Modifying Tables
Excerpted from “Real World QuarkXPress 5” (Peachpit Press). Peachpit...
The Fontz 4.0 Offers Several New Features
Canadian developer ToThePoint Software on Tuesday released version 4.0 of The Fo...