


Triangles are a basic design building block and are easy to create in Adobe Illustrator. Here are a few simple methods to choose from when you need a quick triangle.
Method #1: Use the Shape Tool
The first option you can use is the Shape tool. Go to your Toolbar and long-press the Rectangle Shape tool to open the flyout panel with all of your Shape tools.
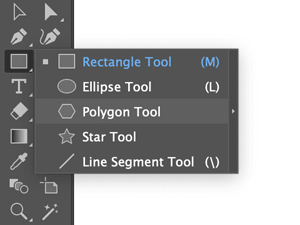
Select the Polygon tool and click anywhere on your artboard.
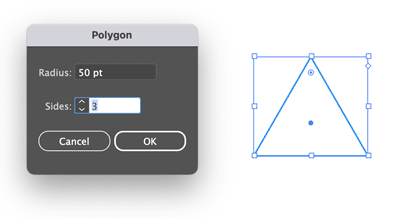
In the dialog box you can set your Radius (the size of your triangle) and Sides. Enter 3 to create a triangle and press OK.
You’ve made your first triangle! You can customize it further by selecting a Fill or Stroke from the Toolbar.

An alternative method of using this tool is to select the Polygon tool, click, and drag your mouse across your artboard instead of clicking on your artboard and letting go. Then, use your arrow keys to increase or decrease the number of sides by pressing up or down on your keyboard arrows.
Method #2: Start with a Rectangle
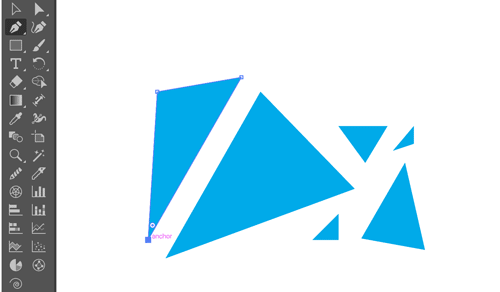
You may find it easier in some instances to start with a rectangle and delete an anchor point to make a triangle.
After drawing the rectangle, use the Direct Selection tool to select one of the four anchor points, and press Delete on your keyboard.


Keep in mind that using this method will eliminate the option to apply a stroke to all sides of your shape. If you want to close the path, simply press Command/Ctrl+J, or choose Object > Path > Join.

Method #3: Use the Pen tool
You can also create a triangle shape using the Pen tool! It’s just about the simplest thing you can draw.
First select your Pen tool (P) from the tool bar. Click, click, click and you’re done.
Happy Creating!
This article was last modified on July 24, 2024
This article was first published on July 24, 2024
Commenting is easier and faster when you're logged in!

Recommended for you

InDesign How-to Video: How to Convert Shapes
How to change circles to squares, rectangles to starbursts, or hexagons to trian...
Making Christmas Ornaments with InDesign
InCorporate InDesign into your holiday celebrations with this little papercraft...

InDesign How-to Video: Create an Equilateral Triangle
In this week’s InDesignSecrets video, Mike Rankin shows off the best way to crea...