

Affinity Designer offers a range of layer effects, similar to those found in Photoshop. Grouped together under the Quick FX panel, they’re actually much more sophisticated than the name gives them credit for. If your Quick FX panel isn’t visible, choose it from the View menu.
Pillow Emboss
The Bevel/Emboss effect is actually several different effects, chosen from the Type menu at the top of the dialog box. The default is Pillow, which produces a highlight/shadow combination both inside and outside the selected object. As with all the effects you drag the Radius slider to increase the width, and you can also You can soften the effect with its another slider. Both the highlight and shadow colors can be changed, as well as their opacity.

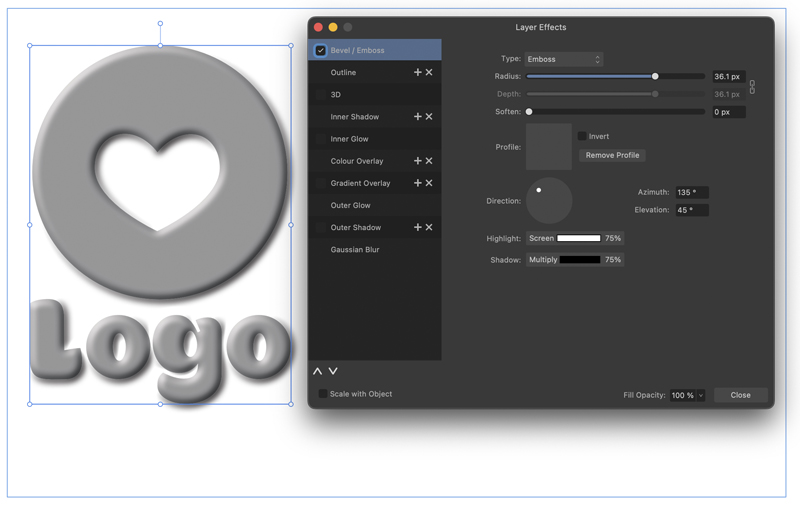
Emboss
This produces just an inner rounding, but it’s also accompanied by a drop shadow on the whole object. The same controls apply as with Pillow emboss.
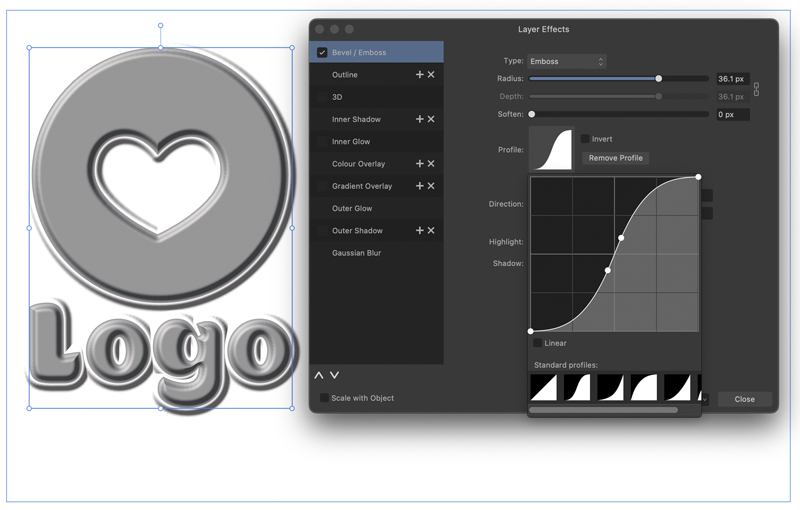
Changing the Profile
Clicking the Profile icon will give you a selection of profiles to choose from, which apply a shape to the embossed edge. You can also click and drag on the curve to customize the appearance to your taste.
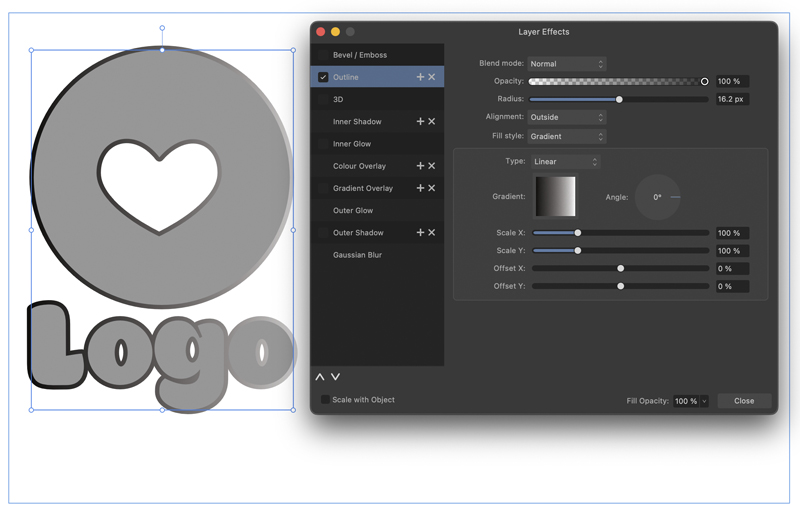
Adding an Outline
The Outline effect is similar to adding a Stroke to an object, with the exception that, as seen here, you can apply it to an entire group, rather than just one object at a time. You can also apply a gradient to the outline. We’ll see an important use of the Outline effect, later on.
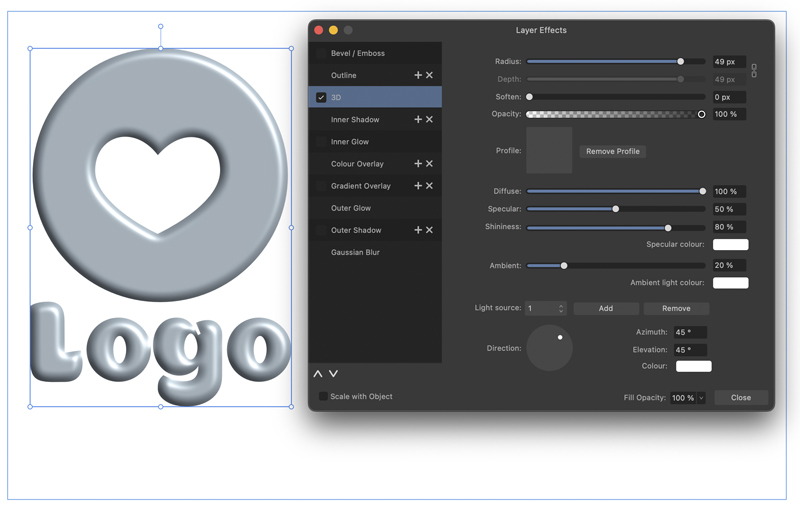
Adding 3D
The 3D effect is more pronounced than a standard Emboss, and doesn’t have the shadow attached. As you’d expect, it’s used to give objects a three-dimensional appearance.
Inner Shadow
The Inner Shadow effect adds a uniform shadow on the interior edges of the object. Unlike the Emboss effects, Inner Shadow doesn’t add a highlight; but you could do that separately by adding the Inner Glow effect.

Gradient Overlay
This effect adds a two-color gradient to any object or group: click the gradient thumbnail to change the colors. Since you can adjust the opacity of the effect, you could add multiple gradients at different angles if you wish by clicking the + button to add another instance of this effect.

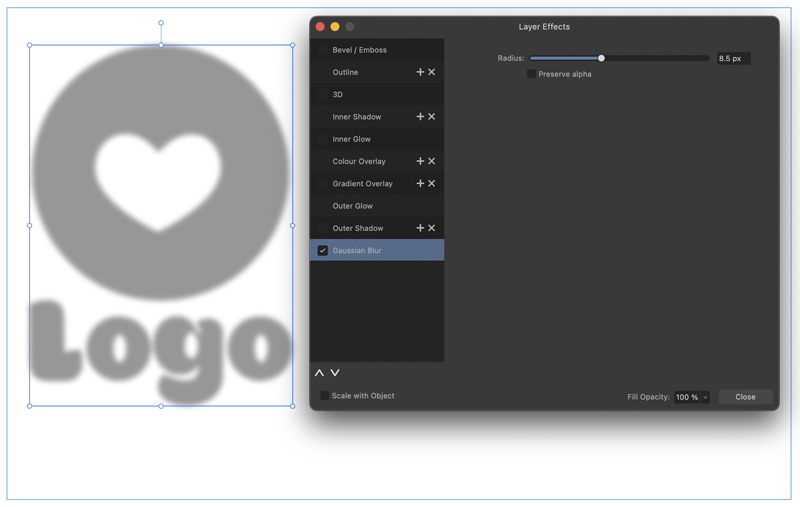
Gaussian Blur
The ability to blur vector artwork is unusual, but this effect makes it straightforward. If you turn on the Preserve Alpha option, the effect would only take place on interior artwork, leaving crisp edges.
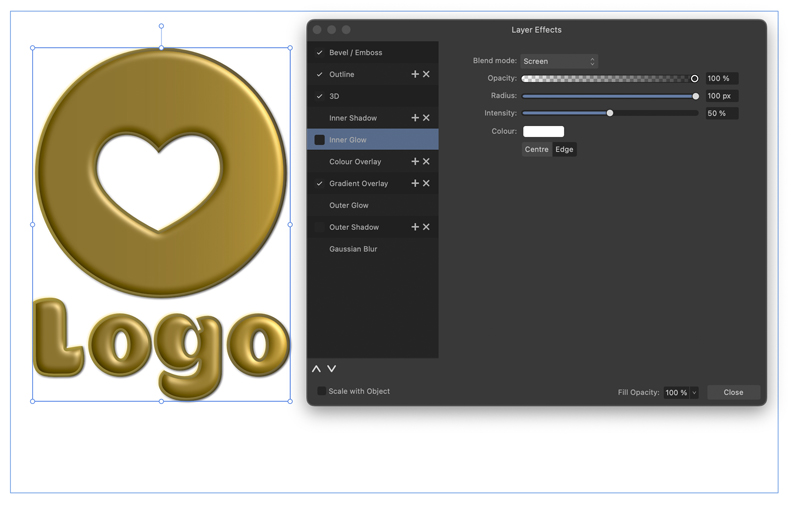
Combining Effects
Multiple effects can be combined to create interesting combinations. Here, Bevel, Outline, 3D and Gradient Overlay have been combined to create this brassy look.
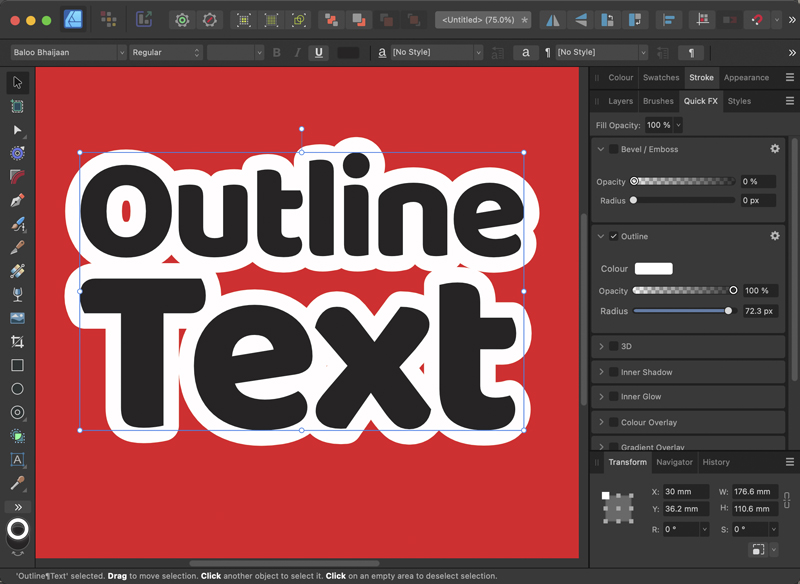
Adding an Outline to Text
This black text on a red background can be hard to read: A white stroke would lift it off the background to make it stand out.
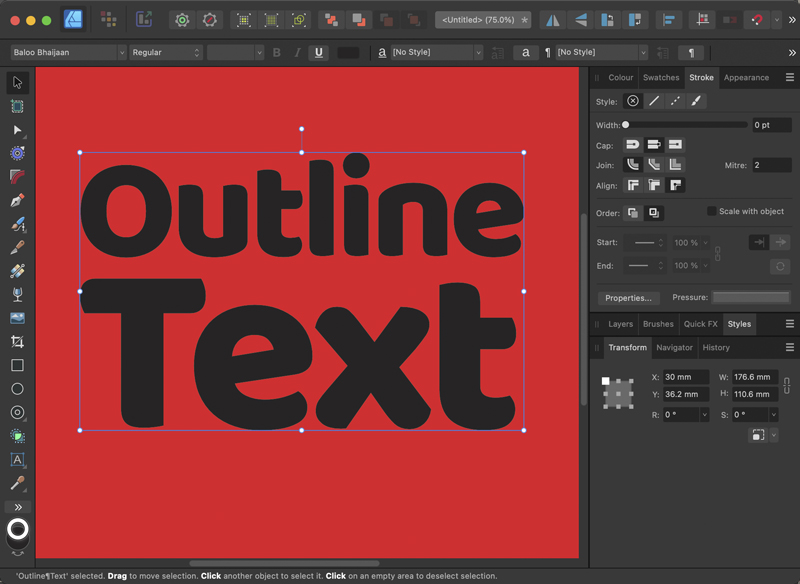
The default Stroke setting
By default, a Stroke is centered on the object, which has the result of thinning the appearance of the text. You can read more about adding strokes in Affinity Designer here.

Moving the stroke
Setting the stroke to be outside rather than inside the object preserves the shape of each letter, but as each glyph is treated as a separate object, the strokes overlap the previous letter. This is clearly unacceptable.
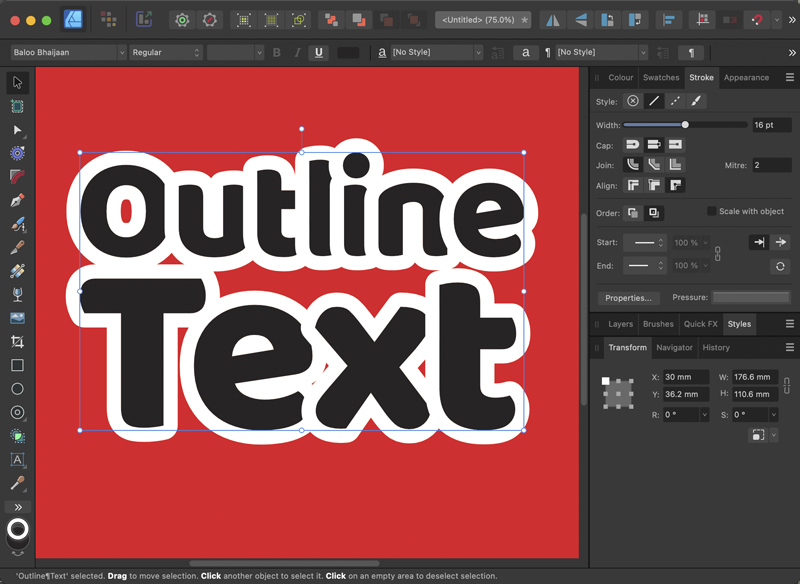
Use Outline instead
Applying a Quick FX outline, rather than a stroke, works much better in this scenario. The outline can be as wide as you wish and it will always appear behind the object without interfering with it.
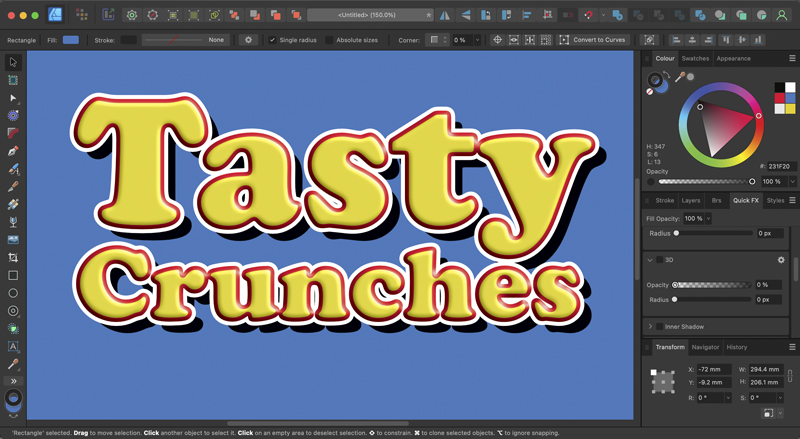
Combining Multiple Effects
The ability to apply multiple effects to a single object allows you to create complex combinations such as this mock breakfast cereal logo. And because it’s live text, you can change the text or the font and all the effects will remain in place – and will remain editable. Note here how the red Outline effect takes on the shading of the Emboss effect, but that doesn’t apply to the white outline, which has been added as a stroke.
This article was last modified on April 10, 2023
This article was first published on April 5, 2023
Commenting is easier and faster when you're logged in!

Recommended for you
Creating Cutout Image Effects with Photoshop
Simulate layers of cutout paper and shadows with a graphic style

How to Get Text Drop Shadows to Update in InDesign
A couple simple workarounds to use when text shadows glitch in InDesign
How to Create a “Stolen Letter” Effect in Photoshop
See the steps for making this fun effect where the subject of a photo interacts...