
Transitioning from InDesign to Affinity Publisher: First Steps
A guide to getting started in a powerful new page-layout program.
This article appears in Issue 5 of CreativePro Magazine.
There are plenty of reasons why you might want to make a move (or at least take some baby steps) from InDesign to Affinity Publisher. Maybe you’re dissatisfied with the current state of InDesign or with subscription software in general. Maybe you’re a true publishing geek and are itching for some new tools to play with after 20+ years of same-old, same-old. Or maybe you’re looking to cut costs and curious to see what Publisher can do for a one-time payment of just $55. InDesign and Publisher share many fundamental features and concepts. So, as an experienced InDesign user, you will probably get acclimated to Publisher very quickly. And if you’re aware of some key features and differences, you’ll be in for a smoother ride. In this article, I’ll lay out some of the basic steps in setting up Publisher to your liking and converting legacy files from InDesign and/or PDF to Publisher documents.
Setting Up Your Work Environment
When you first get started in Affinity Publisher, you might want to adjust elements of the interface so it looks more like you’re used to seeing in InDesign, especially if you want to continue working in both programs. In Publisher, you can select which panels you want to show by choosing View > Studio, selecting or unselecting the panels, and then dragging them where you’d like them to appear onscreen. In InDesign, I prefer two stacks of panels on the righthand side of the screen (Figure 1).

Figure 1. This InDesign workspace was configured with two vertical stacks of panels on the right, something that you can’t replicate in Publisher.
(or both) in the Studio submenu (Figure 2).


Figure 2. You can configure the Publisher interface with a vertical stack of panels on both the left and right sides.

Figure 3. Publisher’s Keyboard Shortcuts options
Similarities and Differences
An experienced InDesign user will quickly recognize many of the tools and commands in Publisher. However, there are also some significant differences between the two programs that you should be aware of.
Missing features
Publisher lacks a few features that may be deal-breakers for a particular job. If you’re producing a long document, be aware that Publisher does not have features for importing or creating footnotes or endnotes. If you place a Word document with footnotes or endnotes, they are simply ignored. Accessibility is also a problem because Publisher does not offer the ability to export to a tagged PDF. Support for interactivity in Publisher is limited to basic hyperlinks and bookmarks. So, you won’t be able to work with fillable forms, object states, buttons, audio files, or video files. Finally, if you use an XML workflow, you’ll need to stick with InDesign, as Publisher cannot open or place XML files.
Master pages
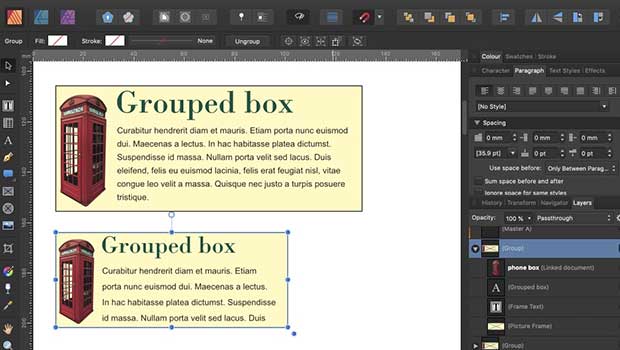
Master pages in Publisher work a bit differently than their InDesign counterparts (now known as parent pages). When you add an element to a master page, Publisher adds it to its own layer. Each master page element is displayed in the Layers panel with a vertical bar on the left so you can distinguish them from regular page elements (Figure 4).
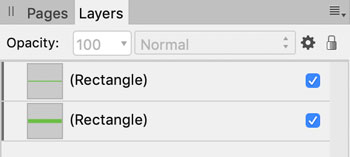
Figure 4. Master page elements appear on their own layers in Publisher.
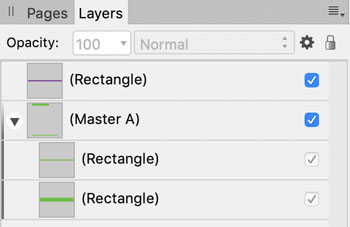
Figure 5. New (purple Rectangle) and inherited (Master A) elements appear on a child master page.
Text styles
Paragraph and character styles in Publisher work similarly to how they do in InDesign, but they are all contained in one panel called Text Styles. If you’re looking to create something like InDesign’s nested styles, create a paragraph style and look in the dialog box sidebar for Initial Words, a similar feature that lets you set one character style to be applied to a specific number of words or up to a certain dash, space, or character (Figure 6).

Figure 6. You can invoke Initial Words (similar to InDesign’s
Nested Styles) in a paragraph style.

Figure 7. Flow options for a paragraph style
Placeholder text
What InDesign refers to as placeholder text, Publisher calls filler text. To generate some, you simply select a text frame and choose Text > Insert Filler Text. By default, filler text is dynamic. As you adjust the text formatting or the size of the text frame, words are automatically removed or added to fit. Filler text also behaves as one collective object. You cannot select any portion at the paragraph or character level, much less edit it. If you don’t like this behavior, you can edit the preference for it, which will allow you to select and edit text at the paragraph or character level (Figure 8).
Figure 8. Turn on Insert Filler Text As Text in General preferences to emulate InDesign’s static placeholder text behavior.

Figure 9. Use any text as filler text by adding it in preferences.
Table of contents
Creating a table of contents in Publisher is a similar process to how it’s done in InDesign. Place your text cursor where you want the table of contents to appear, then choose Text > Table of Contents > Insert Table of Contents. Select which styles were used to format the content you want in your TOC, along with page numbering, PDF bookmarks, and other options (Figure 10).

Figure 10. Table of Contents feature in Publisher
Converting Layouts to Publisher Files
When it comes to converting InDesign layouts to Publisher files, you can start with a PDF or an IDML file, or you can take a hybrid approach and use both.
From InDesign to Publisher via IDML
You cannot directly open native InDesign files (in INDD format) with Affinity Publisher. Instead, if you’re using Affinity Publisher 1.8 or later, you can directly open files in InDesign’s IDML format, which you can create with Save As or Export. (IDML is an XML-based file format designed for compatibility and automation and often used for troubleshooting documents in InDesign; you can find a good introduction here.) In Publisher, choose File > Open and select the IDML file to open it directly. The advantage to opening the IDML file (as opposed to converting a PDF), is that the resulting Publisher document will retain any paragraph styles, character styles, and master pages that were set up in the original InDesign file. The downside to opening an IDML file is that you will probably need to adjust your Publisher file to restore your design to its original state after the conversion, especially if it was a highly designed layout. Note: Conversions from IDML files are a one-way street. You will not be able to save the layout to a format that allows you to get back to an editable InDesign file. However, you can export it to a number of other file formats, the most common of which are PDF, PNG, JPEG, TIFF, PSD, SVG, and EPS. If you no longer have access to InDesign, you’re not totally out of luck, as long as you have a PDF version of your document, because Publisher can open PDFs directly. There’s also a third-party utility you can use to generate IDML files without InDesign; see the sidebar on IDMarkz for details.
From PDF to Publisher
You can open a PDF directly in Publisher—either an entire document or specific pages. Note that opening a PDF in Publisher is different from placing a PDF. Placing a PDF acts just as it does in InDesign, except that you can modify an embedded PDF directly from within Publisher in a new window, via a process that’s similar to Photoshop’s Smart Objects. Simply double-click the embedded PDF in the layout, and it opens in a separate window where you can make changes. When you save those changes, they are reflected in the embedded PDF. You cannot edit linked PDFs in Publisher, but it’s easy enough to embed them in the layout by choosing Document > Resource Manager. In the dialog box that opens, click the linked file and then the Embed button (Figure 11).

Figure 11. You can embed linked PDFs in the Resource Manager to make them editable in Publisher.

Figure 12. Want to embed links automatically? There’s a preference for that.

Figure 13. The same PDF file was imported twice: first, with Favor Editable Text Over Fidelity turned off and then with it turned on. With the preference turned on, line breaks that were the result of text wrap in InDesign are removed so text flows uninterrupted.
The best of both worlds
If you want the visual integrity of opening a PDF and the preservation of styles and master pages you get from an IDML conversion, you can split the difference. Here’s how:
- Open a PDF in Publisher, and save it as your working file.
- Open an IDML file in Publisher, and save it as a new, temporary file.
- Copy and paste master-page elements from the temporary file to the working file.
- Reapply the masters to the document pages.
- Import the text styles from your temporary file to your working file (Text > Text Styles > Import Text Styles), then apply them to the text.
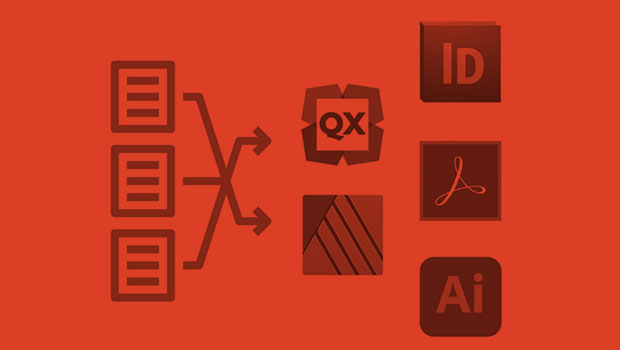
IDMarkz Bridges the Gap
You can automate the conversion from InDesign, via IDML or PDF, to Publisher with the help of the IDMarkz application by Markzware, which combines several of the company’s previous software conversion products. IDMarkz costs $99 per year as a subscription service or a one-time purchase of $149 for a perpetual license. The software also eases conversion to and from other programs, including QuarkXPress, and offers utilities to analyze and preview your files.
Using Publisher-Specific Features
As a fresh competitor in the design and publishing software space, Publisher offers several notable and unique features.
StudioLink
Publisher’s StudioLink feature allows you to use features of Affinity’s companion programs—Affinity Photo and Affinity Designer—directly in Publisher while you work in your file. See Mike Rankin’s feature article in this issue for an example of how you might use StudioLink.
History
Publisher allows you to save the file’s history with the document by selecting File > Save History With Document. This allows you or someone else to see the steps you took while working in the file—and jump back to any of those steps (Figure 14). That information can be helpful if you need to train a coworker or client or if you want to go back to check if you already did something in the file. Note: When this feature is turned on, the file size increases. You can turn it off and resave the file to decrease the file size. 
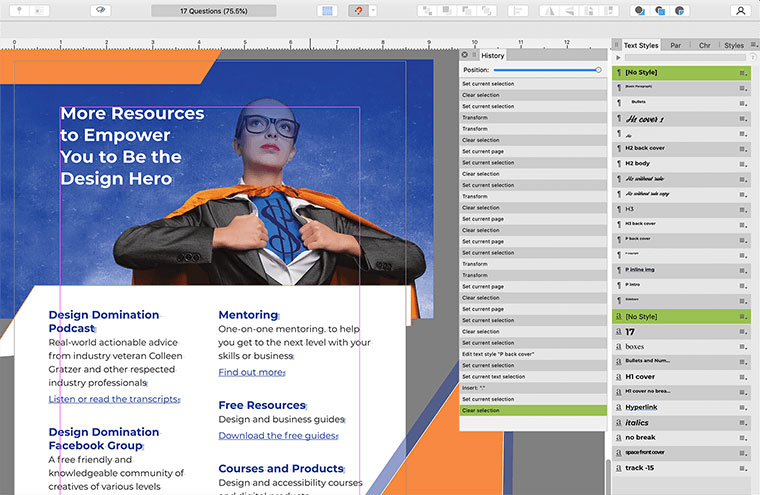
Figure 14. Publisher can save a record of everything you do in a file so you (or anyone else) can retrace your steps.
Easing the Transition
Making the transition from InDesign to Publisher doesn’t have to be a permanent choice. Since Publisher is relatively inexpensive, you might decide to keep both programs in your repertoire, using one or the other depending on the needs of a project or a client. Or, you could take the plunge, knowing that Adobe will gladly take you back (usually at a discounted subscription rate), if things don’t work out with Publisher. Either way, Affinity Publisher is a powerful alternative worth exploring, and one that you will likely find easy to pick up if you have experience using InDesign.
Commenting is easier and faster when you're logged in!

Recommended for you

Affinity Publisher: First Look
Software developer Serif has been taking on Adobe with Affinity Photo and Affini...
InReview: IDMarkz
Preview and convert InDesign files to other formats without a copy of InDesign
Review: Affinity Publisher
In August 2018 Affinity took the unusual decision to launch its page layout prog...