


Theoretically, if you’re doing everything right, you should never see this icon appear on one of your workflow stories:
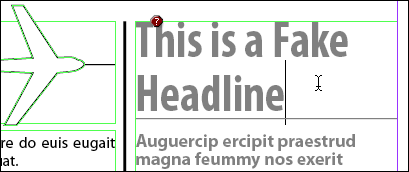
If you see a scary red stop sign icon (it’s a hexagon, I checked) on a workflow story, instead of the usual globe or pencil, it means the story’s link is missing — neither InDesign nor InCopy can find the external InCopy file that is linked to the text frame. Which means that no one can check out or edit the story.
What happened? Someone (I’m not saying it was you) moved or renamed one of the interrelated files that are part of the whole InCopy/InDesign workflow, or saved it in the wrong location in the first place. Some real world examples I’ve heard include:
- Designer exported a frame to InCopy format and inadvertently saved it to their own computer instead of to project folder on the server (so to the designer, everything’s fine, but to anyone else opening the layout or assignment off the server, there’s a missing file);
- Editor or designer wanted to bring work home, so they copied the layout or assignment to their USB Flash drive but not the folder full of linked InCopy files (please don’t ever do this, not even if you do remember to copy the InCopy files, use e-mail-based assignments instead)
- Production manager or IT tried to “clean up” the server, and while working in the Finder or Windows Explorer they inadvertently moved or renamed a linked file
Luckily there are a couple ways to easily fix the problem, and one “last resort” fix.
Whoops, Sorry Sir, I’ll Put it Back
If you know where the linked InCopy file is (or can find it with your computer’s Find command) just move it back to where InDesign or InCopy thinks it should be, and the problem goes away.
You can learn the location and filename that ID/IC is looking for with the help of the Links panel, available from the Window menu in both InDesign and InCopy. Open the Links panel and look for the entry with the stop sign icon.
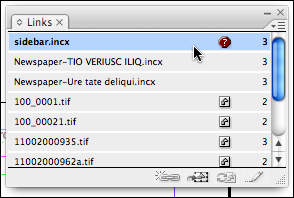
If there’s more than one, click inside the story’s text so that ID or IC highlights that story’s link in the Links panel, the same behavior as the Assignments panel.
Now double-click the missing file’s entry to open the Link Information dialog box, and then look at the Location field at the bottom.

It’s kind of hard to read, but the Location field reports the file’s “Last Seen Location,” the path and filename that IC/ID is pining for. Here’s a zoomed-in view:

Switch to the Finder or Explorer, find the linked file, and move it to that location (renaming it to match the remembered filename, if necessary). Switch back to the program, and both IC and ID should immediately remove the Missing Link icon. Now you can check it out and proceed as usual.
I Meant to Do That
What if you moved or renamed the linked file on purpose, and want to keep it that way? For example, let’s say that to fix an InCopy story which was exported to the wrong location (see the first bullet point above), you went to the Finder/Explorer and moved the INCX file to the correct location.
Now you just need to tell InDesign what you did. With the missing link selected in the Links panel, choose Relink from the Links panel menu (or, if you still have the Link Information dialog box open, click the Relink button to the right of the Location field). The Relink dialog box opens, allowing you to navigate to the new location of the file. Select it and click the Open button.
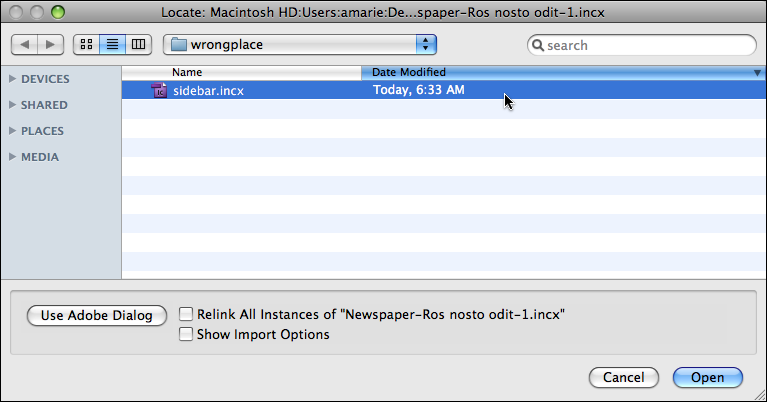
If you’ve renamed the link, you’ll get an “Are you sure?” alert, a failsafe in case you selected the wrong INCX file. Just click Yes, and InDesign shrugs its shoulder, links to the story to the “new” INCX file, and the stop sign goes away. If you look at the Location field in Link Information, you’ll see it’s now updated with the new path and filename.
Only InDesign is able to relink stories to a layout (and thus, to an assignment). Even though InCopy has a Relink command, it only works with standalone InCopy files, at all other times it’s dimmed. But as soon as the designer saves the layout file and updates the assignment, InCopy users can choose File > Update Design to see that the link is fixed.
By the way, InDesign CS4’s revamped Links panel has a wonderful new feature called Relink to Folder.
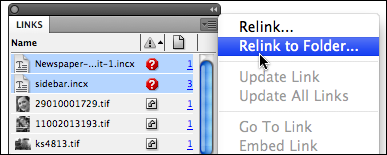
Relink to Folder allows you to quickly fix a whole bunch of missing links that are missing only because someone moved or renamed the folder itself (the one that contains the missing files), or because you moved all the linked files to an existing folder with other files. It doesn’t help if you’ve renamed the files, though.
To use the feature, shift-click all your missing links in the Links panel, choose Relink to Folder, and in the resulting dialog box, select the folder containing the linked files. Click the Choose button, and InDesign reestablishes links to all the missing files it finds in that folder.
When you’re done, remember to save the changes to the InDesign file, updating any affected assignments if necessary, so that the InCopy users working on the layout can choose Update Design and see healthy links again.
In Case of Emergency, Unlink
If the linked INCX file is nowhere to be found, the only solution is to unlink the story in InDesign (not possible in InCopy), and then re-export the story to InCopy format.
To unlink a text frame from its external INCX file, open the layout in InDesign, select the story’s entry in the Assignments panel, and click the Trashcan button at the bottom of the panel.

Doing so doesn’t delete the story in the layout (dumb icon, in my opinion), it just breaks its link to the external INCX file. If clicking Trashcan icons makes you nervous, you could use the Unlink command instead, found in both the Assignments and the Links panel menus.
After you unlink a story, the text remains in the layout, intact and unchanged, within a “normal” InDesign text frame (no workflow icon). Now just export the story to InCopy format again, however you normally do it, and it’s once more available and ready for checking out.
This article was last modified on December 19, 2021
This article was first published on January 30, 2009
Commenting is easier and faster when you're logged in!

Recommended for you

Explore a Little-Known QuarkXPress Gem
To learn more about Quark VS InDesign.com please visit https://www.quarkvsindesi...
Print Isn’t Dead: The Magazine
The London-based group People of Print offers an inspirational showcase for outs...

10 Display Faces that Digital Forgot
Because of your enthusiastic response to my last column, I’ve moved up its seque...