

Using Flash for the First Time: Part 2
This article originally appeared on the Adobe Design Center.
Welcome to Part 2 of this three-part introduction to Adobe Flash. You survived Part 1 of this tutorial, where you created, set up, and imported content into an FLA file. Because you’re reading Part 2, you’re probably ready to learn more about Flash. That’s good, because more fun ensues in this part — you will create symbols, animation, and even write some simple ActionScript to make the banner function.
Note: This article uses Flash CS3 Professional. If you still use Flash 8, please read the previous version of this article. If you’re still using Flash MX 2004, you can read this even earlier version of the article.
You can also watch a video tutorial version of this tutorial series in the Creative Suite 3 Video Workshop.
Requirements
To follow along with this article, you will need the following software:
Flash CS3 Professional
Sample files:
gnome_part2.zip (973K)
Prerequisite knowledge:
Part 1 of this series
Adding Text
You need to add some text to your banner for decorative purposes. You can add several types of text to a Flash document: static text, dynamic text, or input text. Static text is useful when you need to add decorative text to the Stage, or any text that doesn’t need to change or load from an external source. Use dynamic text when you want to load text from a file or database, or change the text when the SWF file plays in Flash Player. Use input text when you want the user to type into a text field. You can take that text and send it to a database, have it manipulate something in the SWF file, and more.
You can add any of these types of text using the Text tool. For this exercise, you will add some static text to the Stage. To add static text, follow these steps:
1. Open the banner.fla document you created in Part 1 of this tutorial, and rename the file banner2.fla.
Note: If you didn’t finish Part 1 of this tutorial, didn’t feel like reading it, or lost your file, then open the source files ZIP archive that accompanies this tutorial. Inside the start folder, find banner.fla and use this file to begin the tutorial.
2. Choose Insert > Timeline > Layer (or click the Insert Layer button on the Timeline) to insert a new layer. Double-click the layer’s name and type text to rename the layer.
3. Select the Text tool (which looks like a large letter T) in the Tools panel.
4. Click near the top of the Stage and type Overworked? into the field that’s on the Stage.
5. Select the text field using the Selection tool. A bounding box appears around the text when you select it.
6. Open the Property inspector (Window > Properties > Properties) and make sure Static Text appears in the Text Type pop-up menu.
7. Change the font of the text to whatever font you prefer. You change the font using the Font pop-up menu (next to the A icon, seen in Figure 1).
8. Change the size of the font to 24 points using the Font Size pop-up menu, and see if it fits within the banner. You might need to change the font size until the text fits on the Stage.

Figure 1: Change text settings in the Property inspector until the text fits on the banner. This text has bold face and a drop shadow filter applied (using the Filters panel).
When you finish, the text should look similar in size and position to the text in Figure 2.

Figure 2: Add some static text to the banner.
9. Select the Text tool again and type Underpaid? below the text you added in Step 4.
10. Select the text field and open the Property inspector. Change the text to the same font you selected in Step 7. Then select a font size so the text is large but still fits on the Stage.
11. Repeat Steps 6 and 7 to add the phrase Gnome? below the previous two lines of text, and then use the Selection tool to select each text field and move them until their position resembles the text in Figure 3.
When you finish, your banner will resemble Figure 3.

Figure 3: You should have three lines of text that resemble this image when you finish this exercise.
12. (Optional) Open the Align panel (Window > Align) to align the text to the center of the Stage. Select a text block on the Stage, click the To Stage button in the Align panel, and then click the Align Horizontal center button. (Move the mouse over a button in the panel to see what its name is.)
13. Choose File > Save to save your progress before moving on.
Tip: For advanced text effects, you can create text in Adobe Illustrator®, save the file as an AI, PNG, or SWF file, and import it into Flash.
Using Symbols
A symbol is an object that you create in Flash. As you discovered in Part 1, a symbol can be a graphic, button, or movie clip that you reuse throughout the current FLA or other FLA files. Any symbol that you create is automatically added to the document’s library (Window > Library), so you can use it many times within a single FLA file.
When you add animation, you should always animate symbols in Flash instead of animating raw graphics (graphics that you draw) or raw assets that you import (such as a PNG file). For example, if you draw a circle using the Oval tool in Flash, you should convert that circle graphic into a movie clip before you animate it. This helps you reduce the SWF file size and makes it easier to create an animation in Flash.
In Part 1 of this tutorial, you created a graphic symbol when you imported the join_us.ai file into Flash. In this tutorial, you want to animate that symbol; therefore, you need to change it to a movie clip symbol, which has a timeline. In the following exercise, you convert a graphic symbol to a movie clip symbol in the following exercise. You will animate this movie clip in later exercises.
1. Delete the join_us graphic symbol from the Stage.
2. In the Library panel, select the join_us graphic symbol, and then right-click (or option-click) the instance.
3. Select Type and then Movie Clip from the context menu to change what type of symbol it is.
The icon that represents what type of symbol it is change from graphic symbol icon to a movie clip icon.

Figure 4: Use the Convert to Symbol dialog box to convert selected content into a symbol, give it a name, and add it to the document’s library.
4. Drag and position a new instance of the join_us movie clip symbol on the Stage.
Remember that the symbol’s name (in the library) is different than its instance name (on the Stage) because you can have numerous instances of a single symbol on the Stage. For example, you can set an instance name for the join_us symbol using the Property inspector after you drag it to the Stage from the Library panel. If you drag another instance of join us to the Stage, you assign it a different instance name. You use the instance name in your ActionScript to reference and manipulate the instance with code, and there are some naming guidelines you must follow when you assign an instance name. (I’ll discuss these later in this tutorial, in the section called Writing simple ActionScript).
Movie clip symbols have their own timelines. This means you can animate each movie clip instance on its own timeline, and on the main Timeline of the document. This is unique to movie clip instances. You will animate the movie clip in the following exercise.
Adding Animation to a Timeline
You have already used the Timeline in Part 1 of this tutorial to insert new layers and add content onto those layers. In Part 1, you added assets to the Stage and a frame on the Timeline. You might have noticed that after you add content on a frame, a filled circle appears on the frame to signify content on that frame. Whenever there’s new or changed content on a frame, it’s called a keyframe and has a filled black dot on the frame. A keyframe is a frame where you define changes in the animation, or a frame that has content on it. An empty keyframe has a hollow circle. For more information on different kinds of frames, do a search on “frames and keyframes” (with quotes) in the Help panel (F1).
You create an animation in a Flash document by adding content to a timeline. When the playhead moves across a timeline, those individual frames play; when they’re played in quick succession (like a flipbook or succession of frames on a reel of film), you can create an animation.
When you create a frame-by-frame animation, every frame is a keyframe. In a tweened animation, you define keyframes at significant points in the animation and let Flash create the contents of frames in between. Flash displays the interpolated frames of a tweened animation as light blue or light green with an arrow drawn between keyframes. Because Flash documents save the shapes in each keyframe, you should create keyframes only at the points in the animation where something changes.
Creating a Frame-by-Frame Animation
To create a frame-by-frame animation, follow these steps:
1. Choose Modify > Document.
The Document Properties dialog box opens. This is the dialog box you used to change the dimensions of the banner in Part 1. Now you want to change the frame rate for the banner.
2. Change the number in the frame rate text box to 18. Click OK to apply the new setting.
A higher frame rate means that your animation plays smoothly, more so than when you had it set to 12 frames per second (fps). Changing the fps setting means that the main timeline and movie clip timelines all play at the specified frame rate.
Note: An increased frame rate also means that there is a slightly increased demand on the user’s computer (or CPU) to render the extra frames each second.
3. Double-click the join_us symbol instance on the Stage.
This opens the symbol in symbol-editing mode (see Figure 5). In this mode, you see the movie clip symbol’s timeline, which runs independently of the timeline for the main FLA document (the one you saw prior to double-clicking the symbol). This means you can have animations that play and stop independently from animations on the main timeline. Remember that a movie clip still plays at the document’s frame rate (18 fps).

Figure 5: In Symbol-editing mode, the symbol you’re editing appears normal, while other items on the Stage are dimmed. Changes you make in this mode apply to every instance of the symbol in your FLA file.
When you enter this mode, it means you edit the symbol itself, not just the single instance on the Stage. Any changes you make on this Timeline (which is the movie clip’s Timeline) apply to every instance of the symbol you use in the FLA file.
You can tell that you’re editing a symbol by looking at the edit bar (see Figure 6).

Figure 6: Use the edit bar to navigate a document. The edit bar might be above or below the Timeline. The rightmost icon (in this case, join_us) indicates the current symbol being edited.
Scene 1 refers to the main timeline of the FLA document. You can click this button to return to the main Timeline. The names after it point to the symbol you’re editing. If the symbol is nested within other symbols, this path might contain several names. In Figure 6, you can see that you’re editing the join us symbol that’s on the main Timeline (Scene 1).
4. Select everything inside the movie clip and press F8 to convert the artwork into another new movie clip symbol. To select all of the artwork, you can click and drag the mouse diagonally over the stage, or hold Shift while you click the three keyframes in the Timeline.
5. In the Convert to Symbol dialog box, type the name nested_mc in the Name text box, select Movie clip, and then click OK.
A new movie clip is added to the library. Also notice that two layers on the timeline are now empty. You can tell that these layers are empty because the frames have unfilled circles, which represent no content, and the topmost layer has a filled circle (meaning it has content). In the following steps you delete the layers that no longer contain artwork.
6. Select the text bg layer on the Timeline and then click the Delete Layer button below the layer name (it looks like a trash can).
7. Repeat step 6 for the star layer. After you’re finished, you should only have one layer on the timeline called text fg. You can rename this layer to star if you wish.
8. Select Frame 15 and then choose Insert > Timeline > Keyframe.
Tip: Press F6 to quickly insert a new keyframe.
This command inserts a new keyframe, which means you can modify the content on that frame to create animation. Currently, the content on Frame 15 is duplicated from the content on Frame 1. When you modify Frame 15 in a future step, the modifications won’t change the content on Frame 1.
9. Select Frame 30 and press F6 to insert a new keyframe. The keyframe duplicates the content from Frame 15. That means the content on all three frames is the same.
10. Select the movie clip instance on Frame 15, and then open the Property inspector (Window > Properties > Properties).
Note: Make sure you select the instance on Frame 15, not just the frame. You can first select the frame on the Timeline (or move the playhead to Frame 15) and then select the movie clip instance on the Stage in order to see the correct context of the Property inspector, as shown in Figure 7.
11. Select Brightness from the Color pop-up menu.
12. Change the slider value to 75% (see Figure 7).
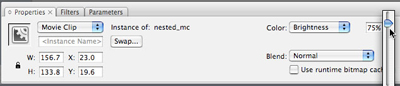
Figure 7: Change the brightness of the movie clip instance.
The brightness changes for the instance on Frame 15. The instances on Frames 1 and 30 do not change. This means that you can now add a motion tween that animates the brightness value between Frames 1 and 15, and then from Frames 15 to 30. After playing Frame 30, the playhead loops back to Frame 1 and the animation starts again.
Tip: You could also change the alpha or tint values using the same procedure. Alpha tweens are more processor-intensive than tweens that change the brightness or tint of your animation. Try to avoid processor-intensive procedures whenever possible.
13. Select the instance on the Stage at Frame 15 again, and then select the Free Transform tool in the Tools panel. Select the lower right handle and drag it towards the center of the image to make it smaller (see Figure 8).

Figure 8: Resize the instance using the Free Transform tool.
14. Click and drag the red toggle (playhead) from left to right across the Timeline.
The star should jump between large and dark, to small and “bright” (or light-colored). This is essentially a frame-by-frame animation, because the graphic changes between frames without any “tweening” applied: you have a succession of graphics that change when the playhead reaches the frame. However, in this case we do want to apply a tween to this “animation”, because it is too choppy and a smooth transition will look nicer. To learn how to apply a tween, read on!
Creating a Tweened Animation
You can create several kinds of animation in a FLA file. In this section of the marathon tutorial series, you will create a tweened animation or motion tween. A motion tween is an animation where you define properties such as position, size, and rotation for an instance at one point in time, and then you change those properties at another point in time. In this animation, you change the brightness and size of the instance (already defined in the previous exercise).
For information on different kinds of tweens, do a search on “about tweened animation” (with quotes) in the Flash Help panel (F1).
1. Select any frame between Frames 1 and 15, and then select Motion from the Tween pop-up menu in the Property inspector.
The span of frames changes color and an arrow appears between Frames 1 and 15 (see Figure 9). Notice how the options in the Property inspector are different when you select a frame compared to when you select a movie clip instance (see Figure 7 earlier).
Tip: You can also right-click (Windows) or option-click (Mac) the frame and select Create Motion Tween from the context menu instead.
2. Select any frame between Frames 15 and 30, and then select Motion from the Tween pop-up menu in the Property inspector to create a second animation.

Figure 9: Create a motion tween between Frames 1 and 15, and then 15 and 30, on the movie clip’s timeline.
3. Click the playhead and drag it across the movie clip’s Timeline to test (or scrub) the animation.
4. Select Control > Test Movie.
Tip: A quicker way to test your SWF file is to use keyboard shortcuts. Press Control+Enter (Windows) or Command+Return (Mac) to test the file.
The test environment opens where you can see the animation. Notice how it loops, appearing to fade in and out because of the change in brightness. By default, the playhead returns to Frame 1 and replays the animation after it reaches the final frame on the timeline in the movie clip. This means the animation loops repeatedly unless you tell it to stop. You will find out how to do this later in the section called Writing simple ActionScript.
Creating a Button
When you create a banner, you need to let your user click anywhere in the banner area and open a new browser window. You can create buttons very easily in Flash. Your button can either have a graphic with rollover graphics, sounds, and even animations of their own. Or you can create an invisible button. Invisible buttons are useful when you want to create “hot spots” on your website or make the entire banner clickable without obscuring your graphics. In the following exercise, you’ll add an invisible button over your banner graphics.
Tip: For more information on creating visible buttons with graphics and rollover effects, search “creating buttons” (with quotes) in the Flash Help panel (F1).
Before you start this exercise, make sure you are on the main Timeline, not in symbol-editing mode for the join_us movie clip. If you are, click Scene 1 on the edit bar (between the Timeline and the Stage by default).
1. Select the topmost layer on the main Timeline (this should be the text layer), and then choose Insert > Timeline > Layer to create a new layer. Rename the new layer button.
2. Select the Rectangle tool in the Tools panel (the button’s icon looks like a square).
3. Find the Colors section of the Tools panel and click the pencil icon to select the Stroke color control.
4. Select No Color, as shown in Figure 10. Doing so disables the rectangle’s outline.

Figure 10: Select No Color for the stroke color control.
Note: The color of the rectangle’s fill, the other color control, does not matter.
5. Click and drag the mouse diagonally across the Stage to create a rectangle.
The size (and color) of the rectangle does not matter — you will resize it later using the Property inspector.
6. Click the Selection tool in the Tools panel and then click the rectangle on the Stage to select it.
A crosshatch pattern appears over the rectangle when you select it.
7. Open the Property inspector (Window > Properties > Properties). Change the value in the W (width) text box to 160 and the H (height) text box to 600. Then change the X text box and the Y text box both to 0 (see Figure 11).

Figure 11: Change the width and height of the rectangle and then set the location of the rectangle to cover the Stage.
8. With the rectangle still selected on the Stage, press F8 to change the rectangle into a symbol.
9. In the Convert to Symbol dialog box, type invisible btn in the Name text box, select Button, and then click OK.
10. Double-click the new button on the Stage to enter the symbol-editing mode.
The rectangle is currently on the first Up frame of the button you created. This is the Up state of the button — what users see when the button sits on the Stage. Instead, you want the button not to have anything visible on the Stage. Therefore, you need to move the rectangle to the Hit frame, which is the hit area of the button (the active region that a user can click to activate the button’s actions).
11. Click the keyframe at the Up frame and hold down the mouse button while you drag the keyframe to the Hit frame (see Figure 12).

Figure 12: Click and drag the rectangle keyframe from the Up frame to the Hit frame on the Timeline.
Now even though the entire area of the banner is clickable, there is no visual appearance of the button on your banner.
12. Click Scene 1 to return to the main Timeline. Now there is a teal rectangle over the banner area. This refers to the invisible button’s Hit area. If it’s distracting to you, you can hide the button layer in the authoring environment. On the Timeline, click the dot that’s under the Eye icon on the button layer to hide the contents of that layer.
Writing Simple ActionScript
You need to add some simple ActionScript 3.0 code to your banner in order for the invisible button to open a website or send information about how many clicks the banner has received.
There are several different places you can add ActionScript in a Flash document. You can select an instance, and add ActionScript that attaches directly to that instance. To access the code, you would need to find and select that instance again. You can also add ActionScript to a frame (or multiple frames) on the Timeline. It’s a good idea to add all of your code to a single frame on the Timeline because it’s much easier to find, update, and organize when you’re working on a file. Do not attach your ActionScript to instances, which you cannot do using ActionScript 3.0 anyway.
Note: You can also keep your ActionScript in external class files that import into the FLA file you’re working on. This is sometimes the best way to organize your ActionScript, particularly when you work on larger projects and especially important in ActionScript 3.0. This topic goes beyond the scope of this tutorial, however.
Notice how your Join Us motion tween continually loops when you test it. By default, the playhead on the Timeline loops if you have content on more than one frame. Therefore, if you have content on several frames in a movie clip or on the main Timeline, it will play and loop forever. You can stop the playhead from looping by adding a single line of ActionScript. For example, if you add this ActionScript to a frame, the playhead stops when it reaches that frame:
stop();
You don’t need to add this ActionScript to your banner. However, you can add this ActionScript to other FLA files you create to stop a timeline. The stop action is an example of ActionScript that you should be aware of when you use Flash so that you can stop looping SWF files when necessary.
Before you add any code, you need to give the button a unique instance name. The instance name enables you to target the button with ActionScript code. If you don’t name the button, your code doesn’t have any way of targeting the button from a timeline. The first step is to assign the invisible button an instance name. Then you can add code that targets that button using its name.
1. Select the invisible button on the Stage.
2. Open the Property inspector (Window > Properties > Properties) and find the <Instance Name> text box in the Property inspector.
3. Type inv_btn into the <Instance Name> text box.
Note: An instance name is different from the symbols name (which is what you type in the Name text box in the Convert to Symbol dialog box). An instance name cannot have spaces or special characters but can contain underscores. Also, instance names are case-sensitive.
4. Choose Insert > Timeline > Layer to insert a new layer and then rename the new layer as actions.
5. Open the Actions panel (Window > Actions) and then select Frame 1 of the Actions layer.
6. Type the following ActionScript into the script pane (the editable text field) in the Actions panel:

In the first line of code, you see inv_btn, which is the instance name of the button you just added to the banner file. You’re adding a listener to inv_btn. In the first line of code, you register an event listener for the click event (MouseEvent.CLICK), because that’s what you event want to “listen” for with this banner. A click event can occur when a user clicks a button, and when this event is dispatched the button’s click event handler is called (buttonClickHandler, also in the first line).
The buttonClickHandler argument is what Flash Player calls once the event you’re listening for (the user’s click) actually happens. This argument is the name of a function found in the following line, and you call this function when a user clicks the button. So, now you need to define that function in your code.
So, the second line of code is the buttonClickHandler function. The function contains information about what happens when someone clicks the banner’s button. You added two lines of information inside the curly braces of the buttonClickHandler function. You have code to navigate the browser to a URL, and you request the URL for a particular web page: https://www.deseloper.com/gnome. Then there’s a second line of code with a trace statement. This statement is just for testing purposes — you know that the button code works if you see this text appear in the Output panel in Flash.
7. Select Control > Test Movie to test your code.
When you click the banner, You clicked me should appear in the Output panel. Also, a browser window should appear that opens the targeted website. If this doesn’t occur, open the finished FLA file for this tutorial (available in the finish folder of this article’s source files) and compare your code to the code in this document.
8. Return to the FLA file, and open the Actions panel. Highlight the trace statement, and click the Apply line comment button (demonstrated in Figure 13.)

Figure 13: Comment out a line of code using the Apply line comment button.
If you retest your code, now the commented out line will not execute, so the Output panel does not open after you click the banner. This line of code was used in the earlier step to check whether the button code executes when you click the button. Now that you know your button code works, you could comment out that line of test code (you can also delete it, if you don’t need to use or modify this code again).
The script in this example is a simple piece of ActionScript 3.0 code that reacts to a button click. There is much more information available about the ActionScript language in the Flash documentation (F1). Refer to the documentation’s Table of Contents for books and reference guides on ActionScript. A good place to start is Programming ActionScript 3.0 in Flash Help. There are also a few video tutorials that contain ActionScript 3.0 code in the Creative Suite 3 Video Workshop, and articles in the Flash Developer Center.
Testing Your Progress
Now you have a Flash banner with graphics and animation, which reacts to button clicks. You have completed your first interactive and animated Flash document!
Let’s take a look at the banner in action, within a browser window:
1. Return to your banner2 document and then choose File > Publish Settings.
2. Select the Flash tab in the Publish Settings dialog box.
3. Select Access Network Only from the Local Playback Security pop-up menu, to avoid possible security warnings. For more information about local playback security options, search “local file security” (with quotes) in the Flash Help panel (F1).
4. Choose File > Publish Preview (HTML).
The default browser on your computer opens and displays the banner. By default, the banner appears at the upper left corner of the HTML document.
5. Click the banner to open the web page. A new browser window should open and display a website.
6. Close both browser windows and return to the Flash authoring environment.
If you are happy with your document, save your changes and proceed to Part 3 of this tutorial, available on January 9. You might want to change the animation or text, or modify the code as necessary.
A finished version of the file is available in the source files) that accompany this tutorial. Look in the finished folder for a file called banner_pt2.fla.
Where to Go from Here
In this second part of the tutorial series, you added text, animation, buttons, and code to your document, and then tested a SWF file. Quite a bit of work in a short period of time! And, now you have an animated, clickable banner that you can export and add to a web page. In Part 3 of this tutorial, you will publish your work and take the file and add it to a Dreamweaver website.
About the Author
Jen deHaan was raised by wolves in the deep woods of the Canadian north. Canada’s chief exports include motor vehicles (or their parts), lumber, newsprint, nonmetal materials, and wheat. One overcast day in 2004, Jen left her life as a Flash deseloper (designer/developer) in Canada to write Flash documentation and samples at Macromedia in San Francisco. Aside from her ongoing work at Adobe as an instructional designer for web and video products, Jen runs several community sites for fun, and maintains a blog at www.webvideoblogger.com and weblogs.macromedia.com/dehaan. She believes that _root tends to be evil and misses Tim Horton’s coffee.