
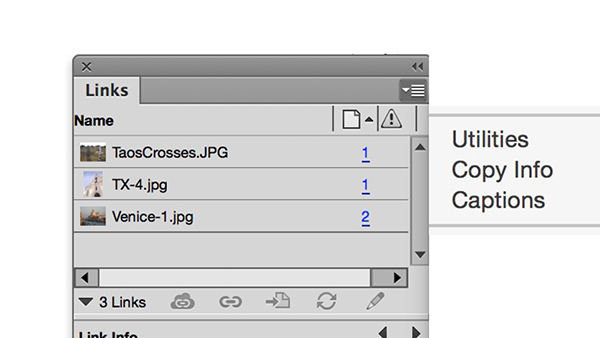
InDesign’s Links panel is a wonderful tool for viewing info about placed graphics (and even linked text files). To really put it to work, dig a little deeper into the Links panel menu. Head down to the bottom portion of the menu and you’ll see three sub-menus: Utilities, Copy Info, and Captions. Each one of those items gives you options for added functionality involving the links in your document.

Utilities:
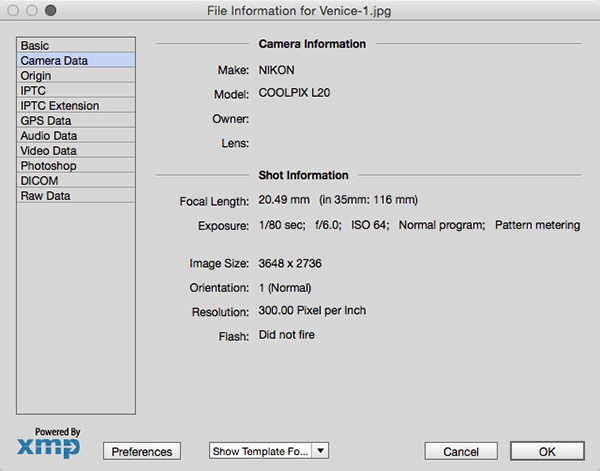
XMP File Info
- Access file and camera information for a specific link.
- The Camera Data pane contains information on the camera used to take the shot, as well as many of the camera settings such as exposure and resolution.
Copy Links To…
- Copy all of the links—or select individual ones—in the current document to a new folder.
- This is a useful way to copy images to another project folder, or to consolidate all images to one central location.
- Note that when you copy the links to a new folder, the images in the document are now linked to the new location.
Copy Info:
- Although you can view a link’s path in the lower section of the panel (provided you haven’t changed that in the panel options), it might be more useful to copy and paste the path elsewhere. Choose Copy Info from the Links panel menu.
- Highlight a single link in the Links panel, click on the panel menu, then choose Copy Full Path or Copy Platform Style Path from the Copy Info sub-menu.
- Select a single link and choose Copy All Link Information, which replicates the info from the bottom section of the Links panel.
- Select one or more links and choose Copy Info for Selected Links, which replicates the info for each link as it appears in the top portion.
- For the last two action above, make sure you have the desired info set to display before copying. Use the Panel Options from the panel menu to display the necessary information.

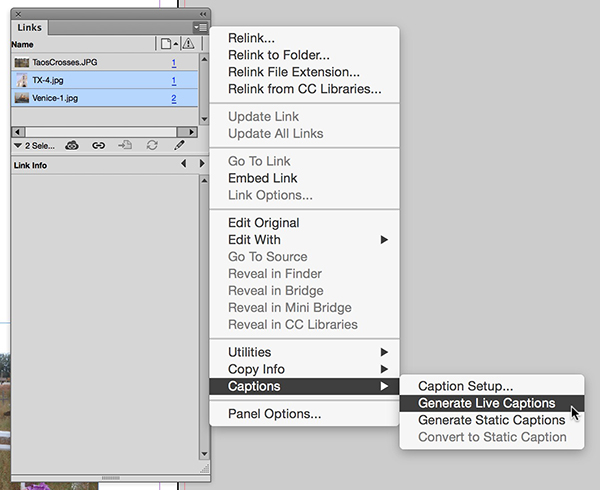
Captions:
- The Captions sub-menu replicates the options for automatic captions that live under the Object menu.
- Using the Links panel menu is a little easier, and it makes sense to use it since you’re already dealing with images in the panel.
- You can set the caption setup options—like which metadata to use, text to add before or after the metadata, spacing, and paragraph style to use—from this menu.
- Choose to create static or live captions for any links selected in the panel. You can also convert a live caption to a static one from this menu.
- The huge advantage to using this menu is that you can create captions for links that live on different spreads, simply by clicking on the names in the Links panel first. Using the caption options in the Object menu method, you’re limited to selecting images one spread at a time.
This article was last modified on March 14, 2016
This article was first published on March 14, 2016
Commenting is easier and faster when you're logged in!
