


Last time we took a trip to InDesign’s Island of Misfit Tools, we looked at the Page and Gap tools and the “secret” Gridify command. This time around, we are heading back to InDesign and checking out the strange little tools with icons that resemble the ball pit at a children’s play area. I refer to them as the “picker-upper” and “putter-downer” tools. Adobe went with the more conventional names of Content Collector and Content Placer tools. Fine. You won this round, Adobe.

Let’s check out what the tools with the silly icons and not-so-silly names do.
Use the Content Collector tool (the icon on the left when viewing the Tools panel in 2-column format) to, not surprisingly, pick up items. You can then place those same items with the Content Placer tool elsewhere on the current page, another page, or even in another document. How is this better than copy and paste? Using the collector tools, you create a link between the objects, meaning when one updates, so do all other instances.
- Select either Content tool. The Content Conveyor will appear.
- In the lower left corner of the conveyor select the Collector tool if it’s not already.
- Click on each item you want to re-use elsewhere. Each item gets added individually to the conveyor. Shift+click to add multiple items.
- Use the Load Conveyor button at the far right of the conveyor to pick up all items in a selection, on certain pages, or pages plus the pasteboard.
- Choosing Create a Single Set will add the items as one selection.

Once you’ve loaded the Content Conveyor, you’re ready to start placing items.
- From the three icons in the center of the Content Conveyor that look like boxes with squares falling out, choose how to place and load each item.
- Placing options include: a) Place (current item), remove from the conveyor, and load the next item; b) place multiple (instances), and keep in conveyor; c) place, keep in conveyor, load next.
- Choose Create Link to make it easy to update all instances of placed content (even if it is an object created in InDesign or in another document).
- Choose Map Styles to map text and table styles between the original and placed content. Set up custom mapping if needed.
- Choose the Placer tool in the lower left.
- Navigate between items in the conveyor using your arrow keys or the arrows at the bottom of the conveyor.
- Click or click and drag to place the items on the page.

If you’ve chosen the Create Link option when placing, the objects you’ve placed (children) are linked back to the original (parent) object.
- Making editorial changes to the parent text will result in modified links for all child text frames. Double-click on the yellow triangle next to the child frame’s name in the Links panel or click once on the symbol on the text frame itself.
- Making a change to an InDesign-created object—such as a shape or table—also results in links that need to be updated.

I’ll admit, the Content Collector and Placer tools are a little clunky to master, but they come in handy when you have to maintain changes or have that client who can’t seem to make up their minds. I use it to make up for the shortcomings in Table styles and also for additional items I need to link across multiple alternate layouts. And, like the oddities on the Island of Misfit Toys, once you look past the oddly cryptic icons and you’ll see what’s inside these misfit tools can be quite useful.
This article was last modified on September 19, 2016
This article was first published on September 19, 2016
Commenting is easier and faster when you're logged in!

Recommended for you
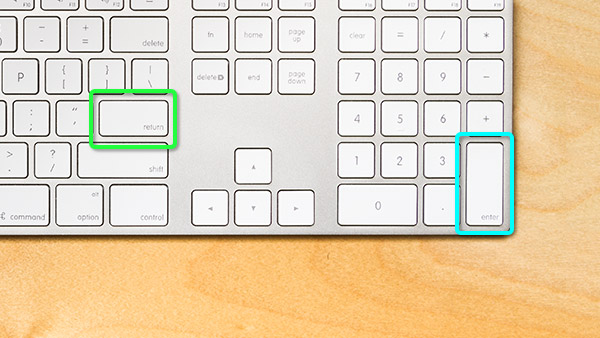
A Tale of Two Enter Keys
If you use an extended keyboard, you might think that the keys on the numeric ke...

Setting Defaults in InDesign
One of my favorite things about InDesign is that it often keeps me from doing so...
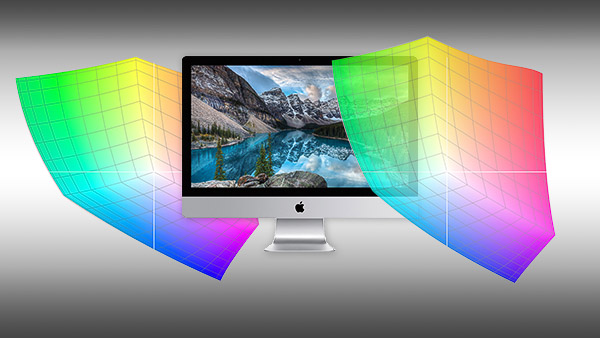
How Do P3 Displays Affect Your Workflow?
A P3 display is an upgrade from sRGB, but there are potential complications.