
Canvas 7: Jack of All Trades

Because Deneba’s Canvas 7 endeavors to be all things to all people-illustration, image-editing, web-design, presentation, animation, and page-layout software-it could be compared to at least 10 or 15 other applications. But I’m going to resist that temptation for two reasons. First, a features war is moot, as upgrades are continually leapfrogging one another, copying the competition’s most recent advances and raising the ante with new gadgets. And second, you’ve already made your investment; a little tit-for-tat showdown is not going to make you throw out what you’re currently using.
Still, there may be a place for Canvas alongside your favorite apps. The bottom line is this: can Canvas 7 help designers, both casual and serious, do what they need to do? And does Canvas bring anything unique to the party? The answer to these questions will help you decide whether to add Canvas to your workflow.
As a designer I’ve tackled a variety of jobs, from newsletters to websites to identity packages and collateral. I’ll attempt to recreate some of these with Canvas 7 to see just how well it gets the job done. Come see the results!

The Canvas workspace is clean and uncluttered. The Docker Bar-the row of tabs below the menu-keeps palettes handy, but out of the way. A palette may be accessed by clicking its tab-as with the Sprite Effects palette, at right-or detached and floated-as with the Toolbox, at left.
Canvas 7’s interface
The Canvas 7 workspace is, for the most part, clean and uncluttered. Below the standard menu and icon bars at the top of the window Canvas adds a Docking Bar. This narrow strip is a handy place to store palettes when you’re not using them, yet still want easy access to them. When you need a palette, you can either click on its tab to open it and choose your settings (after which it disappears into the docking bar again) or you can drag it onto your desktop as a floating palette. A Dock All Palettes command lets you quickly return floating palettes to the docking bar. Unfortunately, this includes the Toolbox, which I am accustomed to always having open. (Canvas does not let you dock the Toolbox along the window’s periphery as do CorelDraw or Macromedia Freehand)

With Canvas, you must specify whether a new document will be an illustration, publication, animation, or presentation. The interface varies for each document type.
As in earlier versions, Canvas 7 forces a distinction among document types. When starting a new document you must choose whether it will be an illustration, publication, presentation, or animation. There is no specific “image” document type (since bitmap images can be a part of any type of document); instead, when you double-click an image in any document Canvas goes into “image-edit” mode, giving you access to many of the traditional image editing tools, such as those found in Adobe Photoshop. The document type you choose will determine the specific interface Canvas will present. Once specified, a document type can’t be changed, but importing a document of one type into another of a different type converts the contents to the new type. This essentially obviates the distinction between Publication and Illustration document types, as both can have columns, multiple pages, and any number of text, vector, and bitmap objects.

Mac or Windows interface? While the document window has the standard Windows controls in the upper right (minimize, full-screen, and close buttons), the palette, at left, does not; it has only a roll-up button in a miniscule title bar. Notice also that the Text Ruler, whose icons are tiny by Windows standards, stays in the document window, rather than the application window.
Deneba seems to have opted for the middle ground when deciding whether to go with a Mac or Windows standard interface. The basic architecture is standard Windows, but the palettes are clearly Mac-oriented. While there is an obvious Adobe influence in the conveniently tabbed groups of controls in some palettes, there is also some inconsistency among the palettes in general. For instance, Type and Inks have an Apply button, while Strokes and Transparency do not. The Painting and Effects palettes, on the other hand, are simply toolboxes, while Clipart and Macros are libraries.

Canvas’s palettes are a mixed bag. The Blend and Align palettes (upper left), for instance, have an Apply button, while the Strokes and Transparency palettes (lower left) do not. The larger unnamed palette (top) is the Painting palette; the smaller one below is the Vector Transparency palette. These are simply toolboxes. The Clipart palette (lower right) is a library window.
By default, there is a text properties bar (called a Text Ruler) in Canvas’s publication mode. (In illustration mode you must activate the Text Ruler manually.) When working with even the smallest amount of text, I find this much easier to use than the Type palette, which requires a tedious “Apply” before taking effect. Unfortunately, as with Adobe products, font selection in Canvas is blind, unlike, Freehand and CorelDraw, which offer helpful typeface previews as you scroll through the font menu.
One other interface issue troubled me. I routinely keep raw image files on one disk, edited files on another, and completed projects on yet another. Regardless of the operation (open, export, save, and so on) Canvas always points to the last directory used. If I had opened an ink palette or template, that’s where Canvas would be pointing the next time I went to open or save a file. So each time I would place an image, export the edited version, and save my Canvas document I would have to tediously navigate several levels of the directory tree.
Creating a publication
Interface issues aside, I found that Canvas had all the necessary functions to easily create a sales brochure. Because Canvas integrates illustration, image editing, and page layout functions I could have created the entire brochure with Canvas alone. But there are several reasons I chose to also use other applications.
When retrieving my photos from a digital camera, it’s essential to see thumbnail previews, as the camera-assigned filenames are generic. Even when I’m placing named files it helps to have a visual confirmation that I’m getting the right version. You can use either File > Place or Image > Acquire to import bitmapped images into Canvas, but neither method offers an image preview. (Only Canvas native files are previewed in the Place dialog box.) One advantage to using the Acquire method is that you can gather files from diverse locations before importing them.
Once imported, images can be touched up in Canvas with many of the same controls offered in Photoshop and other similar applications. But Canvas’s previews are unbearably slow and no before-and-after comparisons are offered, so I chose to use another image editor before importing. Still, when a last minute edit or crop was needed, the tools were there in Canvas, saving me a trip to another application.
Of course, after editing an image in Canvas, I wanted to save it (apart from the rest of the publication). JPEG export with preview enabled was excruciatingly slow. Depending on the image size, more than a minute could elapse with each adjustment I made in the Export dialog box. When I accidentally scrolled to 70 percent instead of 75 percent compression, I was drumming my fingers waiting to correct it.

Canvas’s handy Navigator palette (at left, next to the Toolbox) let me rotate the workspace to work on vertical text more naturally. The Text Ruler (at top, just below the Docker Bar) was a much easier way of working with text than was the Type palette (lower right), as the Ruler didn’t require me to click Apply each time.
One unique Canvas feature came in very handy in preparing my brochure. The Navigator palette let me rotate my workspace 90 degrees to place and edit vertical text without craning my neck. Only the view changed, not the orientation of the page.
Canvas’s many transparency options ultimately served my needs, but understanding them-and deciding which ones to use-took quite a bit of time because of odd nomenclature. The most straightforward method is to select any object and simply adjust the Opacity slider in the Transparency Palette. If you want gradient transparency, you can click and drag across an object with one of four Vector Transparency Tools. (Despite their name, they can be applied to bitmaps, as well.) Other, more complicated transparency options involve channel masks.
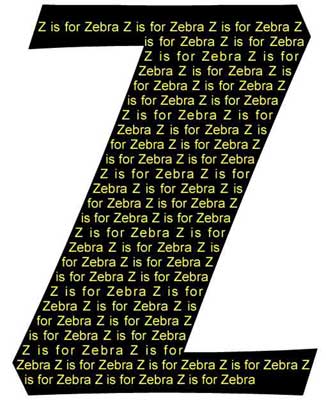
By converting this Z to paths I was able to fill it with text by simply selecting it and typing. A separate text object is created-clipped by the Z shape-and the text remains editable.
Other Canvas features that came in handy were the ability to wrap text inside any vector object by simply clicking the object and typing, and the ability to use any drawing object as a clipping path. The latter, combined with the Push and Reshape tools and the Path to Selection feature make Canvas great for isolating image elements.
Creating an illustration
Canvas compares favorably to other major illustration software. In fact, I personally prefer it to Adobe Illustrator. The ability to create multipage documents, vector transparency, customizable toolbars, style sheets, and HTML export, all found in Canvas 7 (as well as in Freehand 9 and CorelDraw 9) are still lacking in Illustrator 8.

The Push tool let me interactively smooth the curves of this Bézier shape by simply nudging them into place.
Even as a newcomer to the Canvas interface, I was able to throw together a simple illustration in just minutes. I love Canvas’s Push tool (identical to Illustrator’s Push tool and Freehand’s Freeform tool), which make nudging Bézier curves into shape much less painful. A little hunting for the right tools and menu commands, and I succeeded in recreating a more complex illustration from my archives, as well. I particularly liked Canvas’s Sprite Effects, which let me texture my art in a way not possible with other applications.
Sprite Effects, new in Canvas 7, are akin to Photoshop’s Adjustment Layers. They let you apply bitmap adjustments-such as blurs, noise, desaturation, and various filter effects-to both vector (unlike Photoshop) and bitmap objects. What’s more, the effects are recorded separately from the object itself, which means you can selectively turn effects on and off, delete them, or rearrange their order. Any adjustment-fill, stroke, size, and so on-to objects with Sprite Effects requires you to wait while the effect is recalculated. Even on my 500-MHz Pentium III this tedium was enough to discourage experimentation. Canvas offers a Cache Object display option, however, which lets you selectively downsample images and complex artwork for faster screen redraws.
Canvas gives you the option of using as a lens any object (except a bitmap) to which a Sprite Effect has been applied. When acting as a lens the Sprite Effect is not applied to the object itself, but to the underlying objects, as viewed through the lens object. I found this useful when placing text over a bitmap image. It’s also useful for creating a “view-through-glass” effect. Unfortunately, text objects-as do all objects-get converted to paths when used as a lens. By contrast, CorelDraw’s lens functions leave text editable.
Canvas’s Document palette is handy for organizing and navigating complex documents. The palette shows a hierarchy of all pages, layers, objects, and Sprite Effects. Any of these can be toggled to display or print, and can be rearranged by dragging them to a new location on the Document palette. This was particularly handy for me, as I tend to create first, and consider organization later. With Canvas I was able add layers and organize my illustrations once the page became too cluttered to navigate.
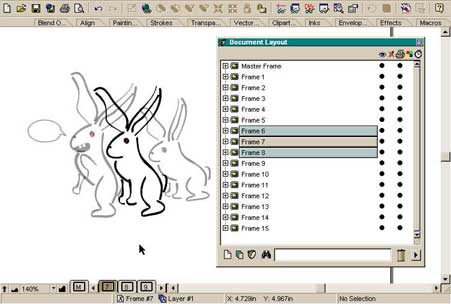
In a Canvas animation, the Document Layout palette shows the sequence of frames. With onion-skinning enabled, the frames previous to and following the current frame are also displayed. To preview the animation, however, you must use a third-party application.
Creating an animation
Canvas 7’s integrated animation features are convenient, but the program has some limitations that make me want another animation package to use alongside it. For instance, the Object > Disperse command will automatically distribute a series of objects from a single page-such as individual elements of a blend-one per page onto multiple pages, each of which represents a single animation frame. But you’d better save before you invoke this command, since there’s no “undo” option.
The lack of a preview function for animations is a serious time-waster. Not only is it necessary to save each animation to disk and open it in a third-party GIF viewer, the process can require 15-20 clicks each time you make an adjustment. Because Canvas’s Save command defaults to the native file format (CNV), you’re forced to use the Save As command, scroll down to GIF, type in a filename, and click each of the desired GIF properties every time you want to save and preview your adjustments. A built-in preview button, such as that found in Jasc’s Animation Shop (included in Paint Shop Pro 6), would be a much nicer option. Canvas also lacks the frame transition effects found in Animation Shop.
Conclusion
If you already own an image editor, illustration package, and page layout software, you probably don’t need Canvas 7. If you’re just getting started, however, Canvas 7 is the perfect way to acquire an entire suite of professional-level design tools for one price ($375). If you’re somewhere in between, consider the cost of a competitive upgrade to Canvas 7 ($199.95 for owners of Photoshop, Illustrator, PageMaker, QuarkXPress, Freehand, and CorelDraw) and you might find it a worthwhile investment for occasional use, especially if you often combine bitmap and vector objects. Budget-minded designers should consider Canvas 7 ESD, a downloadable version of the product, available without printed documentation or CD for $129.95. At that price, Canvas 7 is a real bargain!
This article was last modified on March 12, 2022
This article was first published on February 28, 2000
Commenting is easier and faster when you're logged in!
