

Using Photoshop’s Plastic Wrap Filter

Photoshop’s Plastic Wrap filter is great at creating liquid effects of all kinds. It’s also, unsurprisingly, very effective at wrapping an object in plastic. In this tutorial, we’ll see how we can take a toy ray gun and make it look as if it’s mounted on a packaging display of the kind you’d find in a toy store. Along the way we’ll look at a neat way to round the edges of a selection.
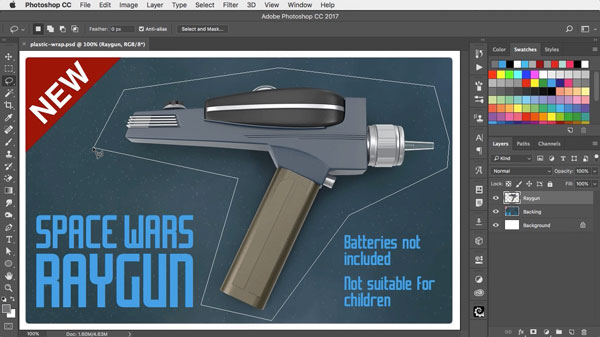
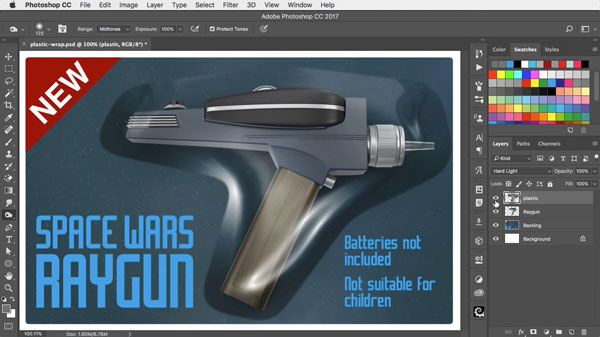
The starting image
This image shows the ray gun on a card background. I’ve given the ray gun a simple drop shadow to lift it off the backing a little way, which makes the whole thing it look more three-dimensional.

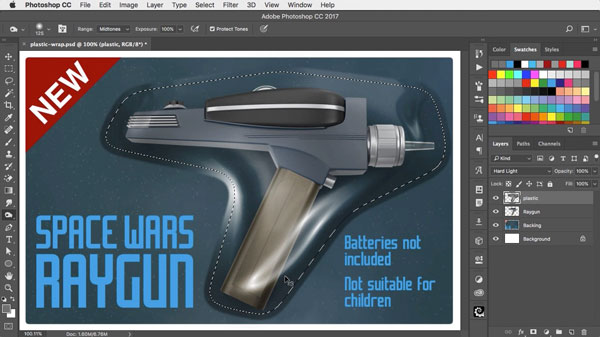
Draw an outline
Use the Lasso tool to draw the shape of the plastic bubble that will encase the ray gun. The easiest way to do this is to hold the Option or Alt key, which will allow you to trace straight lines between points where you click – giving you temporary access to the Polygonal Lasso tool.
Enter Select and Mask
Choose Select and Mask from the Options bar (this dialog was previously called Refine Edge). Set the View Mode to show the image on black, and drag the Feather slider to make a very soft selection.
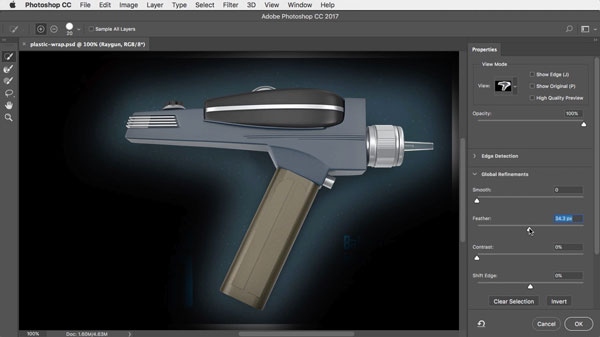
Tighten the selection
Drag the Contrast slider to the right, and the soft selection will become hard-edged – but those spiky corners will have been turned into smooth ones. It would be hard to draw this sort of selection manually. Drag the Shift Edge slider to make the selection larger and smaller, if desired. Then hit the OK button.

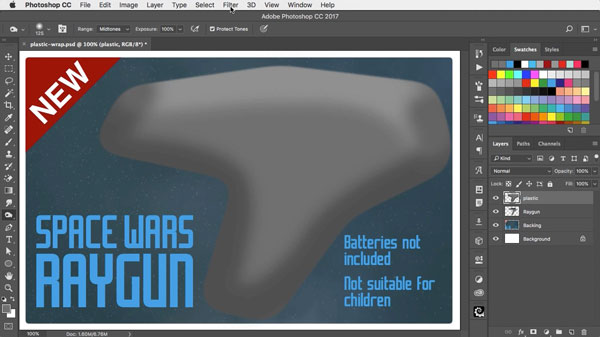
Fill with gray
Make a new layer, and select a midtone gray as your foreground color. Then use Option or Alt and Backspace to fill the selection with the foreground color. You’ll end up with a gray shape that matches the selection you made earlier.

Shade the gray
Use the Burn tool, set to Midtones, to add some dark shading on the underside of the gray shape. Then use the Dodge tool to brighten the upper side. Useful tip: You can access the Dodge tool temporarily by holding Alt or Option when the Burn tool is selected.
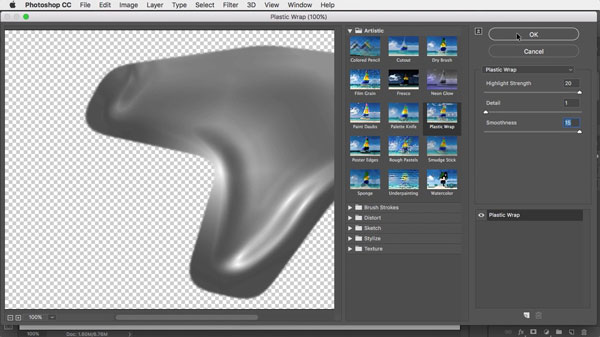
Apply Plastic Wrap
Choose Filter > Filter Gallery to access the filter. In the Artistic section, choose Plastic Warp. Set maximum Strength and Smoothness, and set the Detail level to 0 to produce a smooth wrapping effect.
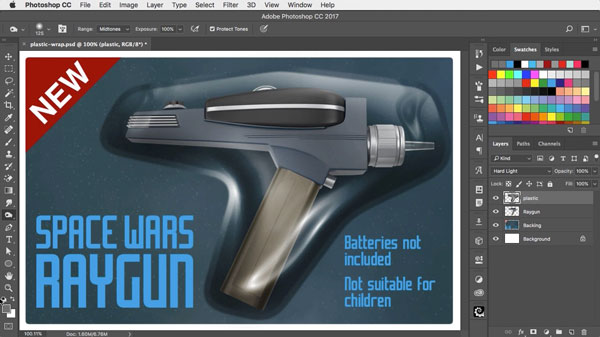
Change the layer mode
Change the mode of the gray layer from Normal to Hard Light, using the pop-up menu at the top of the Layers panel. In this mode, all the mid gray will disappear, leaving just the highlights and shadows visible – a true plastic effect.
Reduce the outline
For a more convincing effect, load the plastic layer as a selection by holding Command (Mac) or Ctrl (Win) and clicking on the layer’s thumbnail in the Layers panel. Use Select > Modify > Contract to shrink the selection by, in this case, 12 pixels.
Inverse and shade
Use Select > Inverse to select everything outside the selected area – the 12-pixel border around the edge – and then use the Dodge and Burn tools once more to add some shading to that border. This creates the impression of the flat part of the plastic that’s glued onto the card backing. Your plastic wrap is now complete.
You can see a video version of this tutorial, and get a link to download the original artwork, at
Plastic Wrap Video Tutorial and Artwork
Check out the video version of this tutorial below, and get a link to download the original artwork at https://www.2minutephotoshop.com/how-to-wrap-a-raygun-in-plastic/.
This Is Great Tutorial! It’s good for displaying or showcasing the Product Packaging style. Thank You for adding this! Best Regards
[…] You can view this tutorial on CreativePro here. […]