

T-Shirt Design and Production: Vinyl Transfers

Let’s talk t-shirts! My name is Sebastian bleak and for over 7 years, I was a Production Manager for the best custom t-shirt shop in Los Angeles. And I’m excited to share what I learned there in a new series of articles here at CreativePro, called T-Shirt Design and Production. In this first article, I’m going to tell you all about a key print method for t-shirts called Heat Vinyl Transfer.
What is a Vinyl Transfer
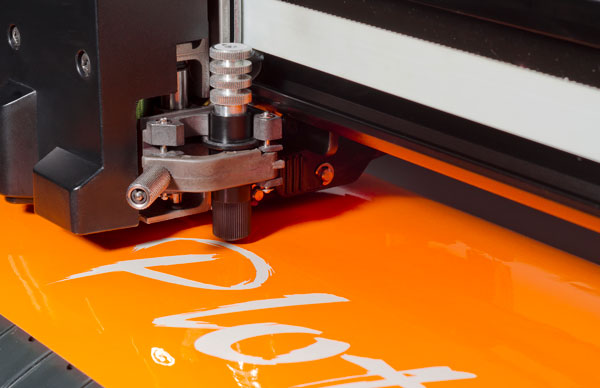
A vinyl transfer is specialty vinyl that has an adhesive on the back, that will react to heat and pressure. A plotter is used to cut your design into the vinyl, then portions are weeded away so that your design can be pressed onto your T-shirt or other promotional items.
Benefits of Vinyl Transfer
If you’ve ever had a single shirt printed or if you’ve ever played team sports you might be familiar with this print method. And in fact, those are also some of the reasons why I’m such a big fan of this print method. If you wanted to create a single t-shirt as a prototype, maybe your next favorite shirt just for you, or many shirts to be individualized like team jerseys, this is a great way to go. It’s cost-effective, quick turnarounds are available. The shirts look great and they’re super durable.
But in my opinion, the best aspect of vinyl transfer is that you use vector graphics to design your t-shirt! A plotter will read the vector paths and send the blade along those paths to cut out your design. Since we’re using a plotter to cut the vinyl, we won’t be able to use a pixel based image for vinyl transfers.
So what kind of designs can we print with vinyl? That would be mostly 1-color text and 2D graphics.
Now let’s go over some tips for preparing your Illustrator graphics to become awesome vinyl transfers.
Tip 1: Create Outlines of Text
If you’re working with text, make sure you use the Create Outlines command (Type > Create Outlines) to convert the glyphs to vector objects, so there is no live text in your design.

If the company printing your t-shirt does not have the same fonts on their machine, this step will ensure your artwork will be printed correctly.
Tip 2: Eliminate Overlapping Vectors
The plotter blade will cut over every vector, so to prevent unnecessary cuts in your design you need to remove any overlapping vectors. Otherwise, they will be visible once pressed on your t-shirt.
To get rid of overlapping vectors, first view your design in Outline Mode (View > Outline, or press Ctrl/Command+Y) and inspect the artwork.
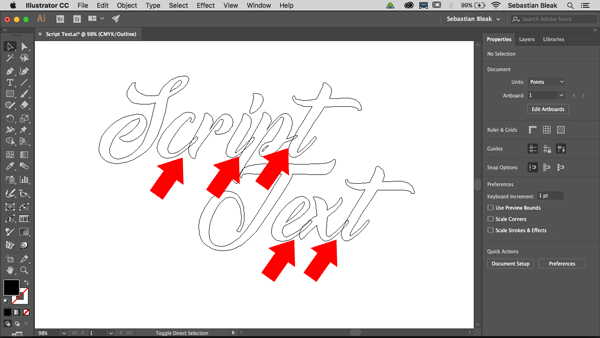
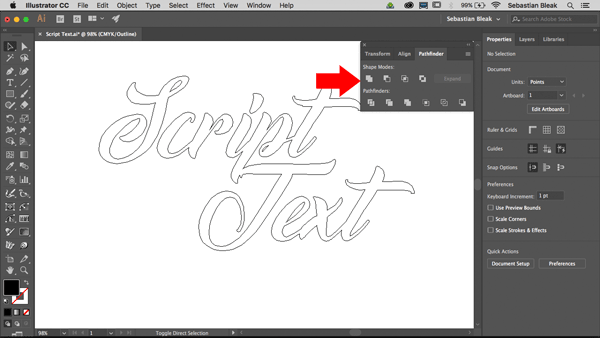
If you see overlapping paths like in the figure above, you can remove them with the Pathfinder Unite feature. Choose Window > Pathfinder, select the overlapping objects, and click the first Shape Mode button.
This step is important for all vinyl designs and you should always avoid using clipping masks for the same reason. You can’t hide anything from the plotter.
Tip 3: Avoid Complex Objects
Do your best to keep anchor points to a minimum and try not to have elements in your design that are too small. What’s too small? Any element that is smaller than a quarter of an inch will be close to impossible to cut from the vinyl. Keeping your anchor points on the low side will actually speed up the process because the plotter blade will stop for a fraction of a second at each anchor point.
What to Expect
Once applied to your t-shirt, the vinyl transfer will feel slightly raised from the shirt and smooth to the touch.
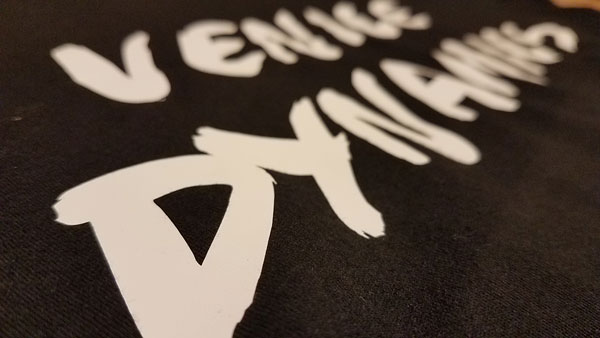
If you’re really trying to bring attention to your artwork, you’ll like the bold crisp look you get from a vinyl transfer.
As an added bonus, the design can outlive the t-shirt if pressed correctly. Picking the right t-shirt helps too! I recommend you use shirts provided by the people producing them but if you want to provide your own, a good start would be never-worn, never-washed t-shirts made with 50% cotton and 50% polyester. This will help the transfer stick to the t-shirt.
If you’re wondering why I haven’t mentioned screen printing as an option, it’s because screen printing is a mass production method.

The cost to print a single shirt using screen printing would usually be the same as if you were printing 12 t-shirts with the same design.
Another cool print method for a single shirt project is Direct to Garment or DTG printing. We’ll talk about that in a future post.
Try It On + Show It Off
Next time you have a really cool vector design you want to show off, give vinyl heat transfers a shot. I’d love to see what you all come up with, so please feel free to tag me on Twitter @sebastianbleak so I could check out your next favorite t-shirt!
Great article! I like how you mentioned not using clipping masks, that’s key with a plotter.
Vinyl is so under-rated. For single-color designs it looks just like screen printing, it’s thin/soft as long as your design isn’t super huge, it’s even more durable than screen printing, and you can do one shirt without breaking the bank.
Great article and I found it very useful for me. Thanks for sharing it