

How to Rescue a Poorly Lit Image with Photoshop’s Shadows/Highlights Adjustment

Photoshop’s Shadows/Highlights adjustment is the perfect tool for rescuing a poorly lit image. But what do all those sliders really do? Here, we’ll go through the adjustment process to see how we can make those options work for us.
Step 1: Open Shadows/Highlights
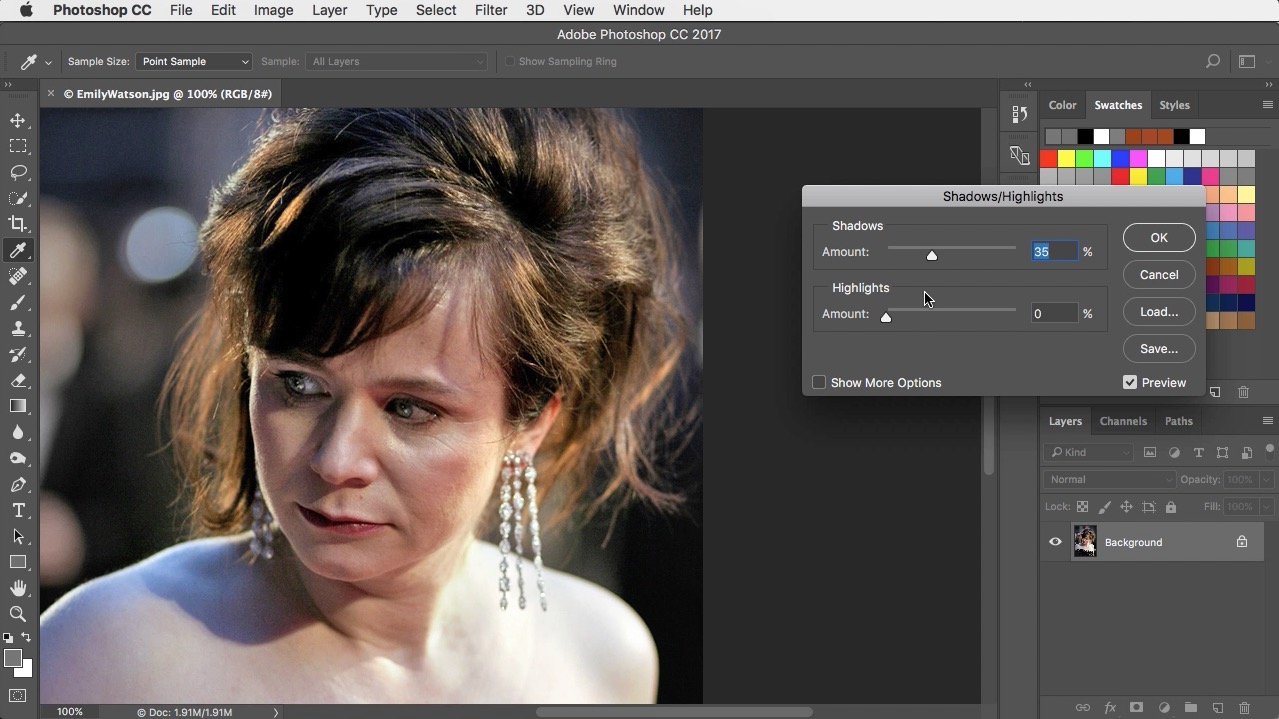
In this photograph of actor Emily Watson (courtesy of Caroline Bonarde Ucci, under Creative Commons) her face is in deep shadow on the left, but her shoulder is too bright on the right. The first step is to choose Image > Adjustments > Shadows/Highlights.

Step 2: Show More Options
The default settings show just two basic sliders, with the default set to 35% shadows. This brightens the dark areas to some degree, but it’s worth taking it further. Click the Show More Options checkbox at bottom left of the dialog to continue.
Step 3: Adjusting Shadows
Raising the shadows level makes the shadows lighter still; dragging the Tone slider applies the effect to a wider range of tones, so the midtones are boosted as well. The Range slider changes the range to which pixels are considered to be shadows; dragging too far on this slider produces artificial results, so move it sparingly.

Step 4: Adjusting Highlights
That shoulder is still too burnt out. Dragging the Highlights slider to the right darkens the tones in this area, but it also makes the shoulder look too gray.

Step 5: Tweaking Tone
Reducing the amount of the Tone slider in the Highlights section counters that gray appearance, while making the right side of the face look more natural.

Step 6: Using Color and Midtone Sliders
The image so far is looking brighter, but rather washed-out. Raising the Color slider gives her better skin color; raising the Midtone slider boosts the contrast and produces a much more appealing image. Remember, at any point you can click the Preview button to compare before and after. Click OK when you’re done.

Step 7: Grab the History Brush
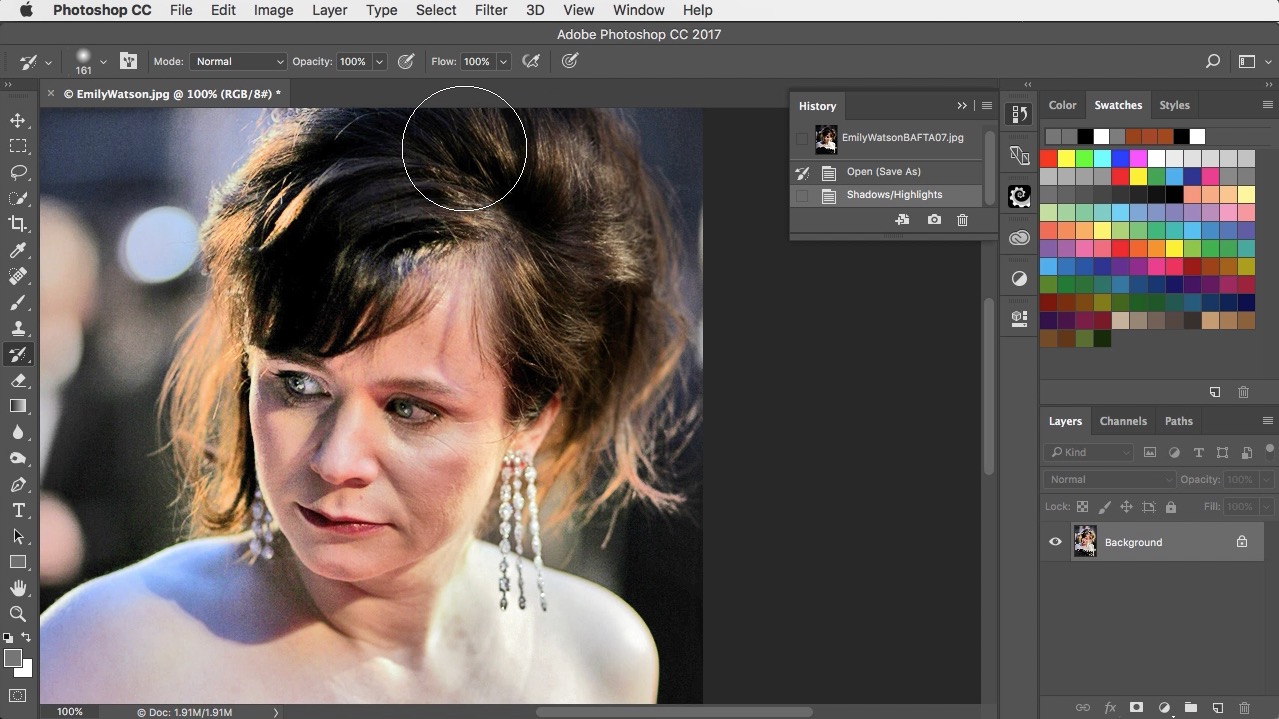
The face looks much better, but now the hair is too bright. To fix this, switch to the History brush and open the History panel: click next to the Open item to pin the history at the starting point.

Step 8: Adjust the Hair
Paint over the hair with the History brush, in one single movement, to return it to its original state. It’s better, but it now looks too dark in comparison with the face.
Step 9: Using Fade
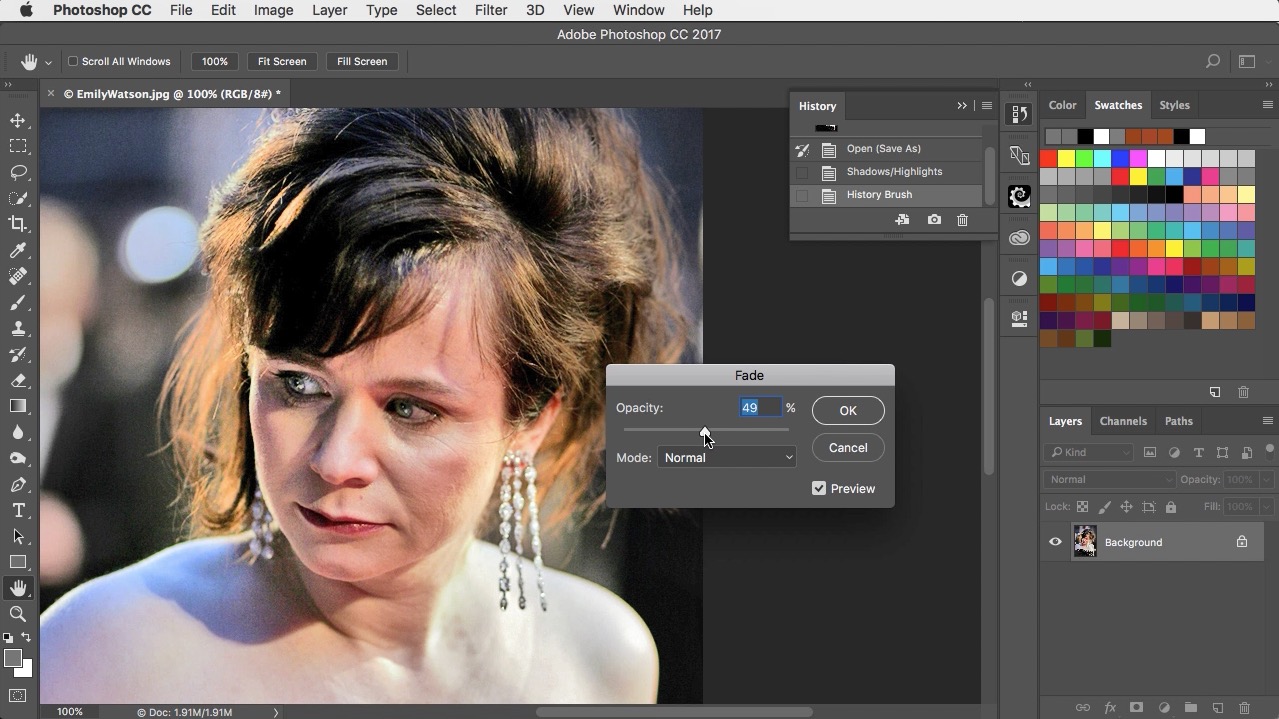
Open the Edit >Fade dialog, and you can drag the opacity of the last brush stroke to lessen its effect. Setting it to around 50% gives a good balance between the dark and light states of the hair.
The Final Image
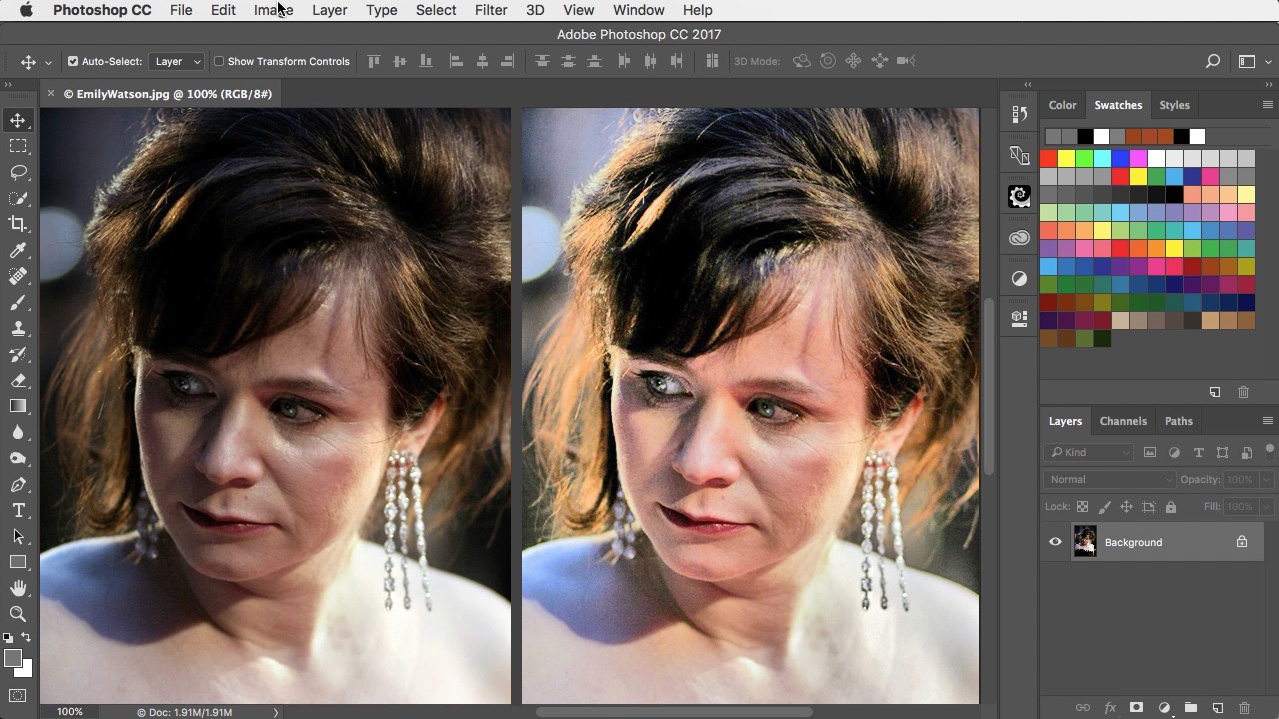
Here’s the portrait before and after adjustment. It’s now significantly better, with good definition and balance between light and dark.
Shadows/Highlights Tutorial and Artwork
Check out the video version of this tutorial below, and get a link to download the original artwork at https://www.2minutephotoshop.com/how-to-adjust-shadows-on-portraits
Thanks, Steve! Although I had used Highlights/Shadows extensively since it first appeared in PhotoShop, I still learned much from you…for example, the “options” menu I was not aware of… Great stuff!
Tom
Boy, you sure ruined a nice photo. The original had character.
Whether a correction improves an image or not depends on the wishes of the designer and the requirements for output. In this case, we’re looking at a celebrity at a red carpet event. Unless it’s a horror movie premier, it’s not the time when you’d want a slightly sinister image, which is what you get with the intense shadows and highlights and her expression.
Not to mention bangs that might print as one solid dark blob and a shoulder that will have no definition. In my days of doing Photoshop work, if I had submitted this photo with the shadows and highlights of the original, it would’ve been immediately sent back for me to redo it, much in the fashion that Steve shows.
I beg to differ. The original was flat, dark and lifeless. I totally agree with Mike’s response!