End-of-book notes
In a book, endnotes can be placed at the end of their chapters or they can be placed in a separate section at the end of the book. In the latter case we speak of 'end-of-book' notes. If all the chapters are in a single file – and each chapter is in a separate story – then end-of-book notes can be handled by InDesign's endnotes (by setting endnote scope to Document in the Endnote Options window).
However, for various reasons many (if not most) typesetters prefer to keep chapters in separate documents and collate them in a book file.
Out of the box InDesign cannot handle end-of-book notes when the chapters are in separate files. But a workflow can be set up to handle them with ease. I'll use two sample books to illustrate how it works.
(There is an another approach to handle end-of-book notes, see here.)
The basic idea is to use InDesign's table of contents to generate the endnotes section. We'll see that this approach gives us some interesting functionality for free, though at the same time it creates a couple of problems. These can be worked around, though, as we'll see later. We'll begin with a straightforward example.
The workflow described here distinguishes four stages:
- The basics. Depending on your requirements this could be the only stage you need. This stage requires only very little preparation and no scripts at all.
- Note linking. Instead of using InDesign's system in PDF and Epub to link note references to endnotes and making the reader jump back and forth, we'll create pop-up notes, which are much easier on the reader.
- Page ranges in the endnote section. Useful for the reader in long texts.
- Index. If the text contains an index and there are index references to notes, two scripts are required to generate the index correctly. On the plus side you get note references in the index of the form Laphroaig, 243 n. 12, which is useful for the reader. This step isn't necessary.
To see how it works, download the end-of-book-notes.zip file, which in turn contains four zip files:
- eobn-basic-before.zip: The files used in the section 'The basics';
- eobn-basic-after.zip: The same files but with the instructions, below, applied;
- eobn-index-before.zip: The files used in the Index section;
- eobn-index-after.zip: The same files but with the steps and scripts applied as shown in the Index section.
The basics
Generating endnotes using the table of contents is in fact fairly straightforward. We'll show how it works with an example. Extract the INDB and the INDD files from the eobn-basic-before.zip archive in a new folder. Open book.indb file.
Preparing the documents
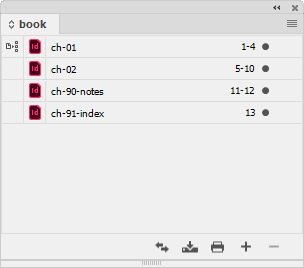
The book contains just two chapters and a document that we'll use for the endnotes:

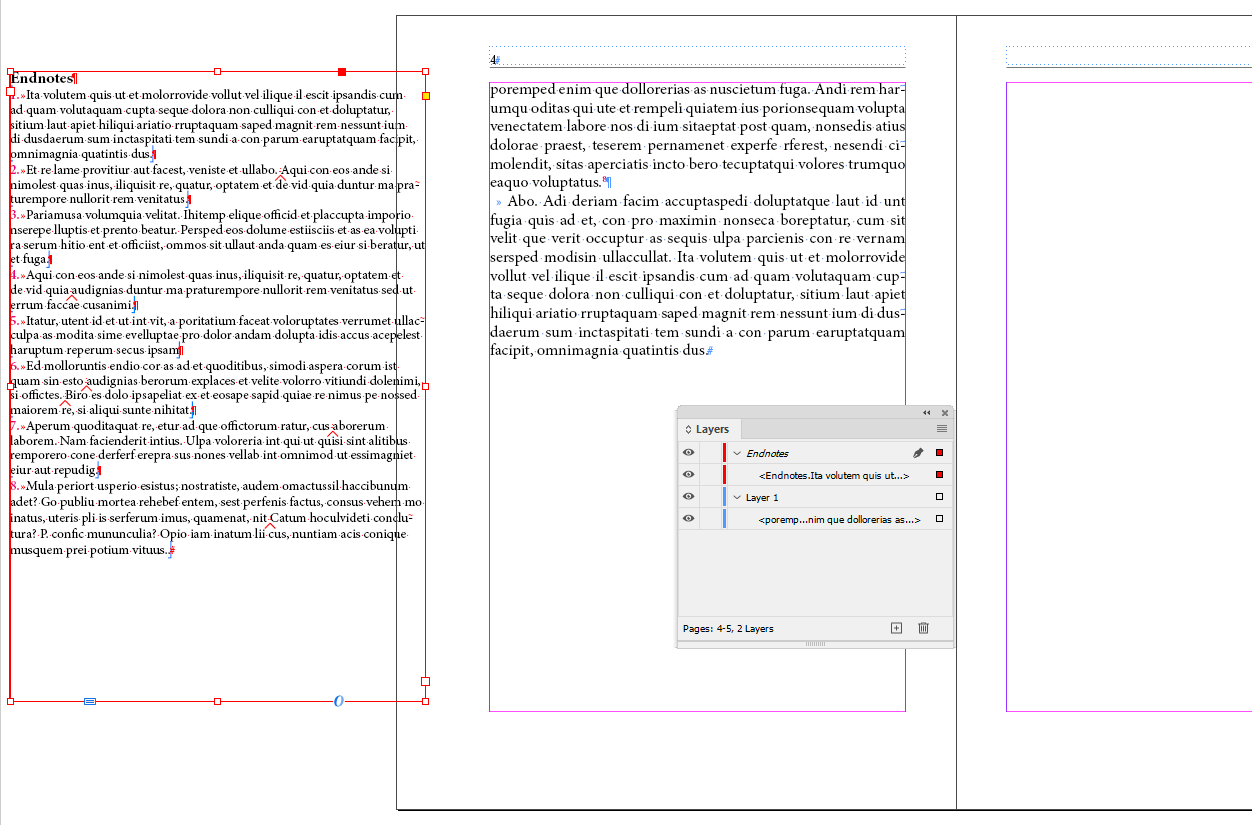
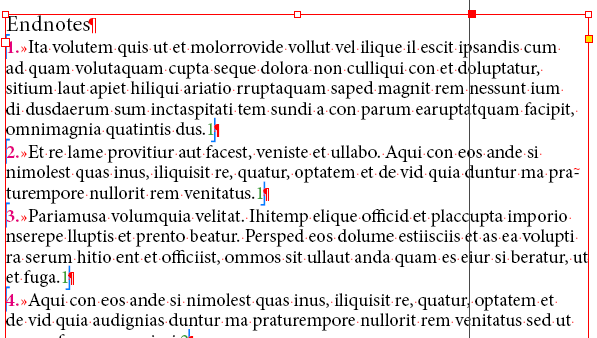
Open the ch-01.indd file and go to the last spread. The document's endnotes are on the last page (the note numbers and references are red in the sample, that's just to make them easier to spot). Open the Layers panel (Window > Layers):

Move the note frame to the last document page with text (here, p. 4) so that just a small part is on the page. Create a non-printing layer (it's called Endnotes in the sample but the name doesn't matter) and move the note frame to that layer:
We don't want an empty right-hand page, so remove it.
In this sample the notes fit in one frame. But if in your documents the notes are in two or more frames, delete the frames after the first one. The notes needn't be visible, but if you do want to see them all (e.g. to edit them) simply enlarge the frame and/or reduce the type in the notes.
Save the document and close it, then open ch-02.indd and move the notes. Moving the notes in all documents is a one-off.
Creating the end-of-book notes
Now open the endnote document, ch-90-notes.indd, into which we'll generate the notes. The document contains a TOC style that picks up the chapter title and the notes. The style's name is Notes. Page references are suppressed:
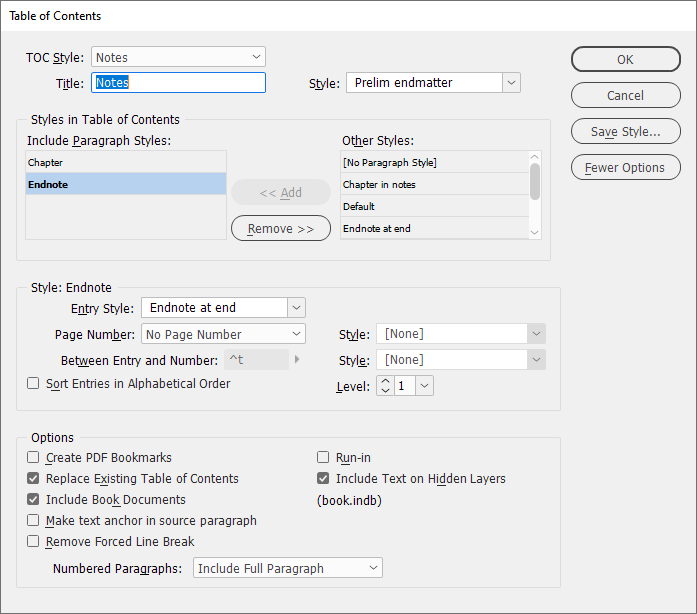
PDF bookmarks aren't produced, nor are anchors added to source paragraphs, they're not needed (they probably just get in the way).
To generate the endnotes, click OK. You should now see the endnotes in the document:
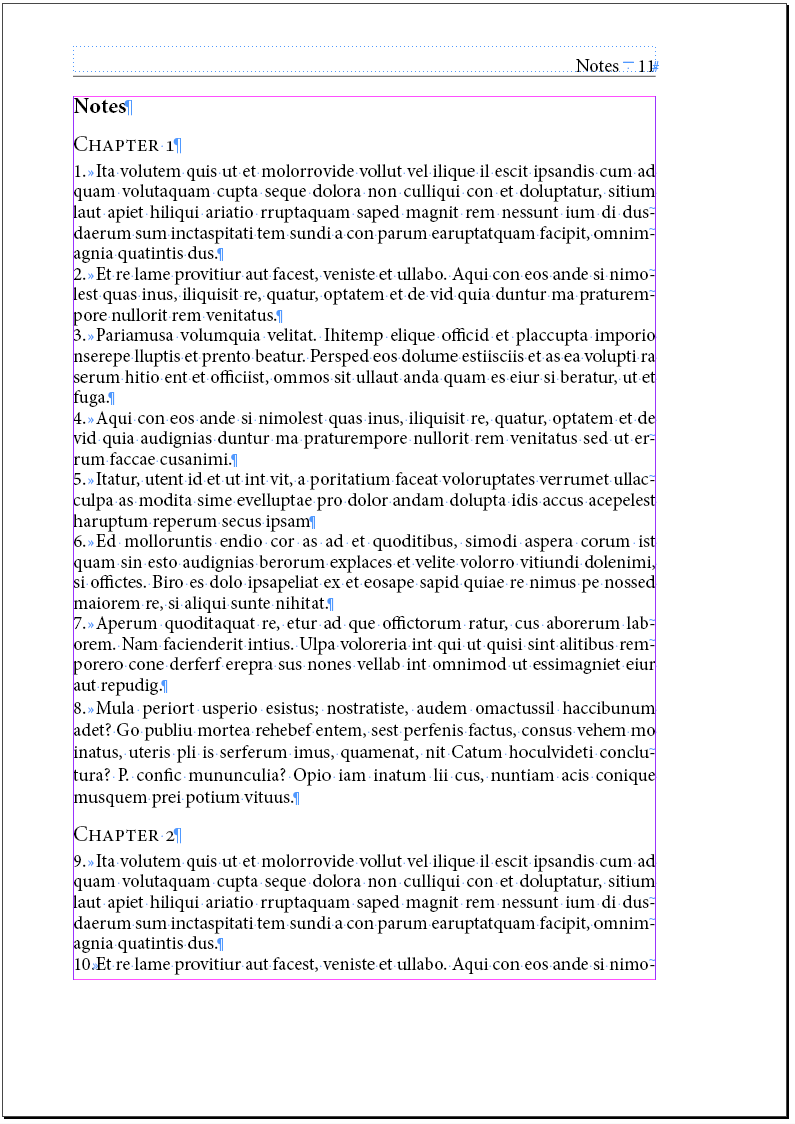
You'll notice that footnote numbering is continuous (the chapter 2 notes start at 9) even if you had numbering restart at every story. That's because the original endnote numbers are lost when you generate the table of contents. The notes in the endnote section are now numbered by paragraph numbering. To restart numbering after each chapter heading, right-click in the note after chapter heading and select (the equivalent of) Restart Numbering:
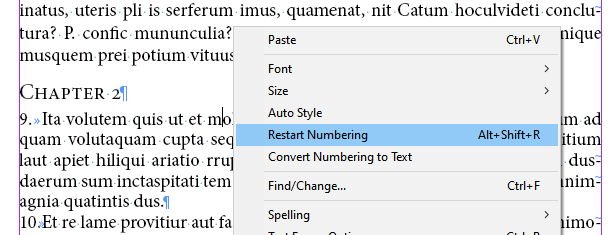
If the document contains many chapters you can use the script eobn-restart.numbering.jsx to reset numbering after every chapter heading. To use the script, place the cursor in a chapter heading and run it from the Scripts panel. The script is in the eobn-scripts.zip archive.
If your output is just print or PDF then this is all you need. Some enhancements are possible, see the following sections.
Active note links
Export the book to (interactive) PDF and open it in a PDF reader. Click on a note reference and you'll see that nothing happens: there is no link. This is because the notes (the real endnotes at the end of the chapters) are on a non-printing layer. The same goes for Epub.
However, that's not a problem at all. In fact, we can de better than creating links from references to notes (and back): pop-up notes. A pop-up note is displayed up when you roll the mouse over a note reference and is hidden again when the mouse cursor rolls off the reference.
To create pop-up notes, use the script descibed here
Page ranges in the endnote section
The endnote document produced above was set up to use running headers that give just the section's title: Notes. For the reader it is more useful if the running headers include the page ranges covered by the document page (and indeed many pubishers request that) so that the running headers have the form of, say, Notes to pp. 23–29. This is a time-consuming job to do manually, but quick in this workflow and easy to set up.
The first step is to include in all endnotes the page number of their note reference. A character style is applied to that page number. After generating the endnote section, therefore, we have in the notes section (i.e. the generated table of contents) page references in a character style, and so we can use character-style-type text variables to include the first and the last instance of the character style. You set that up as follows.
Insert page-number references in the endnotes
Run the script eobn-insert-folios.jsx. This script runs in either of two modes. If there's a book open and no open documents, the script runs against all the book documents; if there are any open documents (irrespective of whether there's an open book file), the script targets just these open documents.
At each note the script inserts the page number of its reference and applies the characters style Note folio, which is created on the fly. It applies a colour to the folio so it's easy to spot:
Note: When you update a document later and pagination changes, run the script again against the document. The script will recognise that there are page-number references in the endnotes and will remove them before inserting the updated numbers.
Prepare the notes file
Open the notes document (ch-90-notes.indd) and create or update the table of contents. The notes will look the same as previously but now with page numbers added:

The page numbers will have to be suppressed later on, we'll leave them visible for now for clarity.
Now create two running-header text variables (Type > Text Variables > Define) that target the character style applied to the page numbers, which is Note folio:

Create a second variable, call it Note folio last, and set it to target the last instance on the page.
Now go the the parent page for the notes and insert the variables and any other text (here, to pp.) in the running header on both pages:

When you now go to a document page you'll see that the page ranges appear in the running headers:
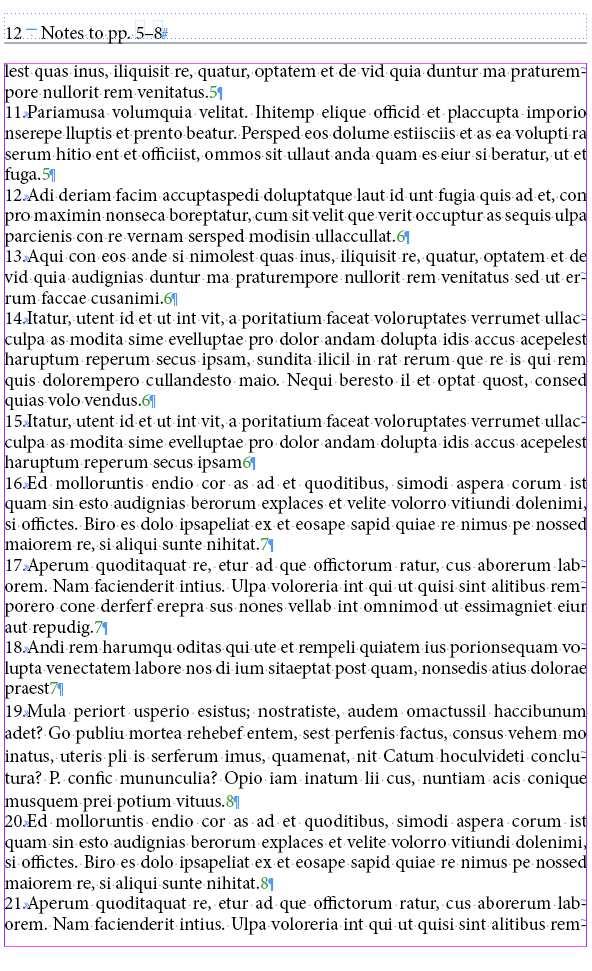
The last step is to hide the page numbers in the footnotes: edit the Note folio character style and set its point size to 0.1, its horizontal scale to 1%, and its colour to Paper.
Document updates
When any changes were made in any document, either changes in the notes or updates in the main text that caused some reflow, run the eobn-insert-folios.jsx script again against those documents and update the Notes TOC.
Index
The only real problem I see with the approach outlined here is that any index markers in endnotes are dropped when the endnote section is generated as a TOC. But with a couple of scripts we can work around that. To see how this works, extract these three scripts from the eobn-scripts.zip archive and place them in InDesign's Scripts folder:
eobn-index-markers-to-dummies.jsx
eobn-dummies-to-index-markers.jsx
eobn-index-merge-notes.jsx
The general idea is to add items that survive the creation (or updating) of the endnote TOC. There are several possibilities; I use zero-width inline graphic lines. eobn-index-markers-to-dummies stores the required properties of the index markers in the graphic lines's label, then, after doing the TOC, eobn-dummies-to-index-markers inserts index markers using the info in those graphic lines. We'll outline all this in the following steps.
1. First, close any documents and/or book files. Then extract the files from eobn-index-before.zip in a new folder and open the indb file. (As above, these before files are used to practice the workflow on, the files in the eobn-index-after.zip file show the desired outcome.)
2. Run eobn-index-markers-to-dummies.jsx. Like eobn-insert-folios.jsx, the script has two modes of running: if there's an open book and no documents are open, the script runs against all book documents; if there are any open documents, only those documents are targeted.
3. Open ch-90-notes and update the note section by updating the Notes TOC.
4. Run eobn-dummies-to-index-markers.jsx in the notes. This creates index markers in the notes document.
5. Open the index document (ch-99-index) and generate the index in the usual way. In the Generate Index dialog the Following Topic character is set to End Nested Style Here – please don't change that. (The index is in fact updated, I generated it earlier and removed it.) The generated index looks as follows:

The blue backslashes are InDesign's End Nested Style characters. If there's only one in an entry, it was inserted when the index was created (it was set as the Following Topic character in the Generate Index dialog). That is the case in the first entry, Aqui\1, 2, 5, 6.
When an entry contains two End Nested Style characters, as in the second entry (aborerum\7\11) the second one was again inserted when the index was generated, while the first one was inserted when eobn-dummies-to-index-markers.jsx was run. The number following the first of two End Nested Style characters is the note number: aborerum\7\11 stands for 'aborerum in note 7 on page 11'. It follows that in this case the topic's name is in fact aborerum\7 and that therefore references to the main text and those to notes are on separate lines.
This means that we now have to merge them. Run the eobn-index-merge-notes.jsx script against the index; the result in our example is as follows:
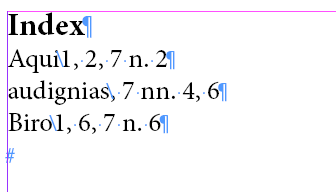
The references to topics in the notes are merged with the references to the topics in the main text. When two or more notes are on the same page, these are combined, as in aborerum 11 n. 7, 12 nn. 15, 18
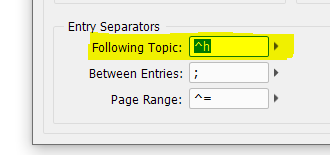
6. All that's left for you to do is to replace the remaining End Nested Style characters with the character or string you need as the topic separator.
Dependencies and prerequisites
1. The endnotes and the endnote references should be styled with dedicated paragraph and character styles. The scripts use these two styles for various new styles, all of which are created on the fly.
2. If you generate an index and there are index markers in endnotes, then set the End Nested Style character for the Following Topic character in the Generate Index dialog:
Updating documents
After any change – adding or deleting a note; inserting or removing text; adding or removing index markers in any notes; changing the order of chapters; etc. – run the scripts again:
- eobn-insert-folios.jsx to update the page references in the endnotes;
- if there are index markers in the text, run eobn-index-markers-to-dummies.jsx;
- update the Note TOC in the notes chapter;
- if there's an index, run eobn-dummies-to-index-markers.jsx; (re)generate the index; run eobn-index-merge-notes.jsx.
A word of caution
The approach outlined here works well but you should be aware that not everything in the original endnotes makes it to the generated endnote section. All formatting is preserved, and all anchored elements are preserved as well. But several of InDesign's special markers are removed: index markers, cross-references, footnotes (not relevant in this context), hyperlinks – I haven't checked them all, there may be more. But in many (if not all) cases there are workarounds, as shown by the workaround for the loss of index markers in endnotes.
Version history
25 Feb. 2024: Re-imagined the workflow, which is now much simpler.
10 July 2023: Posted.
Useful script? Saved you lots of time?
Consider making a donation. To make a donation, please press the button below. This is Paypal's payment system; you don't need a Paypal account to use it: you can use several types/brands of credit and debit card.
Click to download the InDesign files
Installing and running scripts
Questions, comments? Get in touch