

10 Photoshop Efficiency Tips from CreativePro Week

One of my favorite things about CreativePro Week is how you can pick up great tips at any time, day or night. Little nuggets of knowledge are there for the taking just about everywhere—in the sessions, at lunch, in the hallways, at the Ask the Expert table, and so on. Gather enough of them and you’ll really increase your efficiency and enjoyment at work. Here are ten of my favorite Photoshop tips that I learned at the show in Washington, DC.
- Escape the Home Screen. Love it or hate it, the Home Screen greets us all by default when we fire up Photoshop. You can of course turn it off in General Preferences, but if you just want to banish it instantly, press Esc. Clicking the program icon in the top left corner of the window does the same thing, but using a keyboard shortcut is faster. To get the Home Screen back, click the Home icon on the left side of the Options bar.
- Too many tabs? Time to tile. If you have so many documents open that you can’t even see all the tabs to find the one you want to work on next, it’s time to tile them. Choose Window > Arrange > Tile. Now all the documents are visible.

Click the one you want and choose Window > Arrange > Consolidate All to Tabs to get back to your tabbed view. Better yet: Assign keyboard shortcuts to both the Tile and Consolidate commands so you can easily snap back and forth between them.
- Rotate the view. Whether you’re drawing with the Pen tool, painting, or cloning, it can helpful to rotate the view as you go. It’s like turning the piece of paper when you’re drawing or tracing something. To rotate on the fly, hold R and drag.
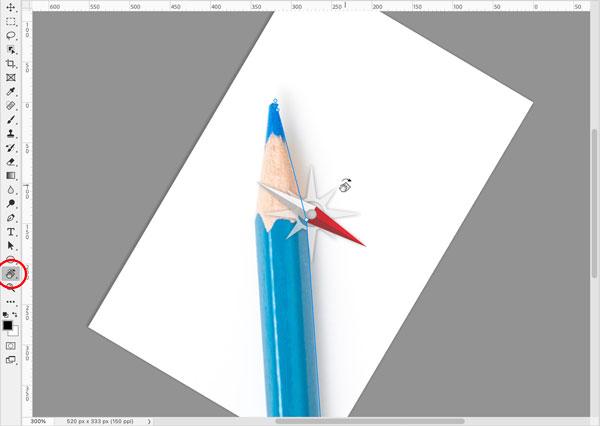
When you release you’ll snap back to the tool you were using and finish the task at hand.
Then, when you’re done and want to rotate back to the normal orientation, press Esc.
- Navigator Zooming. If you use the Navigator panel, you probably just click or drag on the image thumbnail to, well, navigate, to a different area. There are zoom controls below the thumbnail but they’re a bit clumsy to use. Instead, just hold Command/Ctrl while dragging on the thumbnail to zoom in on a specific area of the image.


- Filter layers by name. In a complex document with a ton of layers you might want to filter the Layers panel view so you can find or focus on some specific layer(s). The quickest way to do this is to press Command+Shift+Option+F/Ctrl+Shift+Alt+F. This switches the filter type to Name and puts your cursor in the adjacent field where you can immediately start typing to filter the list of visible layers in the panel. You can do the same thing by choosing Select > Find Layers.

- Show/hide selected layers. When you have one or more layers selected in the Layers panel, you can press Ctrl+,/Command+, to toggle their visibility off and on.
- Select (almost) all layers. Press Command+Option+A/Ctrl+Alt+A to select all layers but the Background layer.
- Modify all type layers at once. If you have a document with a lot of type layers and need to modify the formatting of them all at once (change the color, font, size, etc.) First, set the filter type to Kind in the Layers panel and click the button to filter for type layers.
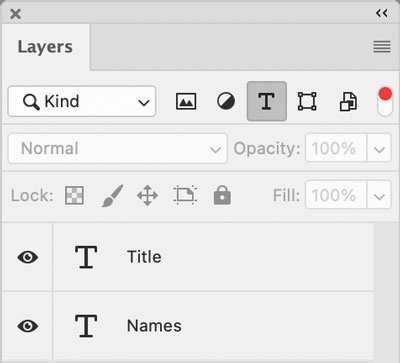 This hides every layer that isn’t a type layer. Then, use the keyboard shortcut from the previous tip: Command+Option+A/Ctrl+Alt+A to select all the type layers. Now you can use the Properties panel to make your modifications to all type layers at once. Not a fan of the Properties panel? Just press T to get the Type tool and use the Options bar.
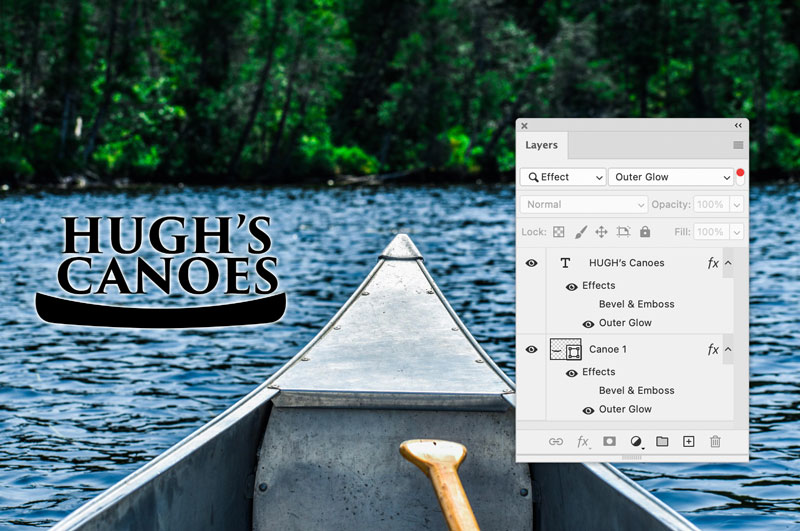
 - Effective layer filtering. One of the options for filtering the display of the Layers panel is by Effect. So you can show only layers with effects like Drop Shadows, Strokes, Bevel & Emboss, etc. in the panel.
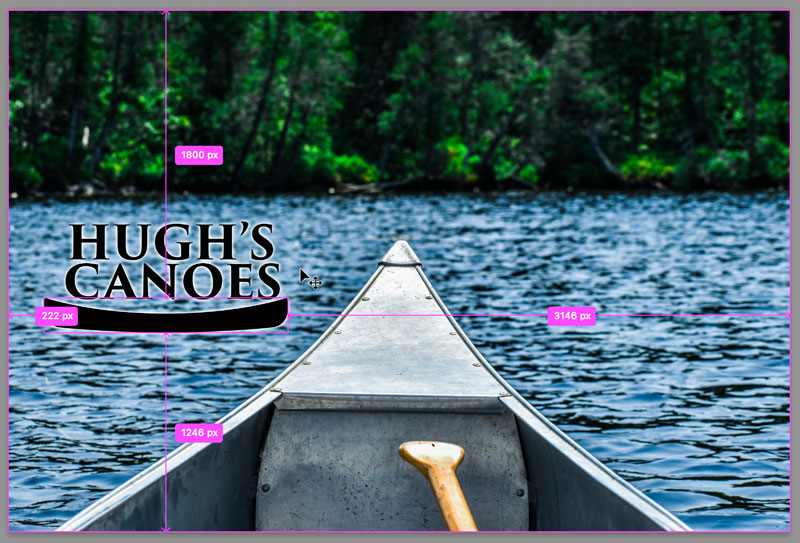
- Smart distances. Hold the Command/Ctrl key to display Smart Guides showing the distance from the selected layer’s content to that of other layers.
This is just a tiny sample of the kind of knowledge you can pick up at CreativePro Week. If you want more, you can purchase an on-demand pass from this year’s show, which includes access to the recordings of all sessions, all handouts, and an alumni discount to join us in Phoenix next year!
Hi Mike, the link to ‘the recorded sessions’ doesn’t seem to take me to any recorded sessions.
Sorry for the confusion, Stuart. I fixed that paragraph and link to make it clearer that the recordings are available with an on-demand pass.