

Working With Type in Photoshop CS6


Applying paragraph styles
Applying a paragraph style is easy. With the text selected, simply click the style name. If the text has been changed from the Basic paragraph style, Photoshop retains those overrides and applies only the attributes of the style that do not conflict with the overrides. In that case, clear overrides to apply all the style’s attributes.
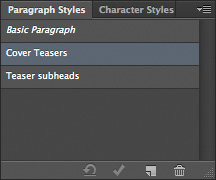
1. Select the “What’s Hot” text, and then select Cover Teasers in the Paragraph Styles panel.
Photoshop applies some of the Cover Teasers attributes to the paragraph, but not all of them because there were style overrides in effect when you applied the style.
2. Click the Clear Override button at the bottom of the Paragraph Styles panel.
3. Select the text beneath “What’s Hot,” and then select Teaser subheads in the Paragraph Styles panel. Click the Clear Override button again.
4. Repeat steps 1–3 for the “What’s Not” and “Coming this year” sections. Now there is just one more change to make to specific areas of the text.
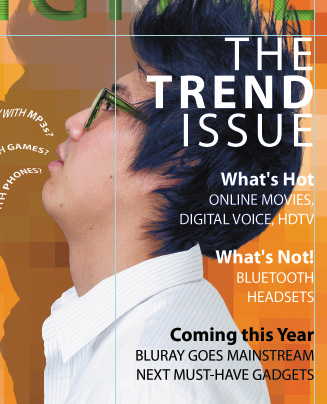
5. Select “Coming this year” and all the text that follows it. Then, in the Character panel, change the text color to Black.
6. Finally, click the Commit Any Current Edits button to accept the type changes.
Tip: Use the Adobe Illustrator Glyphs panel to preview OpenType options: Copy your text in Photoshop and paste it into an Illustrator document. Then, choose Window > Type > Glyphs. Select the text you want to change, and choose Show > Alternates For Current Selection. Double-click a glyph to apply it, and when you’ve finished, copy and paste the new type into your Photoshop file.
Opentype in Photoshop
OpenType is a cross-platform font file format developed jointly by Adobe and Microsoft. The format uses a single font file for both Mac OS and Windows, so you can move files from one platform to another without font substitution or reflowed text. OpenType offers widely expanded character sets and layout features, such as swashes and discretionary ligatures, that aren’t available in traditional PostScript and TrueType fonts. This, in turn, provides richer linguistic support and advanced typography control. Here are some highlights of OpenType.
The OpenType menu
The Character panel menu includes an OpenType submenu that displays all available features for a selected OpenType font, including ligatures, alternates, and fractions. Dimmed features are unavailable for that typeface; a check mark appears next to features that have been applied.
Discretionary ligatures
To add a discretionary ligature to two OpenType letters, such as to “th” in the Bickham Script Standard typeface, select them in the image, and choose OpenType > Discretionary Ligatures from the Character panel menu.
Swashes
Adding swashes or alternate characters works the same way. Select the letter, such as a capital “T” in Bickham Script, and choose OpenType > Swash to change the ordinary capital into a dramatically ornate swash T.
Creating true fractions
Type fractions as usual—for example, 1/2—and then select the characters, and from the Character panel menu, choose OpenType > Fractions. Photoshop applies the true fraction (1/2).
Adding vertical type
You’re almost done with the text for the magazine cover. All that remains to do is to add the volume number in the upper right corner. You’ll use vertical type to add it.
1. Choose Select > Deselect Layers. Then select the Vertical Type tool, which is hidden under the Horizontal Type tool.
2. Press the Shift key, and begin dragging in the upper right corner of the cover, near the letter “L.” Release the Shift key, and drag a vertical rectangle.
Pressing the Shift key as you begin dragging ensures that you create a new text box instead of selecting the title.
3. Type VOL 9.
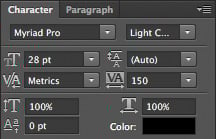
4. Select the letters either by dragging or triple-clicking them, and then, in the Character panel, select the following:
• Font Family: a serif typeface, such as Myriad Pro
• Font Style: a light or narrow style, such as Light Condensed
• Font size: 15 pt
• Tracking: 150
• Color: Black

5. Click the Commit Any Current Edits button in the options bar. Your vertical text now appears as the layer named VOL 9. Use the Move tool to drag it to the right, if necessary.
Now, you’ll clean up a bit.
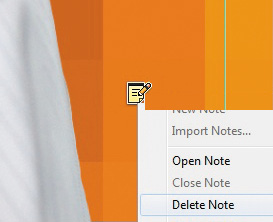
6. Click the note to select it. Then right-click (Windows) or Control-click (Mac OS) and choose Delete Note from the context menu; click Yes to confirm that you want to delete the note.
7. Hide the guides: Choose the Hand tool, and then press Ctrl+; (Windows) or Command+; (Mac OS). Then zoom out to get a nice look at your work.
8. Choose File > Save to save your work.
Congratulations! You’ve added and stylized all of the type on the Digital magazine cover. Now that the magazine cover is ready to go, you’ll flatten it and prepare it for printing.
9. Choose File > Save As, rename the file 07Working_flattened, and click Save.
Click OK if you see the Photoshop Format Options dialog box.
Keeping a layered version lets you return to the 07Working.psd file in the future to edit it.
10. Choose Layer > Flatten Image.
11. Choose File > Save, and then close the image window.
Review questions
1. How does Photoshop treat type?
2. How is a text layer the same as or different from other layers in Photoshop?
3. What is a clipping mask, and how do you make one from type?
4. What is a paragraph style?
Review answers
1. Type in Photoshop consists of mathematically defined shapes that describe the letters, numbers, and symbols of a typeface. When you add type to an image in Photoshop, the characters are composed of pixels and have the same resolution as the image file. However, Photoshop preserves the vector-based type outlines and uses them when you scale or resize type, save a PDF or EPS file, or print the image to a PostScript printer.
2. Type that is added to an image appears in the Layers panel as a text layer that can be edited and managed in the same way as any other kind of layer. You can add and edit the text, change the orientation of the type, and apply anti-aliasing as well as move, restack, copy, and change the options for layers.
3. A clipping mask is an object or group whose shape masks other artwork so that only areas that lie within the shape are visible. To convert the letters on any text layer to a clipping mask, select both the text layer and the layer you want to show through the letters, and then choose Create Clipping Mask from the Layers panel menu.
4. A paragraph style is a collection of type attributes that you can quickly apply to an entire paragraph.
Download this excerpt as a PDF.
When I Click on the path where the horizontal line crosses the type tool image I get a small circle about .25 inch to the right and no text can be entered. Tried all sort of ways but can’t make the text appear. What a bummer!