

Using Photoshop Tool Presets
If you find yourself using the same settings for a particular tool—or set of tools—in Photoshop, you might want to consider creating tool presets. Being a recent convert to Photoshop tool presets, I can only wonder why it took me so long to adopt this time-saving technique. Maybe you need to fill a shape with a specific pattern, or to crop several images to the same size or ratio. Whatever your needs, setting up tool presets will keep you from having to remember and constantly input information for each tool you use.

Photoshop’s Options Bar.
Select the tool you want to make a preset for in the Tools panel, remembering that not all tools allow for presets. In the Options Bar (Window > Options) input any settings you need for the preset, such as size, opacity, fill, or other options available. From the Tool Presets panel menu (Window > Tool Presets), choose New Tool Preset and give it a descriptive name. Next time you need that tool with those specific settings, it’s just a matter of invoking it from the Tool Presets panel or the Tool Picker at the far left side of the Options Bar.

Paintbucket preset to fill with a semi-transparent pattern.
To view just the presets for the current tool, select Current Tool Only at the bottom of the panel. With this option selected, the set of presets will change as you cycle through the tools. To put the presets in an order that makes sense for you, you’ll have to venture away from the panel. Go up to Photoshop’s Edit menu, choose Presets, then Preset Manager, and finally select the Tools option in the pull-down menu. You can choose Save Tool Presets from the panel menu to save out the entire set, which can then be loaded via the panel by anyone with that file.
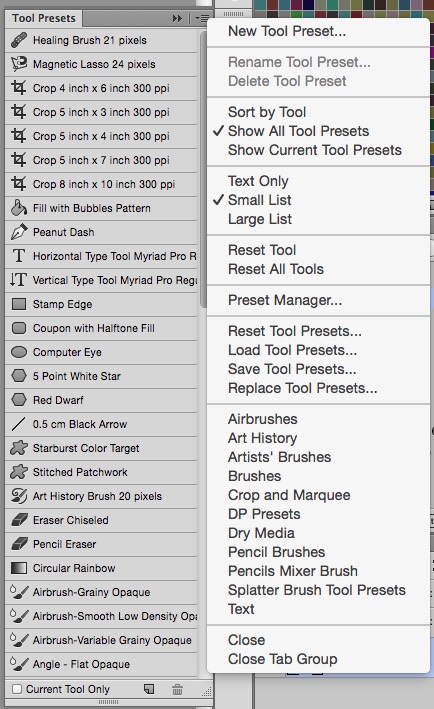
Tool Presets panel and panel menu.
Not only don’t you have to remember the settings you chose to get the job done last time, you don’t even need to remember where the tool lives in the Tools panel! Such is the magic of Photoshop tool presets.