

Using Adobe Stock in Photoshop
There’s no question that Adobe is putting a lot of resources into Adobe Stock. Adobe’s stock photo solution that is built into all of the Creative Cloud applications makes it easier than ever to find and use stock photography in your projects. One of the challenges that designers have always faced was keeping track of the stock photos that they were using.
In a typical workflow, users would download low-resolution versions of the images to use in their comps. Once approved, they had to log back in to the appropriate stock photo site, download the high-resolution version of the photo and replace the low resolution versions for the final project. This was often a time consuming and tedious process as the stock photo id numbers had to be tracked and maintained, and often the adjustments that had been applied to the low-resolution versions of the photos had to be re-applied to the high resolution versions.
Adobe Stock aims to solve many of these problems by streamlining the entire workflow. Currently, Adobe Stock consists of over 55 million photos, videos, illustrations, vector graphics, 3D assets, and templates for you to choose from.
Searching Adobe Stock
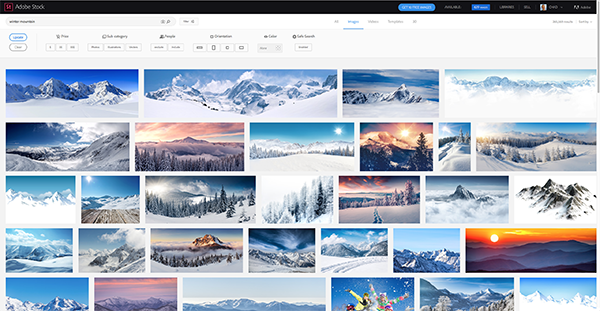
Searching Adobe Stock for an image couldn’t be any more convenient. Simply open the Libraries panel in Photoshop and click in the Search Adobe Stock field at the top of the panel. Enter your search criteria in the field and press Enter or Return and the search results are presented within the Libraries panel.

Resizing the Libraries panel can help to make the thumbnails larger and the pictures easier to see, but if you want to see a larger preview of an image, simply double-click on it and the image will open to the Adobe Stock web site in your web browser. The Adobe Stock web site can also be accessed from within Photoshop by choosing File > Search Adobe Stock. There are some advantages provided by searching Adobe Stock via a web browser, including the ability to filter your search by a variety of different parameters such as price, orientation, sub-category, and whether the photo should include people or not.
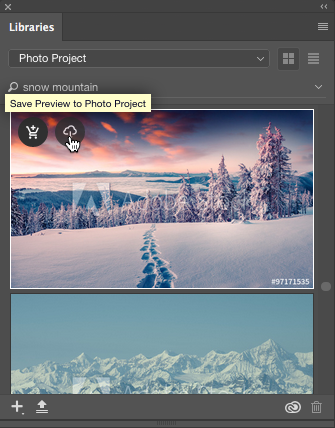
Regardless of where you are searching Adobe Stock, on each asset you’ll see two icons. One icon allows you to download a preview of the asset to a CC Library, the other allows you to license and save the asset to a CC Library. In a typical workflow, you’re probably in the design phase where you’re experimenting with images and don’t want to commit to buying yet so we’ll choose the option to Save Preview. This downloads a watermarked low-resolution version to your CC Library.
Using the Stock Photo
After adding the watermarked photo to your CC Library, drag the photo from the library onto your document. This adds the photo to your document as a smart object so that any filters and effects that are applied to it will be applied as smart filters. Feel free to add any Adjustment Layers that you desire as well. Add layers to the document as you normally would and save your project.
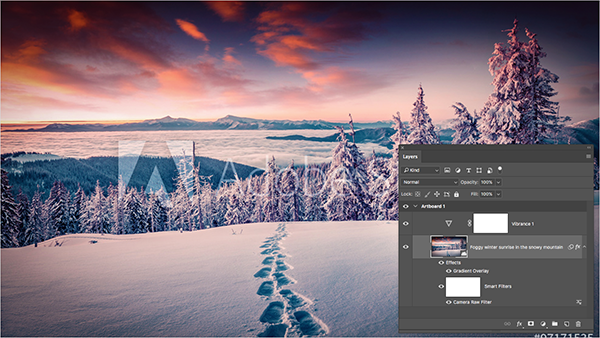
Although it’s possible to double-click the downloaded preview in the Libraries panel to open it in Photoshop, you’ll receive a warning if you make any changes to it indicating that those changes will not be retained if you later decide to license the image.
Licensing the Photo
Once you receive approval to move forward with the project, you can license the image. This process couldn’t be easier. Simply right-click on the photo in the Libraries panel and choose License Image. If you have credits on Adobe Stock, you’ll be notified that you’ll use one of your credits. If you don’t have any credits you’ll be provided with purchasing options.

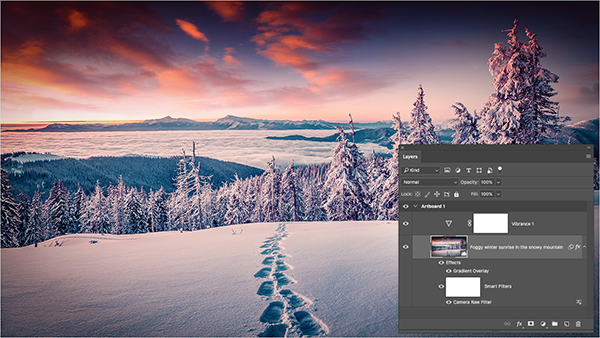
At this point, your licensed high-resolution photo will download to your Library replacing the watermarked low-resolution version. The speed of this process depends on the speed of your internet connection. You’ll see a small spinning icon in the upper-right corner of the thumbnail of your photo in the Libraries panel while the photo is downloading. You’ll also see a blue checkmark in the upper-left corner indicating that the photo has been licensed.

Your project will automatically refresh with the high-resolution image that contains no watermark. All of the adjustment layers and effects that were applied to the watermarked version of the photo will now be applied to the licensed version, allowing you to move on with the project without any additional intervention on your part. This is one of the key benefits that a Smart Object provides in Photoshop and it’s an automatic process when you use Adobe Stock.
Editing the Adobe Stock Image
After you license the image, it is entirely possible to make edits to that image as needed. For example, I realized that there were a few elements in the photo that I wanted to remove. Because the Stock Photo was a Smart Object, I was able to double-click on the thumbnail for the photo, which opened it in a separate window. I used the tools of my choice to remove the distracting elements, saved the photo and closed it, and the update was reflected in my project as well as in the Libraries panel. One thing worth noting is that if you would rather not edit the original photo that you downloaded, it’s easy enough to right-click on the photo in the Libraries panel and choose Duplicate to make a copy of the image before retouching so that you always have the original to go back to (you can also re-download it at any time as well).
Summary
Throughout this article, you’ll notice that not once did I mention the need to keep track of where you downloaded a photo from or what it’s id number was. That’s because Adobe Stock is fully integrated with Adobe Photoshop and many of the other Adobe applications as well. This allows you to focus more on your design and less on the mundane task of keeping track of stock photos.