

Review: LandscapePro

LandscapePro is the latest offering from Anthropics, developers of the excellent Portrait Professional. What that app does for Portraits, this one does for landscapes: you can apply one-click global changes to adjust the time of day, weather conditions and season, and then refine the settings for perfect results.
Using LandscapePro
Begin by opening an image in LandscapePro. A label bank allows you to drag labels to mark specific areas of the image – sky, water, ground, tree, person, and so on:

Figure 1: Drag labels to identify regions in LandscapePro
Once you’ve labeled each major area, hit the Continue button to proceed to the next step. The app will attempt to gauge where each region begins and ends, and its automatic selection algorithms do produce a reasonable interpretation of the scene:
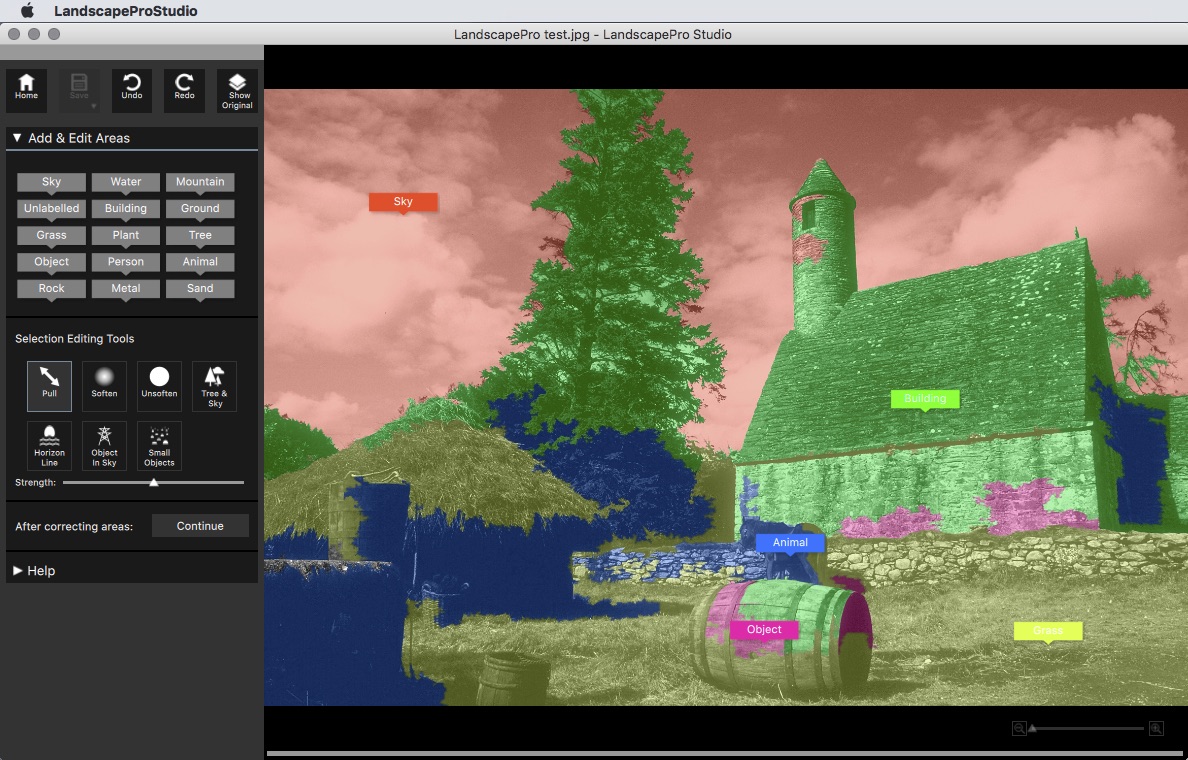
Figure 2: LandscapePro guesses where each region begins and ends.
Of course, there are errors here. The building has gaps in the tower, and at the base; the tree finishes abruptly, where it should merge into the bushes beneath; and the pink overlay that marks the ‘object’ covers just a fraction of its surface.
But this is just the starting point. Using an innovative interface, you can extend a selected region by simply clicking in it and dragging the region where you want it. A black arrow indicates the direction in which you’re dragging, as can be seen bottom right here. As you drag, the app automatically spreads into the target area, sensing boundaries as best it can:
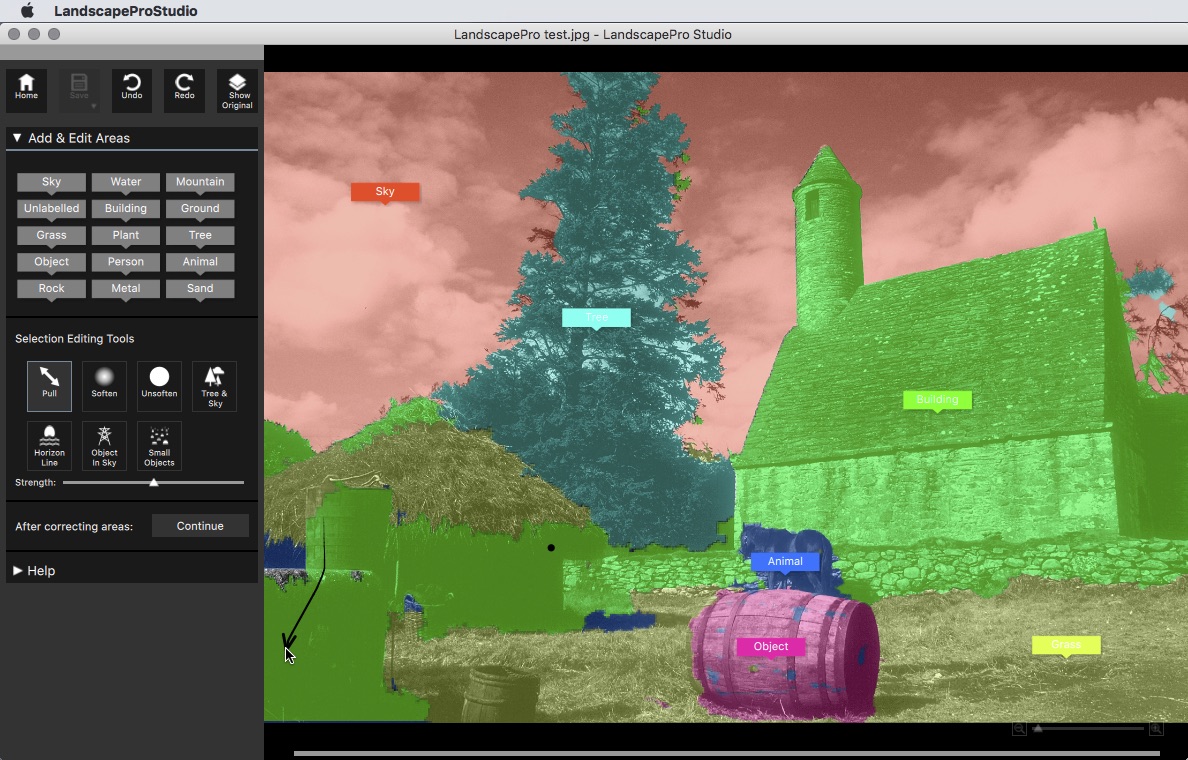
Figure 3: Click and drag in a region to spread it elsewhere in the image.
There are further refinement tools, such as one to soften a boundary and one to deal with trees through which sky can be seen. This latter tool is used by scrubbing over the affected area, which allows the app to intelligently separate out the tree from the sky with a good degree of accuracy. You don’t have to get it perfect at this stage; if the selection needs further refinement, you can return to it later:
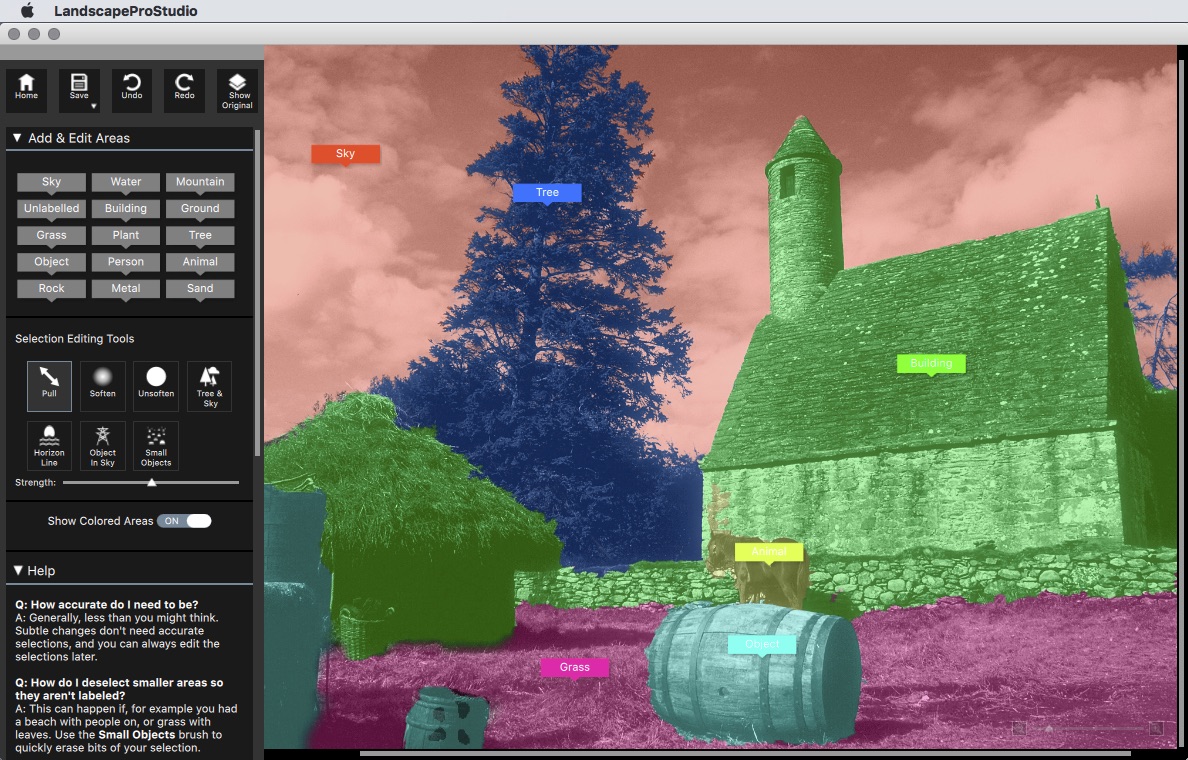
Figure 4: Note how the Tree & Sky tool can reveal the sky behind the intricate shape of the tree.
Once the areas are selected, you need to specify the horizon line. Even if the horizon isn’t visible – and it rarely is – it’s easy enough to gauge where it will appear. Once this is done, you can go ahead and start changing the feel of the photograph. A good place to start is the Global Presets, which offer one-click adjustments that produce a dramatic alteration. In each of these cases, the entire sky is replaced with one that matches the selected scene, and the rest of the image is colored and toned to match. The results can be surprisingly effective, as these examples demonstrate.

Figure 5: The Sunset preset

Figure 6: The Storm Brewing preset
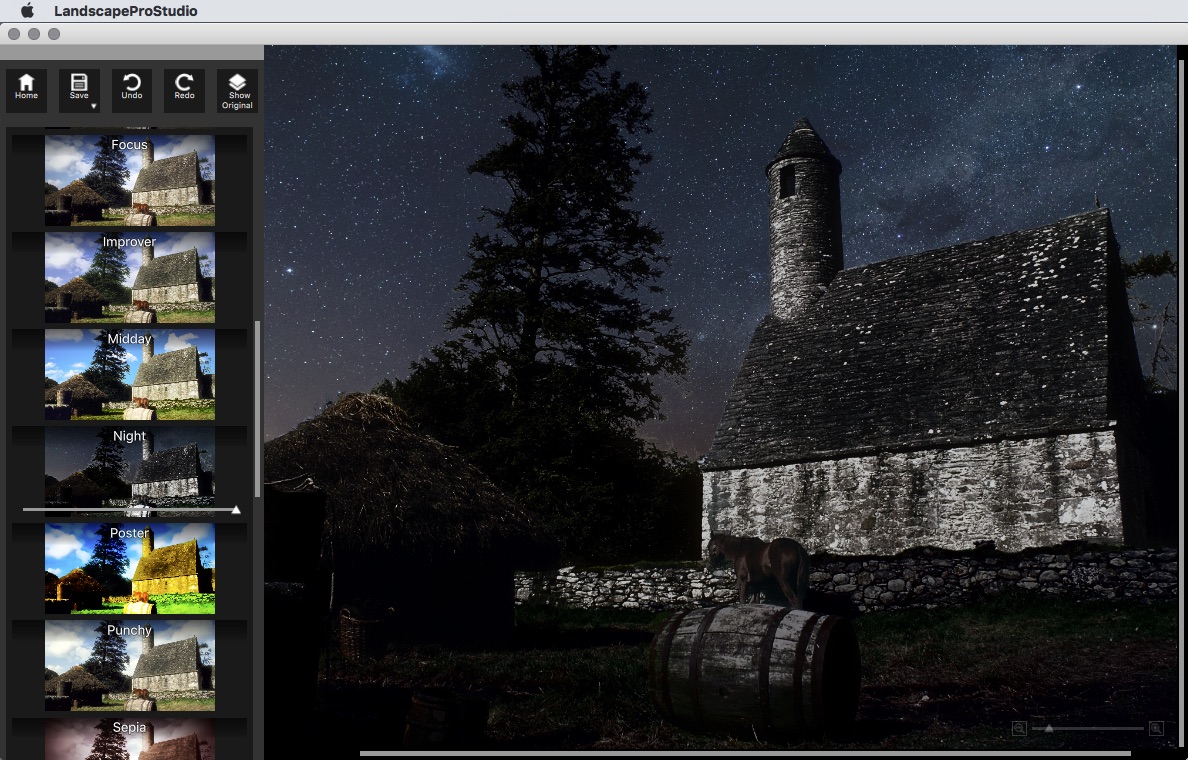
Figure 7: The Night preset

Figure 8: The Cold Sunset preset
You can also choose to adjust the tonal range. Every element can be adjusted individually, of course. In the Sky section, you can choose from a wide range of day and night cloud formations, each of which will change the feel of the entire image. Each of the presets has a slider, so you can vary the strength of the effect:
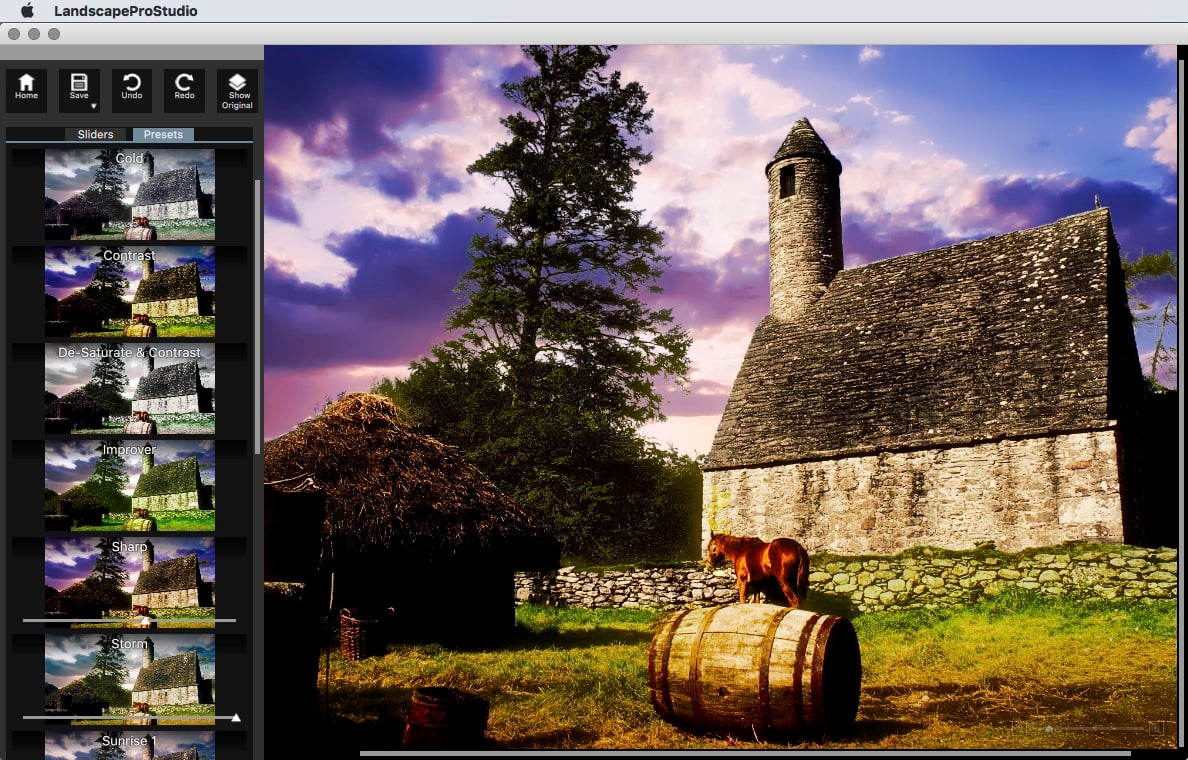
Figure 9: Sharpening the image with a slider to control the strength.
In addition to applying presets to each element, you can switch to Slider mode for fine tuning. Here, you’re able to adjust the contrast, high/low key, fill light, exposure recovery and black point. In the Color section, you can set the vibrance, saturation, “colorfulness,” temperature, and tint:
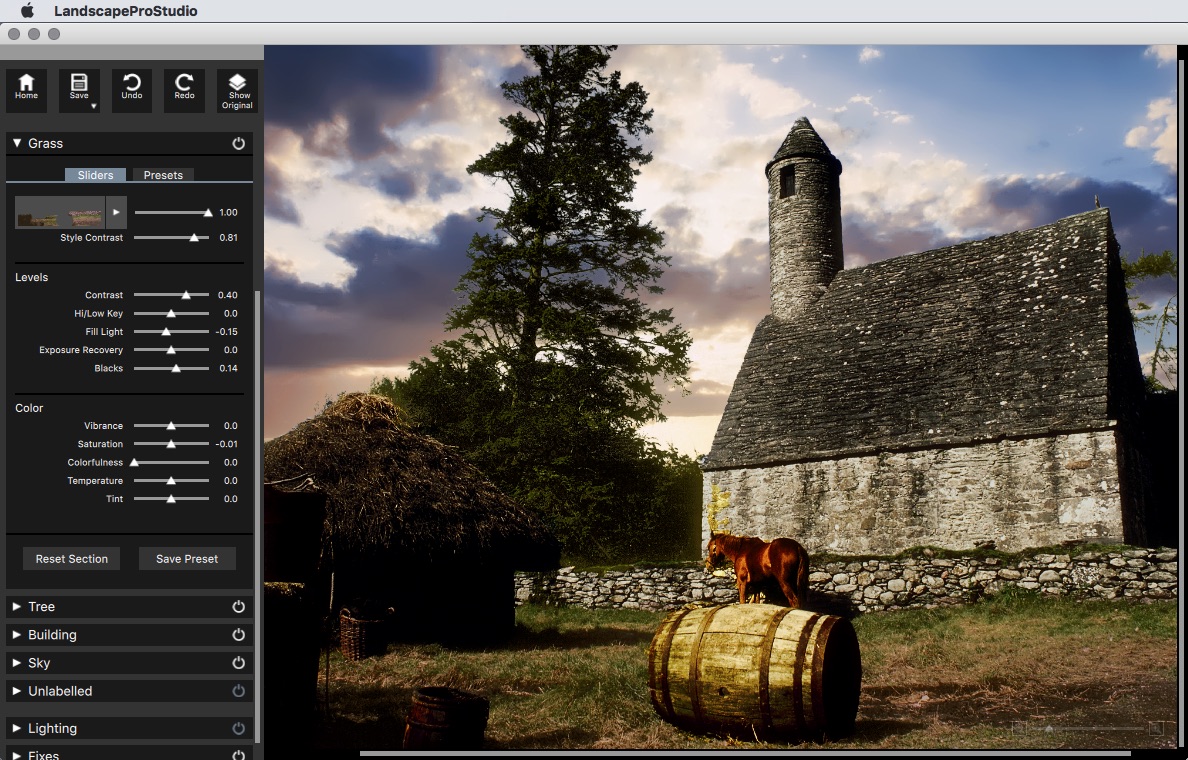
Figure 10: You can use sliders to adjust every aspect of each region.
One of the most impressive features of LandscapePro is the ability to change the lighting direction on an image, simply by dragging the light source around the screen. While this obviously can’t remove hard shadows, such as those on the right side of the building, it goes a long way towards simulating the effects of different lighting conditions:

Figure 11: Change the lighting direction by dragging the light around the image.
Summary
LandscapePro is an entertaining and surprisingly powerful tool for reinvigorating your landscapes, enabling you to produce dramatic results in minutes. The ability to replace entire skies, even when seen through trees and other intricate objects, is impressive. Even more compelling is the way in which changing a sky affects the tone of the whole image. The only drawback is the object selection process, which uses an automated approach that sometimes falls short of capturing objects precisely. A simple brush tool that enabled you to paint an object’s boundaries would be a bonus.
LandscapePro comes in two flavors: the basic version is $39.95, and the Studio version, which includes RAW image handling, 48-bit TIFF files and the ability to run as a plug-in for Photoshop, Lightroom and Elements, is $59.95. Check out landscapepro.pics for more details, and a free demo version.
Pros: A unique way to adjust landscape images with a high degree of control over the weather, time of day, season and lighting conditions, as well as an innovative approach to delineating different regions.
Cons: The selection process would be eased by the addition of a simple brush as well as the automatic tools.
Rating: 9 out of 10
I have never used Landscape Pro before. I wonder if there is a class for it at LIU Post.