

Create Parallax Video Effects in Photoshop with Qlilipn
We’re well used to seeing parallax effects on modern websites, where images scroll at a different rate to the rest of the page and so add the illusion of increased depth. But the parallax effect on photos, where the camera appears to zoom into the subject while blurring and distorting the background, is a newer phenomenon.
Creating this effect from a still photograph has always demanded a high degree of skill – until now.
The bizarrely-named Qlilipn is a newly-upgraded Photoshop plug-in that automates the process in a manner that’s both ingenious and extremely effective. Using the tool is not immediately intuitive, however, so here’s a guide to how to get the most out of this innovative plug-in.
Install the actions
First, purchase Qlilipn – it’s available for just $16 from creativemarket.com. The package contains a number of elements, among them a set of action sets that drive the process. To install these, double-click each of the .atn files in the download folder and they’ll be automatically installed in your copy of Photoshop (only version CC 2015 or newer is supported). Alternatively, right click on the files and choose “Open with Adobe Photoshop CC 2015”. If Photoshop is running, you may need to restart it for the actions to appear.
Open the template
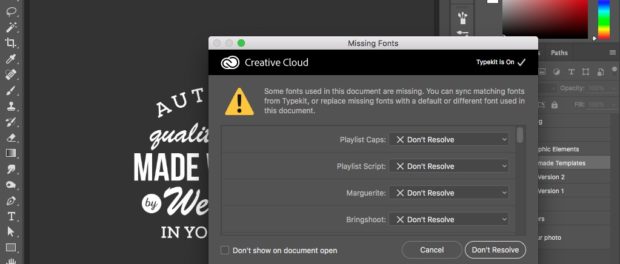
Open the template named Premade Template.psd. Unless you’ve taken the trouble to install all the free fonts first, you’ll see a warning that some fonts in the document are not available. Dismiss this dialog – it’s unlikely that you’re going to want to include text anyway, and you can always change the fonts if you do.
Resize the template
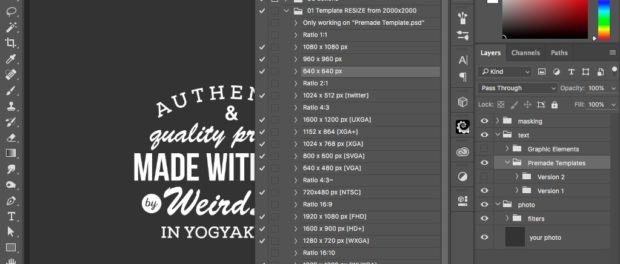
The default template comes in at a whopping 2000 pixels square, which is so large that it’s unlikely your processor will be able to play the resulting movie in anything approaching real time. Unless you definitely need a huge resolution, the next step is to resize the document. But don’t just use the Image Size dialog: instead, use Window > Actions to open the Actions Panel, flip open the folder named 01 Template RESIZE from 2000 x 2000, and select the end size you want from the list (I’ve chosen 640 x 640px). Press the Play button at the bottom of the panel to play the action.
Hide the text

To hide the default text, simply click the eye icon next to its folder’s name in the Layers Panel. But you’ll need to remember to reveal it again before you save the document, as any changes to the layer structure here will cause the final action to fail.
Pick your photo

Choose an appropriate photograph. It should contain a medium-distance view of your subject, with an interesting background – a plain background will produce little visual effect. Place it in the Photo folder inside the Layers Panel, resizing it as necessary to fit. I’ve chosen a photograph of myself sitting at a museum table lit from below, which produces this curious lighting effect.
Select the figure

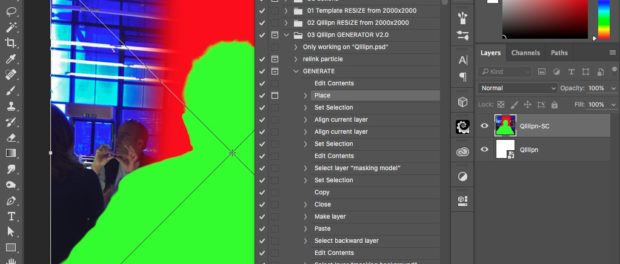
Use whatever selection tools you prefer – Quick Selection Brush, QuickMask, even the Lasso – to select the figure within the photograph. Then choose the layer named Masking Model and fill the selection on this layer (alt + backspace will fill with the current foreground color). If you prefer, you can simply paint over the figure on this layer. It doesn’t matter what color you choose: the attached Layer Style will mean it always shows up as bright green.
Select the background

You now need to select a “flat” portion of the background – the area that will remain in focus, in the distance, after the sides are zoomed in. This can take a bit of trial and error, and you should aim for a vertical band of selection. It’s easiest to paint this directly onto the layer named Masking Background; use a large, soft-edged brush for best results.
When you’re done, use Save As to save this document with a different name so you don’t inadvertently overwrite the original. Then close the document.
Open the Master file

Open the file named Qlilipn Master.psd, and you’ll see a warning dialog telling you that you need to relink a missing file. This is an mp4 movie containing the moving dust film, so click the Relink button in the dialog and locate the file in the download folder.
You’ll then need to change the resolution of this master document to match the one you chose earlier: use the same procedure, using the size in the actions folder named 02 Qlilipn RESIZE from 2000×2000. The process will take a few seconds, as there are a lot of layers to be resized. (You can’t see all the layers, as they’re inside a Smart Object.)
Play the action
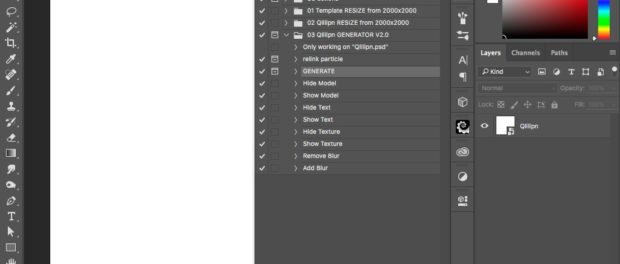
Now to make the magic work. In the Actions Panel you’ll see a folder named 03 Qlilipn GENERATOR V2.0. Open that folder, and choose the action named GENERATE.
Locate the image file
You’ll be prompted to locate the image file you saved earlier; navigate to it in the Open dialog. When it appears in the current document, hit the Enter key to complete the process of placing it.
View the result

It may take up to 30 seconds or so, but in a short while your video will be complete. Use Window > Timeline to open the movie controls, and press the Play button to run it. Even with a fast computer it may be jerky, as there’s a lot going on here; but the final rendered movie will be perfectly smooth.
Hide the text
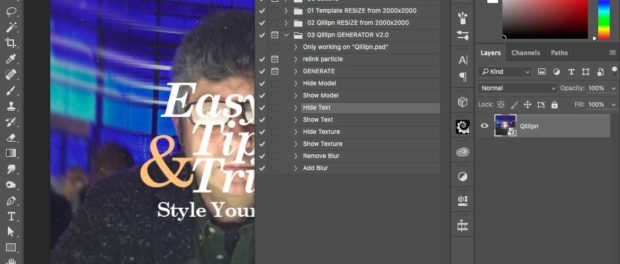
You’ll notice that the default text shows up in the animation. To hide it, open the Actions Panel again, and in the folder named 03 Qlilipn GENERATOR V2.0 choose the action Hide Text, and press the Play button at the bottom of the panel to run it. You can also choose to hide the dust texture layer here, but I’d recommend keeping it as it adds an extra layer of interest to the finished product.
Export the movie

From Photoshop’s File menu, choose Export > Render Movie. You’ll see this dialog, from which you can choose the format (leave it at H.264 unless you know you want something else). You can also set the frame rate – the default is 15 fps – and, if you like, you can export at a smaller size.
And that’s all there is to it. Given the right starting image, Qlilipn is capable of stunningly impressive results. It’s a tremendously powerful tool that produces an effect that would be vastly time-consuming for even the most accomplished Photoshop professional to create manually.