Making a Complete PDF of a Book Without the Original Files
How this for a worst case scenario: you work for a publisher and need a PDF of a backlist title. The original files have gone corrupt or missing. Nobody’s got time to redo a whole book. Luckily, with a scanner, a razor blade, and some tricks in Adobe Bridge, Photoshop and InDesign you can have the PDF made in no time. In this article, we’ll go through the steps of making a PDF for an online reading platform. You can adapt the settings for your scans and final PDF output to suit your requirements.
A Small Sacrifice: Cut and Scan Pages
The first step is to carefully take apart a copy of your book and scan both sides of each page. First, measure and note the book’s trim size. The first page of the inside of a paperback is pasted to the inside of the cover and you’ll have to cut off about ¼” of the bind edge. Similarly, the back page is glued to the back cover. Trim as carefully as possible. We’ll fix these paste-down edges later.
Clean the scanner glass if necessary. It should be completely free of dust and smudges.
Lay the pages as straight as possible on the glass, and scan them with size, resolution, and color space settings to suit your requirements. For this project, I used 100% size, 275 ppi, and CMYK. Save all the scans in one folder. To avoid confusion, make sure to scan the pages in order since your scanner will probably name your scans sequentially.
Open your folder of page scans in Adobe Bridge. All the images should be in the order of the pages of your book. If not, you can sort them by name, relying on your scanner’s default file naming system, or choose to display them by selecting “Sort” from the View menu, and choosing “By Date Created” from the flyout list of options.
Straighten and Crop Images in Photoshop
Open the images in Photoshop and select the Crop tool. Put the document dimensions in the Options dialog box. (In this case, 8” x 10” is the same as 4” x 5”, as they are the same ratio).

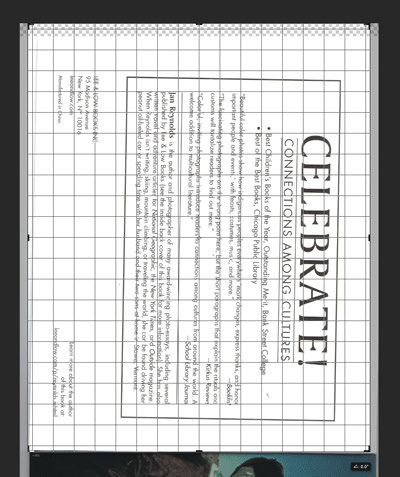
As you click and drag on the document, a handy grid shows up to help you straighten the image.

Since my scans came in sideways, I needed to turn them by selecting Image Rotation from the Image menu. You could select 90° CW (clockwise) or CCW (counter-clockwise) as necessary.
The paste-down pages can be cropped short to neaten the cut edge.
Make the Marketing Cover
When the cover scan is open and cropped, save it a tiff, with book ISBN as the filename, 1200px on the longest side (or whatever size and specifications you require). Our supplier specifically needs no compression and the byte order to be “IBM PC.”
Restore the Paste-Down Edge
If the paste down page has a solid color background:
Open the scanned page in Photoshop and crop it to the cut edge of the page, not the book size. Straighten and the scan rotate as above.
Using the eyedropper tool, option+click on the page background to select that color as Photoshop’s background color.
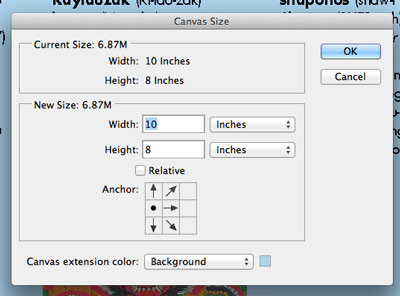
Under the Image menu, select Canvas Size. Indicate the book size in the dialog box. Choose an anchor in the tiny grid below. For instance, if you would like the file extended to your right and centered top to bottom, click in the center left box so the dot is there, and the arrows point up, down and to the right:

Select background as your extension color. Save.
If the background is a photo:
Crop the scan to the neaten edge of your trim. We’ll fix this in InDesign.


It is wonderful to learn the working habits of other designers, even if they seem silly and wasteful. There was no point in scanning in CMYK for an output intent of sRGB. And why should anyone waste time in InDesign to do what Acrobat does in a couple clicks?
It would be really helpful if we could print this article in its entirety.
Print both pages to PDF and assemble in InDesign as the article instructs.
Here’s a link to a PDF version: https://ow.ly/pfsQz
Enjoy!
Buy a Fujitsu ScanSnap scanner like the ScanSnap iX500. Cut the binding off the book and drop it into the scanner. Press a button and a few moments later the entire book is scanned, pages are sorted and rotation errors are automatically adjusted, and OCR is done if you request it. This scanner does both sides of the page at the same time. I have scanned hundreds of books with my scanner. I just make sure to regularily open it and clean the glass and the rubber feed wheels with a micro-cloth. No software is needed as the Snapscan software does it all!
Doesn’t the availablility of a single PDF file of this article defeat the purpose of Drupal’s pager, which gives creativepro.com more advertising impressions… and limits your ability as the site operator to measure the interest generated by this article?
Maybe. Or maybe folks will read the article, enjoy it, come down here to comment, and realize there’s an extra bonus for them if they want it.
If scanning black-only (aka black-and-white) pages, change the scan settings to lineart or black-and-white mode (terminology depends on scanner software); 1200-1500 ppi @ 100%; and save as LZW-compressed TIFF (never JPEG). With a good clean scan, the image will look virtually as good as the original. (Be sure to watch out for the text bleed-through on low-opacity paper.)
I think including fonts in a PDF composed 100% with scanned images is a waste of a mouse click. :P