

Fixing Slideshow Projection Problems With Photoshop
The church of St Andrew, Holborn, in the heart of London, was built by Christopher Wren in the 17th century and is notable for housing not only a magnificent organ installed by the composer George Frideric Handel, but also the tomb of the philanthropist Thomas Coram. So when Coram, the charity he founded, celebrated their 275th anniversary this year, they chose to do so by staging a dramatization of his life and works in the church. The text would be based on the writings of Charles Dickens, who wrote about Coram, with the part of Dickens played by the actor Simon Cowell.
But there was a problem. The church tower was undergoing restoration work at the time of the performance, and the organ was covered up with an ungainly polythene sheet. The church authorities would not give permission to remove the sheet for the concert. My commission was to work out how to project an image of the organ onto the sheet, so it would look as much as possible like the organ itself.

The organ covered by polythene sheeting
The church had a projector capable of throwing an image a very short distance, but the second problem was that the balustrade at the edge of the organ loft wasn’t quite deep enough to position the projector sufficiently far from the sheet to be able to fill the space. So the first step was to build a platform that would cantilever out over the edge of the balustrade, adding an extra foot or so of distance.
Since Simon Callow would be performing directly beneath, however, it was necessary to submit a design for the platform to be approved in advance by the church commissioners.

A design for the projection platform, built out of wood, that would overhang the organ loft balustrade.
The third impediment was that, bizarrely, the church had no photograph of the organ without its covering – and the polythene sheet meant I couldn’t take one of my own. The best option was a snapshot taken by the organizer of the event on her phone—and we’re not talking a high resolution smartphone, but a low pixel count Nokia of some vintage. It wasn’t anywhere near perfect, but it would have to do.
The fourth problem was that even with the projector mounted on the new stand, it was still too close to the sheet for the projector’s built-in keystoning software to distort the image enough to match the shape of the sheet. In addition, the projector couldn’t be mounted directly in front due to some decorative woodwork, and had to be slightly to one side.
The solution came in several stages. First, I created a simple grid in Photoshop, which I set to fill the screen. With my laptop linked to the projector, I was able to project this image onto the polythene sheet.

The grid ready for projection.
Of course, the grid looked completely wrong on the sheet, as I knew it would. But having checked it was large enough and visible enough, I made the layer containing the grid into a Smart Object in Photoshop, and then distorted it using Free Transform. If you hold Command (Mac) or Ctrl (Windows) and drag a corner handle inside Free Transform, you can move each corner independently. In this way, I was able to distort the grid so that, when projected, it fit the sheet nearly perfectly.

The distorted grid inside Photoshop.
The great thing about Smart Object layers is that you can edit their contents, while still retaining any distortions applied to them. This meant I was able to double-click the Smart Object layer to open it in a new window. I could paste an image on top, and then save and close the Smart Object to view the distorted image (in this case, a view of Coram’s Foundling Hospital). With its straight horizontals and verticals, it would be a good test of the system.
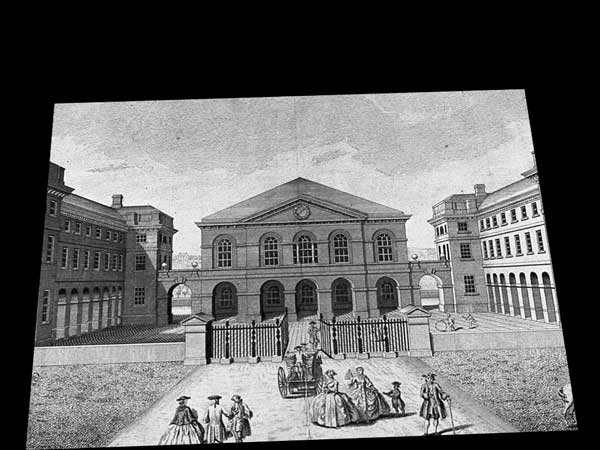
The Foundling Hospital, as distorted inside the Smart Object.
It worked fine, filling the sheet so that the orthogonals came out truly horizontal and vertical. Stage one complete.
The snapshot of the organ had been photographed from below, as you’d expect. And since it was going to be both projected and viewed from below, that would probably be OK. After distorting the snapshot to make it exactly fit the shape of the frame, I saved the Smart Object, automatically applying the distortion to the organ image as well.
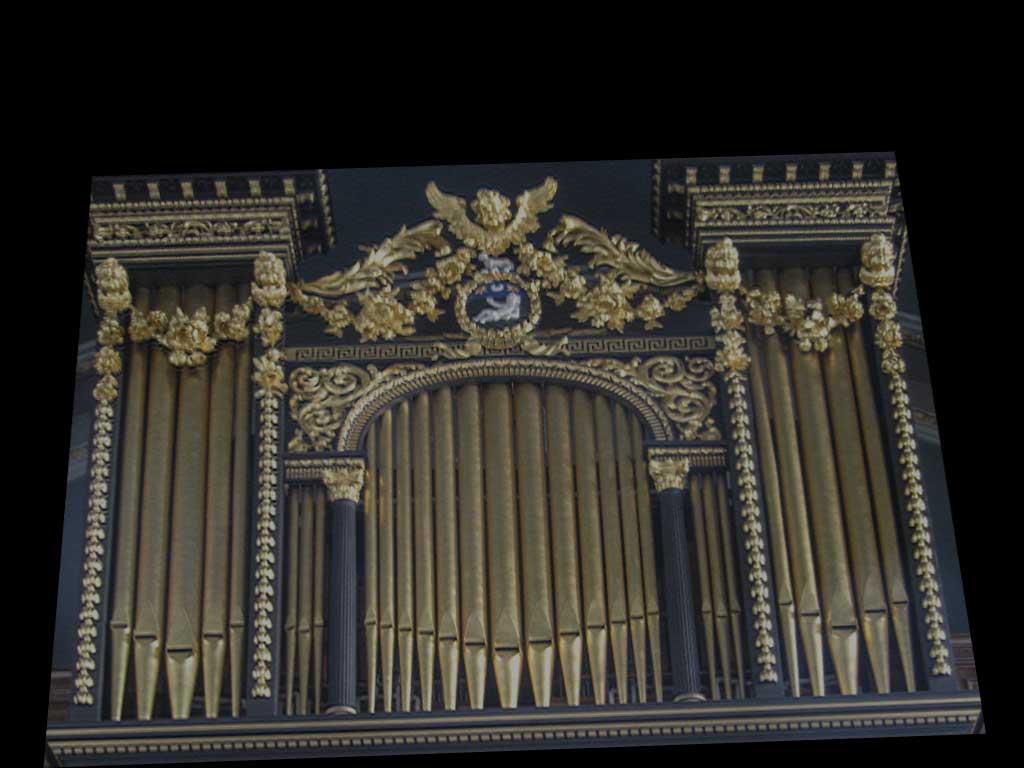
The distorted organ, which filled the sheet to neatly cover the original.
It worked surprisingly well. Even though the sheet was wrinkled and creased, the projection was strong enough to make you think you were really seeing the organ through it.
The presentation used a number of slideshow modules, including scrolling text, animated engravings and moving images. I created these in After Effects, outputting each one independently as a separate QuickTime movie.
I imported all the movies into Photoshop, dragging them inside the Smart Object that had originally held just the distortion grid. Using the timeline, I arranged all the movies so that they overlapped and joined together as required.

All the components on the timeline, inside the Smart Object in Photoshop.
When all the timings were finalized and the individual elements complete, I saved the Smart Object once more. Now, it was no longer a simple grid, but a playable movie, complete with the original distortion. All that remained was to output the movie from Photoshop as a QuickTime file so it could be played in real time.
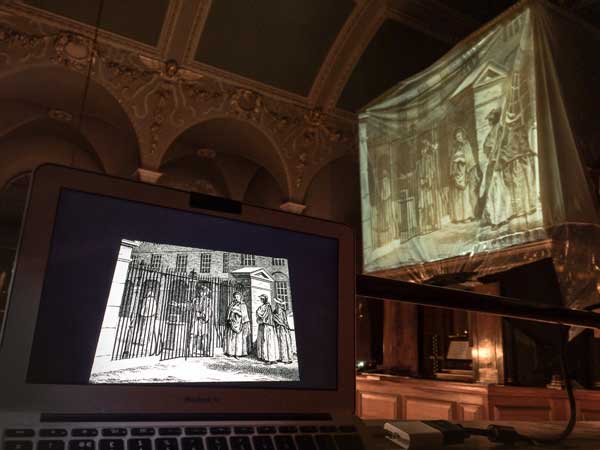
The distorted image on my laptop on the gallery, with the projection neatly fitting the sheet over the organ.
What had seemed an almost impossible job was made possible due to the sheer power of Photoshop’s ability to play distorted moving images with ease. And beginning and ending the concert with a view of Handel’s pipe organ, complete with a firework finale, was the icing on the cake.