

How to Create Connector Lines in Keynote

Making flow charts isn’t the most glamorous job, but the same principles and design can be employed to create an infographic or to convey movement in a layout. The best way to force a reader to follow from one object to the next is by using connection lines. You could certainly lay them out in Illustrator, or even right in InDesign, but you’ll have to re-position the connectors every time you move the connected objects. Using Apple Keynote’s charting capabilities can give you connection lines that are dynamic and automatic. Changing the position of connected objects repositions the connection lines as well.
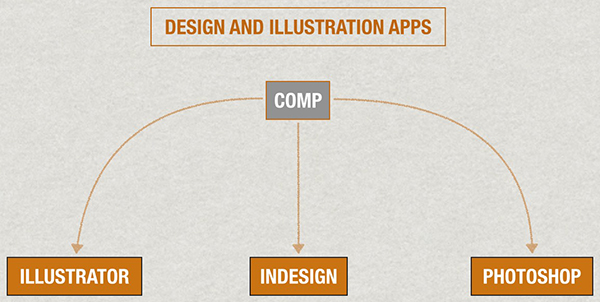
Objects connected by dynamic connection lines in Keynote.
Select two objects and choose a connection line type from the Line menu under the Insert menu.
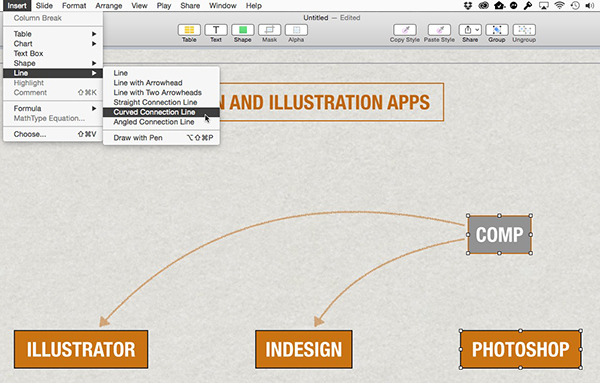
Select two or more objects when creating connection lines.
You can style a connection line just like you would any regular line, including line type, width, and arrowheads. Save the newly-created line as a line style, so that all your connection lines look the same. Unfortunately, arrowhead styling does not become part of the style.

Create a line style for the connectors, so they are consistent.
You can change from curved to straight to corner connectors at any time, under the Arrange tab of the Format Inspector (while line is selected).
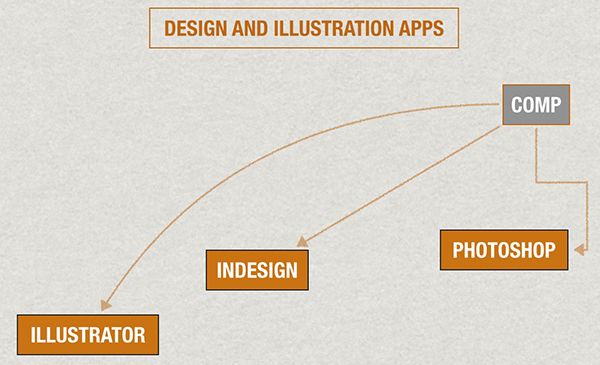
Keynote’s three connection line types: curve, straight, and corner.
In that same Arrange tab, you can change the offset value to create a gap between the objects and the connection line.
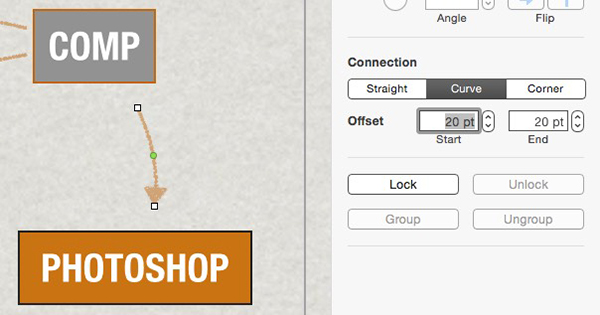
The Arrange tab of the Format Inspector.
Select the connector and drag the green dot to change the side it connects on, its curve amount, or the position of a corner connector.
Move all connected objects at the same time by grabbing and dragging the connection line.
If you used old version of Keynote, you can no longer drag the end points of a connection line. Doing so will disconnect the line from the objects and revert it to a “normal” line.
To use in other applications, like InDesign or Photoshop, Export to a PDF from Keynote. Choose Best under Image Quality in the Export dialog box to keep your vectors—and your type—as vectors.
Great! Thank you for the tip.
Sure thing!
Is there a quick way of doing this (shortcut for instance), as going into the menus for every connector is pretty cumbersome, and they don’t seem to be able to be copy-pasted?
Not from within Keynote, no. But you can set app shortcuts in your Mac’s preferences. System Preferences > Keyboard > Keyboard Shortcuts > App Shortcuts. Click the plus sign, find Keynote, then enter the exact menu name, and enter your keyboard shortcut. Remember, there are individual menu items for the different types of connection lines, now. Hope that helps!
Thanks – that’s a helpful tip! I find Mac less shortcut friendly than Windows, but hadn’t realised I could define my own!
That shortcut things whee very interesting. I didnt know that one… You learn something new every day. Or your dead. :-)