

A Film Technique for Your Digital Photography

Before Picture Elements (“pixels” for short) were a gleam in some IBM engineer’s eye, image capture involved gelatin-coated film, darkrooms and an array of messy, smelly chemicals of varying degrees of toxicity, but we loved it. Back then, “image capture” was called “taking photographs.” (And, by the way, get off my lawn.)
“Analog” photography evolved through more than a century and a half of research, technology and experimentation. Film technology reached its zenith in the early 2000s, only to be put up against the wall without so much as a blindfold when the digital revolution came. But there are many techniques evolved for film that translate perfectly into the brave new world of DSLRs and 100-megapixel digital backs. Many darkroom techniques work very well in Lightroom, and there’s one maxim that’s important to keep in your mental library.
Expose for the Highlights, Develop for the Shadows
With rare exceptions, film maxed out at ISO 400. Low light and high contrast lighting conditions could be a challenge, especially given the limited latitude (“dynamic range” in digital-speak) of most films. “Expose for the highlights, develop for the shadows” was a maxim every photographer learned by heart, and anyone serious about the art learned the Zone System, originated by Ansel Adams.
One of the darlings of newspaper and theatrical photographers was Kodak’s Tri-X, a film with the astonishing (for the times) latitude of almost 9 stops. That meant it was sensitive enough to capture image detail in fairly dark shadows and quite bright highlights on a single frame. (“Stops” roughly translates to “bits-per-pixel” when comparing film to digital. One f-stop increases or decreases sensitivity to light by a factor of two, just as one bit is “times two,” so a jpeg has a “latitude” of about 8 stops. Your eye has a total range of about 20 stops, but only about 6-1/2 stops in a single glance.) This great latitude meant that you could “push” Tri-X very effectively — pretend that it was really ISO 1600 when taking the shot, then add time in the developer to recover some shadow detail and give an acceptable print.
Why would you do that? Sometimes there just isn’t enough light, but using flash or some other artificial light source isn’t appropriate, isn’t available, or isn’t permitted. At “standard” exposure, you might have to use too slow a shutter speed to get a usable image, especially if you’re shooting hand-held or the subject is moving.

Avoid flash when photographing Shaolin martial arts experts. (1/60th @ f4.0, ISO 1600)
In a film camera, you underexpose by setting the ISO to a value higher than the actual rating of the film. If ISO 400 requires a shutter speed of 1/15th, you can set the ISO to 1600 and shoot at 1/60th. The resulting negative is grainier and more contrasty than usual, and generally loses some of the details in the shadows because the underexposure exceeds the film’s latitude. With film, if you want to control the added contrast, you can compensate chemically in the developing and fixing, by using a lower-contrast grade of paper when making the print, or both.
All of these situations, and all of these techniques, translate perfectly into a digital workflow, with some bonus tricks that make digital even more versatile.
Darkroom, Meet Lightroom
To get the best out of these techniques, you really have to shoot raw images. They’ll work somewhat for jpegs out of your smartphone, but the raw file brings so many advantages that, other than for selfies and casual snapshots. you really shouldn’t be using anything else.
Too Much Light and Not Enough Light, in the Same Shot
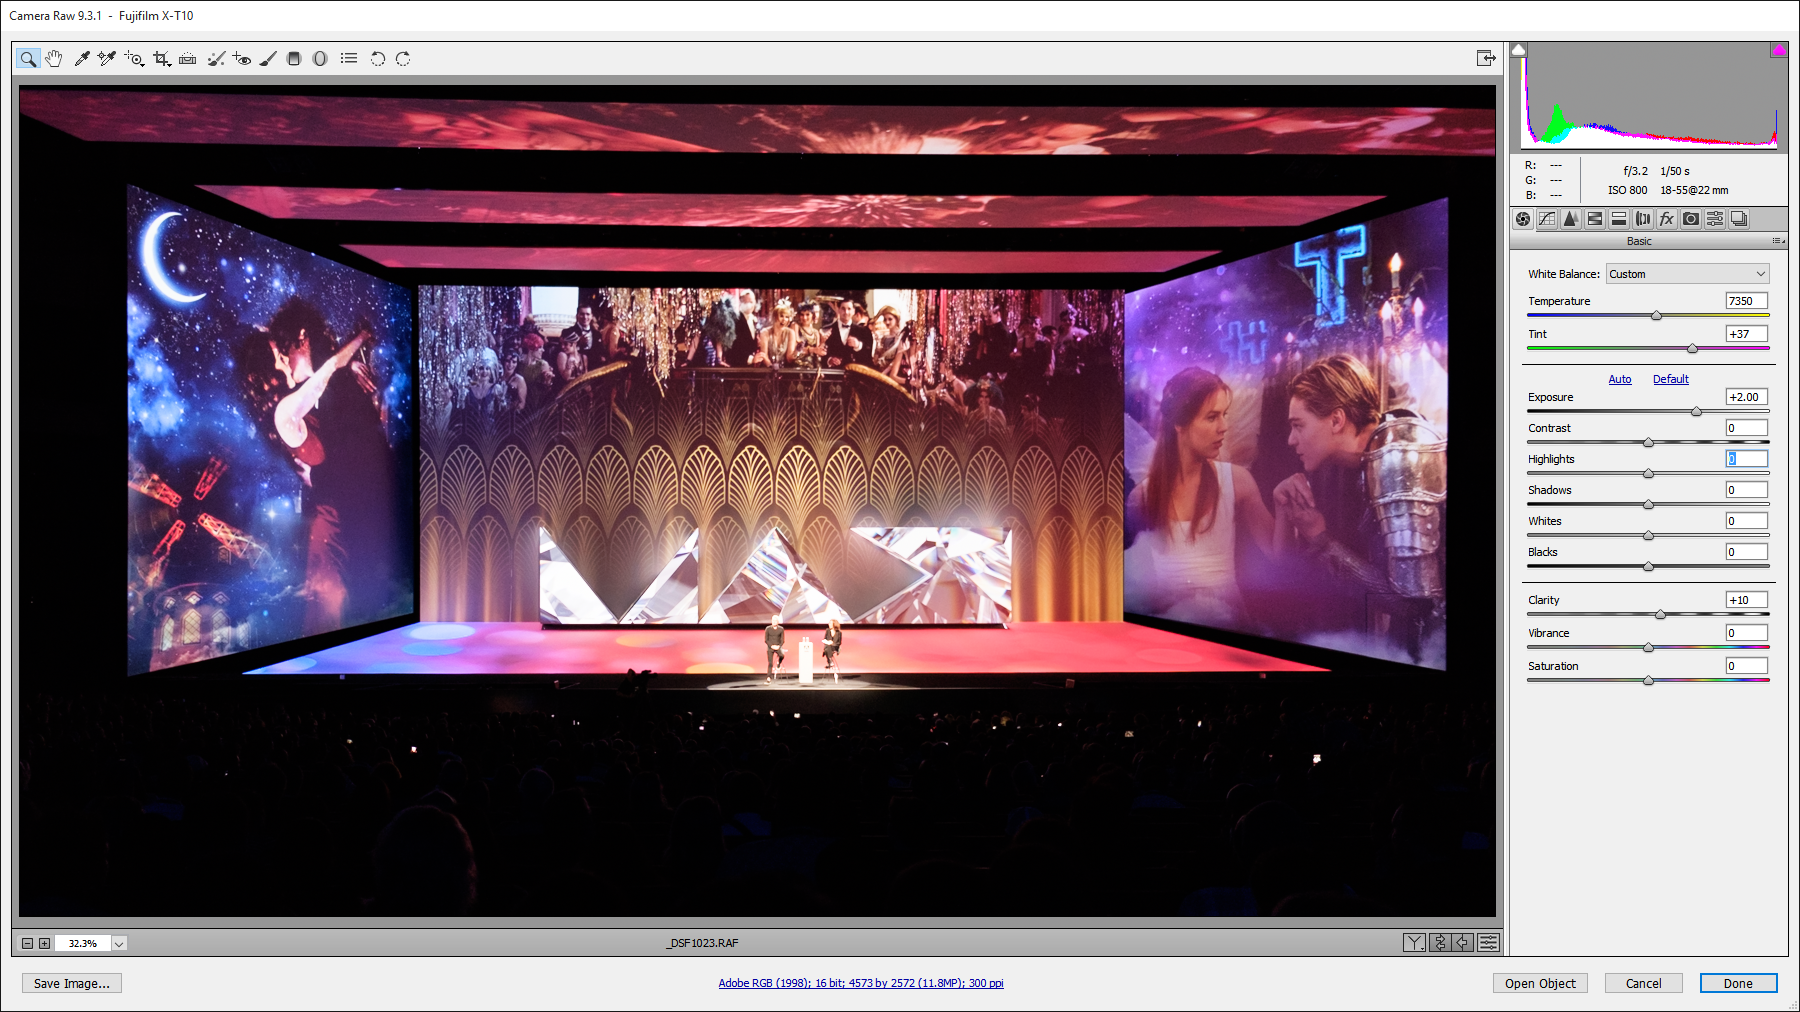
I shoot a fair number of local events, fundraisers, and theatrical presentations. I hate using flash for this kind of shoot, even when it’s allowable, because it’s distracting and because the flat glare of on- or slightly-off-camera flash just looks ugly. “Available Light” photography is a subject unto itself, but here’s a great example of too much light and too little light in the same shot, with no possibility of using a strobe: a shot I took from the audience at one of the Adobe MAX 2015 keynotes.
In order to get anything usable at all, I set the ISO at 800. (I was testing out my new Fujifilm X-T10 — everybody who attended MAX got one — so I had no experience with its image quality at higher ISOs.) The shot was underexposed by two stops to keep the shutter speed at 1/50th of a second, fast enough to assure a crisp hand-held image with image stabilization turned on.

Adobe MAX keynote. 1/50th @ f3.2, ISO 800
The problems are obvious: there is no shadow detail at all, the white balance is way off, overall it’s too dark, and it could use some cropping. There is one important plus that will become obvious shortly: all the highlight detail is present, even in the brightest parts of the scene.
We’re going to “push process” this image in Camera Raw from Adobe Bridge, which has all the same adjustments as Lightroom’s Develop module with a different UI. Theatrical shots are inherently contrasty to begin with, but we can compensate.
Click to enlarge
After fixing the color temperature (always your first move, because it heavily influences everything else), cropping, and bumping the exposure by two stops to give the equivalent of ISO 3200, we have a problem of extreme contrast, just as we would with push-processed film. The highlights are completely blown out and there is still no detail at all in the deepest shadows.
Here’s where the huge advantages of raw format digital capture come into play, because not only can we alter the color temperature of the image, a raw file has 14 bits of dynamic range per channel per pixel. That’s roughly equivalent to an impossible 14 stops of latitude in film. We have lots of room to play, and no toxic chemicals are involved. Watch closely. You’ll notice that at no time do my hands leave my wrists, and I won’t touch the contrast slider.

Click to enlarge
Remember “expose for the highlights, develop for the shadows”? Adjusting the exposure has blown out the highlights, but by pulling them back with the Highlight slider in Camera Raw, we’ve brought all that detail back. The Shadow slider (“develop for the shadows”) brings in just enough detail that we can see there’s an audience, giving the shot context without distracting from the stage.
Why not just use the Contrast slider? It tends to give too bland a result for this kind of image, and it’s a blunt instrument, working both ends of the histogram at the same time. Just as Levels or Curves in Photoshop give you more control than Contrast/Brightness, so the Highlight and Shadow sliders give finer-grained control over contrast than the Contrast slider itself.
Here’s another example, using the same technique (ISO 400, 1/30th @ f4.5, pushed to ISO 1600 equivalent):

The uber-talented Michael Duff in concert
Outdoor and Indoor Contrast
Shooting indoors when there are windows in the shot can give you a similar problem. If you have a sturdy tripod and a taste for HDR, you can bracket the exposures to capture both highlight and shadow detail. Otherwise, expose for the highlights…

1/100th @ f9.0, ISO 200, exposure compensation -1 stop
…and develop in Lightroom or Camera Raw for the shadows:

Available Light vs. Mixed Light
Portable lights or strobes are terrific if a) you have them with you, and b) you can light the whole scene, but there are plenty of shooting scenarios where the lighting sucks and using your on-camera flash will just make a bad situation worse.

Click to enlarge
Abandoning the strobe and shooting available light gets rid of the problem and makes a panorama (which would be impossible to light adequately in this situation) possible.
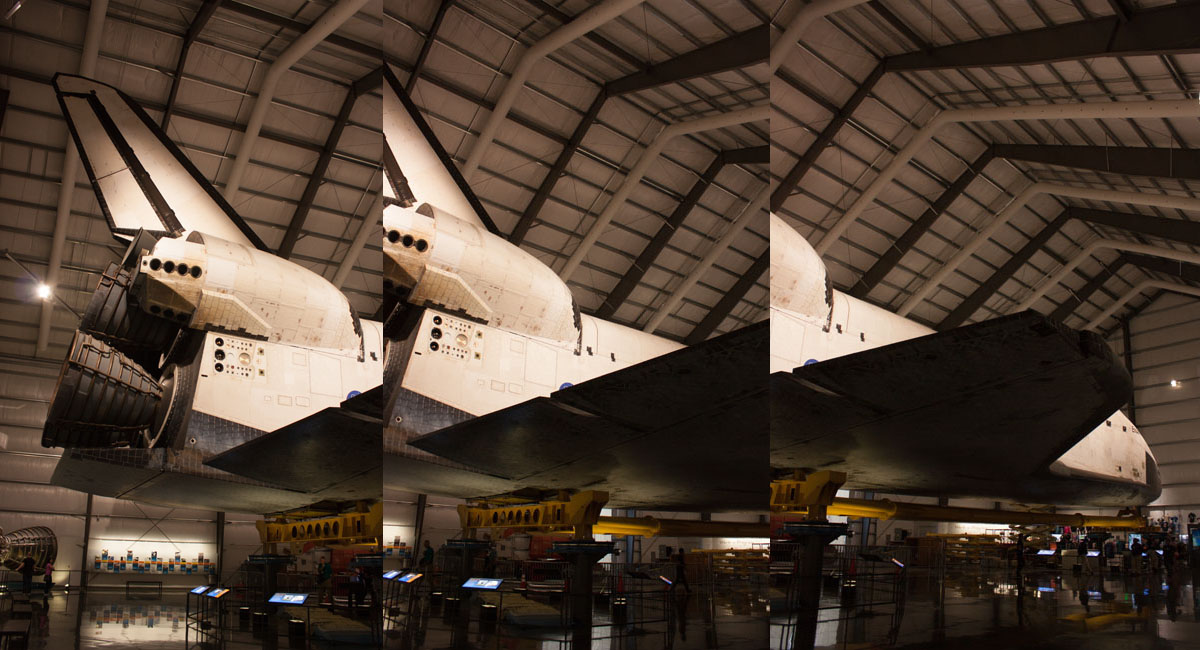
Three shots that will become a panorama. (1/30th @ f4.5, ISO 800)
The same technique of boosting exposure and shadows while pulling back the highlights must be applied equally to all the shots in the panorama, of course, but the raw file and a good raw processor such as Lightroom gives us all the flexibility we need to create an image that faithfully recreates the original look of the scene.

“Expose for the highlights, develop for the shadows” will also bail you out when you have to shoot in very bright sunlight and a strobe or reflector won’t help, such as the shot below. There was no way to retain the rich blue in the sky and avoid totally blocked-up shadows in this 3-frame merge of a stealth fighter:

Further Reading
For a lot more on coping with (or avoiding) difficult lighting situations, I highly recommend “Shooting in Sh*tty Light” by Lindsay Adler and Erik Valind, published by Peachpit Press. For Everything You Need to Know and a Whole Lot More about using Camera Raw and Lightroom, check out “Lightroom Essential Training” by the brilliant Chris Orwig, or just about any of Deke McLelland’s deeply informative and highly entertaining Photoshop titles on Lynda.com.
Good shooting!
phenomenal article, thanks