10 Essential Tips for Working with Styles in InDesign
Styles are an essential tool for formatting text efficiently and consistently. Here are 10 important tips for getting the most out of text styles in InDesign.
1. Pay Attention to Based On Styles. Every style you create in InDesign is based on another style. So when you change an attribute in a style, that change can be reflected in all the text formatted with styles based on it.

2. Be cautious about editing the definition of the [Basic Paragraph] style. If you make changes to [Basic Paragraph] and then copy and paste text into a document where the defintion of [Basic Paragraph] is different, the formatting of the text may change.

3. Use Next Style options. When creating a paragraph style, use the Next Style setting to specify which style is applied after the current style when you press Enter or Return.

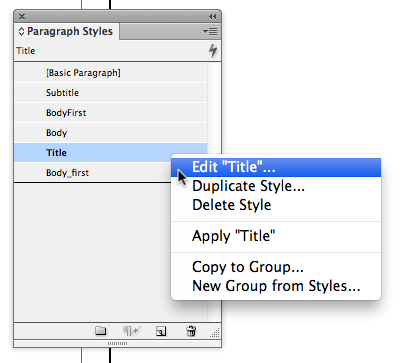
4. Don’t double-click on styles. You can double-click on styles in the Paragraph or Character Styles panels to edit them, but it’s not a good idea since you might accidentally apply a style to text you have selected. Instead, right-click on a style and choose Edit Style from the contextual menu.
5. Apply a style while you create it. If you want a new style to be applied to selected text, select Apply Style To Selection.

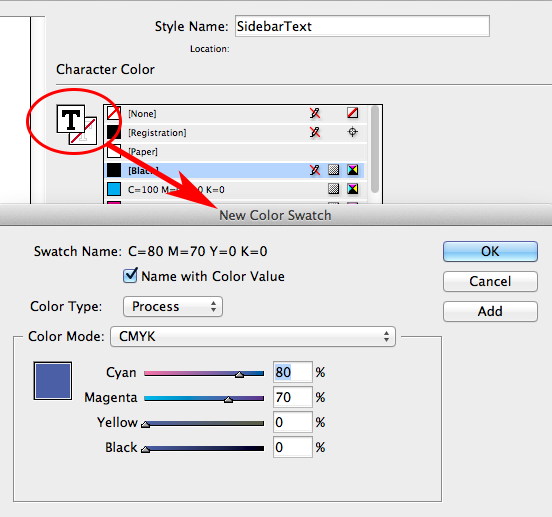
6. Create a swatch for a style. When choosing a Character Color in the New Paragraph (or Character) Style dialog boxes, double-click the fill or stroke box to create a new color swatch.
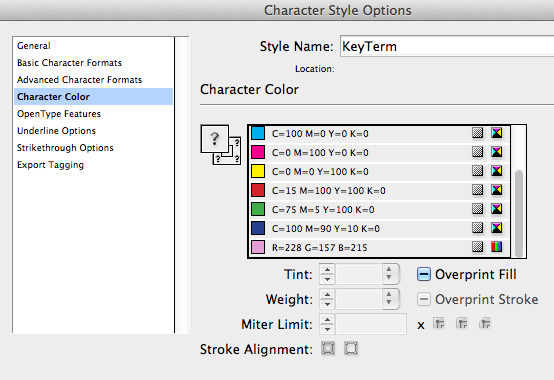
7. Removing a color from a character style. You can edit a character style so it no longer applies a color to text, Command/Ctrl-click the color name.

8. Redefining a style. The fastest, most convenient way to change a style definition is to select text with the style you want to change, make the change, then choose Redefine Style from the Paragraph or Character Styles panel menu. Or even better, use the keyboard shortcuts Command+Shift+Option+R/Ctrl+Shift+Alt+R to redefine a paragraph style, and Command+Shift+Option+C/Ctrl+Shift+Alt+C to redefine a character style.

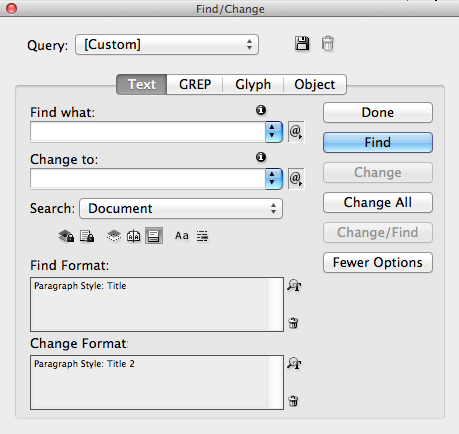
9. You can use the Find/Change dialog box to replace instances of a particular style with another. In the Find/Change dialog box, leave the Find What: and Change to: fields empty. Then click in the Find Format: and Change Format: fields below to specify the desired styles.
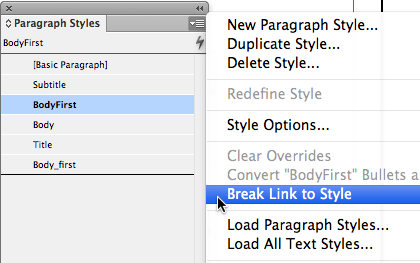
10. Break the Link to a style. To make text no longer formatted by a style, but leave the appearance unchanged, select the text and choose Break Link to Style from the panel menu.
More Resources To Master Type and Typography
CreativePro Week is the essential HOW-TO conference for creative professionals who design, create, or edit in Adobe InDesign, Photoshop, Illustrator, Acrobat, and Microsoft PowerPoint.
Featuring over 30 expert speakers and 75 sessions and tutorials, CreativePro Week offers five days of in-depth training and inspiration, all in one place. No matter your skill level, you’ll learn techniques and best practices you can start using immediately to improve your productivity.
Members get a special discount on registration! Sign up today.


Thanks!
I already knew most of these tips, but the “8. Redefine Style” was new to me…
and it’s just GREAT!!! :-D
(one day I should explore all those menu items… who am I kidding… ;-)
Thanks Mike!! Love this stuff. Most of these tips I point out to new users in the basic ID training I provide my company. However, tips 6 & 7 were new for me. After 20 years of ID, I’m always glad to learn more.
#6 and 7 … nice
Great tips! And the nice thing about Apply Next Style is … when you create an Object Style for a text box, you can select a style for the text inside that box, and then select Apply Next Styles (or something like that — I can’t get to my computer right now), applying that object style to a new text box will (or should) change all the text inside accordingly.
I have noticed, however, that if I import text or copy/paste it from an email, this doesn’t always work. Still, it’s a great timesaver!
Thanks, Yvonne. The tip about applying Next Style with an object style is a great one. I do think it will work in all cases if you do 2 things: 1. Set Clipboard Handling preferences to Text Only 2. Apply the object style to the text frame only after pasting/placing the plain text.
Alternatively, you can have the Clipboard preference set to All Information, but then you have to use Edit > Paste Without Formatting
I found this helpful as I use type style guides more and more. I would like to have a copy of it in pdf form. But when I go to save it or print it to pdf it truncates the right hand side so I can’t read the full sentence in the instructions. How can I get a clean full pdf copy of this that I can use day to day offline?
With Safari, go to File > Export as PDF. Done!
Great tip, Scott!